Automatically create social card images for your Astro blog
One of the ways you can make your blog posts stand out to readers is to add a social card. Even if you haven’t heard of them before, you’ve probably seen them around - they’re the preview images that you can see when you paste a link into a site like Bluesky:

When my blog was running on Gatsby, I used to have a plugin for this, but never got around to bringing it over to my Astro blog. I was starting to miss having it - so here we are!
My current setup involves the following:
- A
/social-cardpage that that is used to render the social card - It will render for a specific post depending on the slug that is passed in via a query parameter (i.e.
/social-card?slug=my-post-name) - A script that loops through all the posts in my blog, renders the social card page for that post, and then takes a screenshot using Puppeteer
Creating a new page to render your social card image
Firstly, I created a new Astro file called social-card:
---
import { getCollection } from 'astro:content';
import { SocialCard as SocialCardComponent } from '../components/SocialCard.tsx';

const posts = await getCollection('posts');
---

<SocialCardComponent posts={posts} client:only="react" />
That social-card page in turn renders a React component:
export const SocialCard = ({ posts }: { posts: Post[] }) => {
  const searchParams = new URLSearchParams(window.location.search);
  const slug = searchParams.get('slug');
  const post = posts.find((post) => post.id === slug);

  if (!post) {
    return null;
  }

  return (
    <div>
      <h1>{post.data.title}</h1>
    </div>
  );
};
The React component uses the ?slug= query parameter in the URL and renders a custom social card using the data specific to that post.
I chose to use React here, as if you try and access query params from Astro using:
const slug = Astro.url.searchParams.get('slug') || '';It won’t return anything in static mode, and I figured rendering it as a React component would be simpler than doing whatever the workaround is. (I assume if you are using another framework other than React, you should be able to do something similar).
An alternative approach could be to use Astro’s dynamic routes and create a page like /social-cards/[slug].astro that would generate routes for all of your social cards. But that seemed like more of a hassle than this.
Write the script to take the screenshot
Once you’ve gotten your social card into a state you’re happy with, you can use Puppeteer to take a screenshot of it:
const { join } = require('path');
const puppeteer = require('puppeteer');

const CARD_WIDTH = 1200;
const CARD_HEIGHT = 628;

const CONTENT_FOLDER = 'src/content/posts';
const OUTPUT_FOLDER = 'public/social-cards';

const BASE_URL = 'http://localhost:4321';
const TIMEOUT = 5000;

const LIMIT = 1;

async function timeoutFn(ms) {
    return new Promise(resolve => setTimeout(resolve, ms));
}

const generateSocialCards = async (limit = LIMIT) => {
    const contentPath = join(process.cwd(), CONTENT_FOLDER);
    const outputPath = join(process.cwd(), OUTPUT_FOLDER);

    const postSlugs = require('fs')
        .readdirSync(contentPath, { withFileTypes: true })
        .filter(path => {
            const isMarkdownFile = (path) => /\.(md|mdx)$/i.test(path);
            return path.isDirectory()
                ? ['index.md', 'index.mdx'].some(file => require('fs').existsSync(join(contentPath, path.name, file)))
                : path.isFile() && isMarkdownFile(path.name);
        })
        .map(path => path.name.replace(/\.(md|mdx)$/i, ''))
        .slice(0, limit);

    const browser = await puppeteer.launch({
        args: ['--no-sandbox', '--disable-setuid-sandbox'],
    });

    console.log(`Found ${postSlugs.length} posts to process`);
    LIMIT && console.log(`(Limited to ${LIMIT} posts. Remove LIMIT value to process all posts)`);

    for (const slug of postSlugs) {
        const outputFile = join(outputPath, `${slug}.png`);

        if (require('fs').existsSync(outputFile)) {
            console.log(`Skipping ${slug} - social card already exists`);
            continue;
        }

        const url = `${BASE_URL}/social-card?slug=${slug}`;

        try {
            console.log(`Generating social card for ${slug}`);
            const page = await browser.newPage();
            await page.setViewport({
                width: CARD_WIDTH,
                height: CARD_HEIGHT,
                deviceScaleFactor: 1,
            });

            await page.goto(url);
            await timeoutFn(TIMEOUT);

            await page.screenshot({
                path: outputFile,
                clip: {
                    x: 0,
                    y: 0,
                    width: CARD_WIDTH,
                    height: CARD_HEIGHT,
                },
            });

            console.log(`Successfully generated social card for ${slug}`);
            await page.close();
        } catch (error) {
            console.error(`Failed to generate social card for ${slug}:`, error);
        }
    }

    await browser.close();
    console.log('Finished generating social cards');
};

generateSocialCards().catch(console.error);
Tips before running the script
A couple of things you need to do before running the script:
- Install Puppeteer with
npm i --save-dev puppeteer - Make sure to hide the Astro dev toolbar, or else it will ruin your screenshot.
- Make sure you create an output folder where you want your screenshots to be saved. I put them in
public/social-cards
Running the script
Add your new script to your package.json file:
{
  "scripts": {
    "social-card": "node scripts/social-card.js"
Then you can run your script using npm run social-card 🎉
By default I have it set to run for only one for one post, so you can test that it works properly. Once you’re happy with the results, you can remove the LIMIT variable and run it against all of your posts.
Add your image to your SEO component
Hopefully, you should have a SEO component already set up - SEO is really important for your blog!
You can add your social card to a post via the og:image meta tag:
<meta
    property="og:image"
    content={new URL(`/social-cards/${post.slug}.png`, Astro.url)}
/>
Anything that you put into your public folder will get deployed on your site, so make sure it’s in there.
Rendering images in your social cards
If you’re not really sure where to start with your social card design, an easy way to make them look more fancy is to add images. I use them for both my hiking and programming posts.
Adding local images from your frontmatter
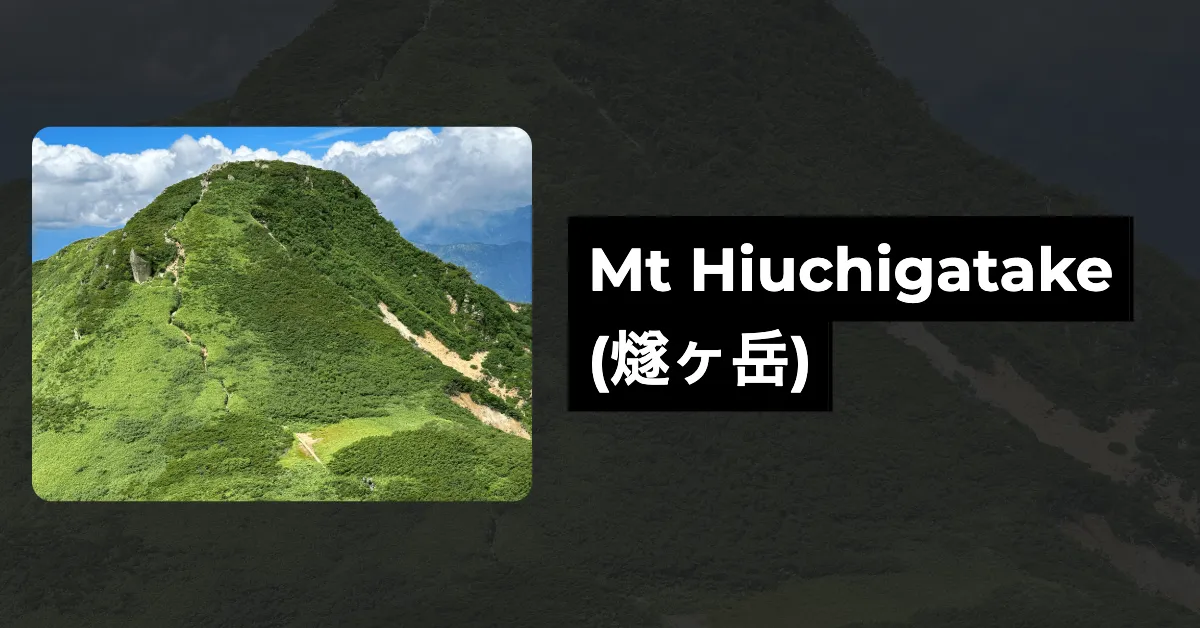
Each of my hiking posts has a cover image, which I set in its frontmatter. It points to a file stored in the same folder as the index.mdx file:
---
title: Mt Hiuchigatake (燧ヶ岳)
date: 2025-03-08
cover: "./mt-hiuchi.png"
---
I can directly access the src value of this image via post.data.cover.src:
<img src={post.data.cover.src} />Adding remote images from a URL
In the case of my programming posts, I have assigned each of my posts a cover image from a free photo service called Unsplash.
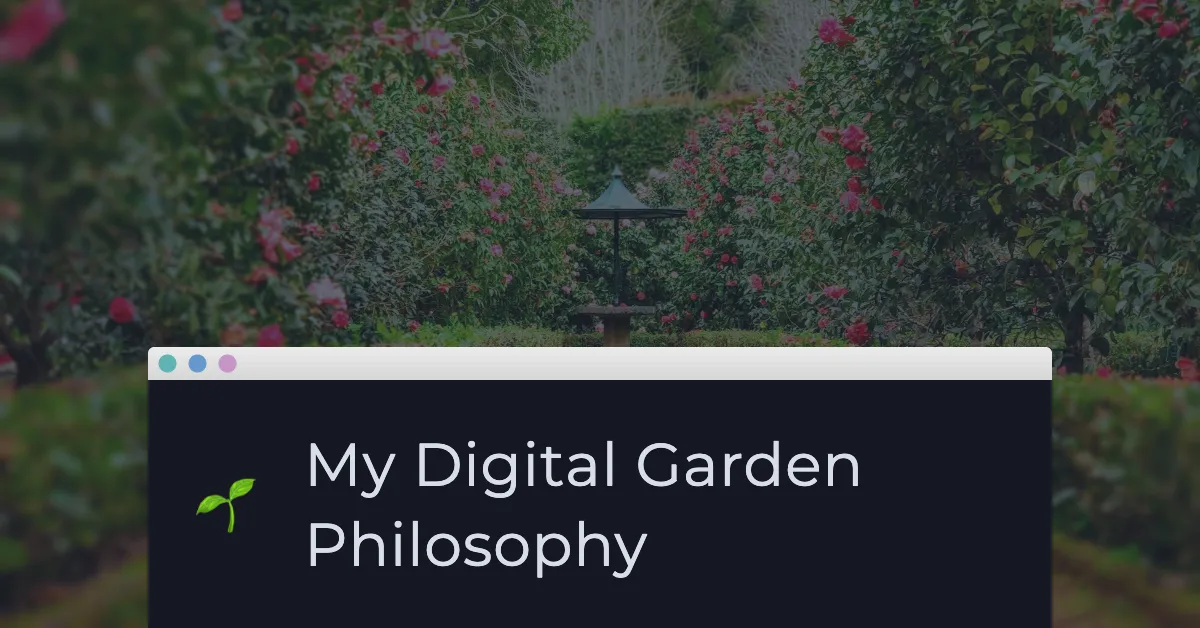
I store this URL in my frontmatter as well:
---
title: "My Digital Garden Philosophy"
date: 2024-12-14
cover: 'https://images.unsplash.com/photo-1585320806297-9794b3e4eeae'
---
I can then render this URL as a background image with CSS:
<div
  style={{
    backgroundImage: `url(${post.data.cover})`,
  }}
>
PS: Hiding the /social-cards page from your readers
By default, if you added a new /pages/social-cards.astro file, this will be deployed and the URL viewable by anyone visiting your blog (if they happened to stumble upon the link).
If you don’t want the page to show up when you deploy your blog, you’ll need to add an underscore to the front of the file name (_social-cards.astro).
However this would also hide the page on your dev build, so you won’t be able to take a screenshot. Instead, you can add this to the bottom of the script so it un-hides the page, takes the screenshots, and then hides it again for you:
const hiddenPath = join(process.cwd(), 'src/pages/_social-card.astro');
const visiblePath = join(process.cwd(), 'src/pages/social-card.astro');

const renameAndGenerateSocialCards = async () => {
	try {
        fs.renameSync(hiddenPath, visiblePath);
        await generateSocialCards(collection);
    } finally {
        fs.renameSync(visiblePath, hiddenPath);
    }
};

renameAndGenerateSocialCards().catch(console.error);
Alternatively, you could deploy the page but add a redirect so users get redirected to the home page.
if (import.meta.env.MODE === 'production') return Astro.redirect('/');The downside of this is that the redirect is a bit ugly (you get taken to a blank white page that tells you it’s going to redirect you).