hikes
A guide to the best hikes in Kyushu
28 Jun
You'll have to get a ferry or plane to Yakushima from Kagoshima, and from there there are public buses available to the trailheads.
There is the option to rent a car on the island.
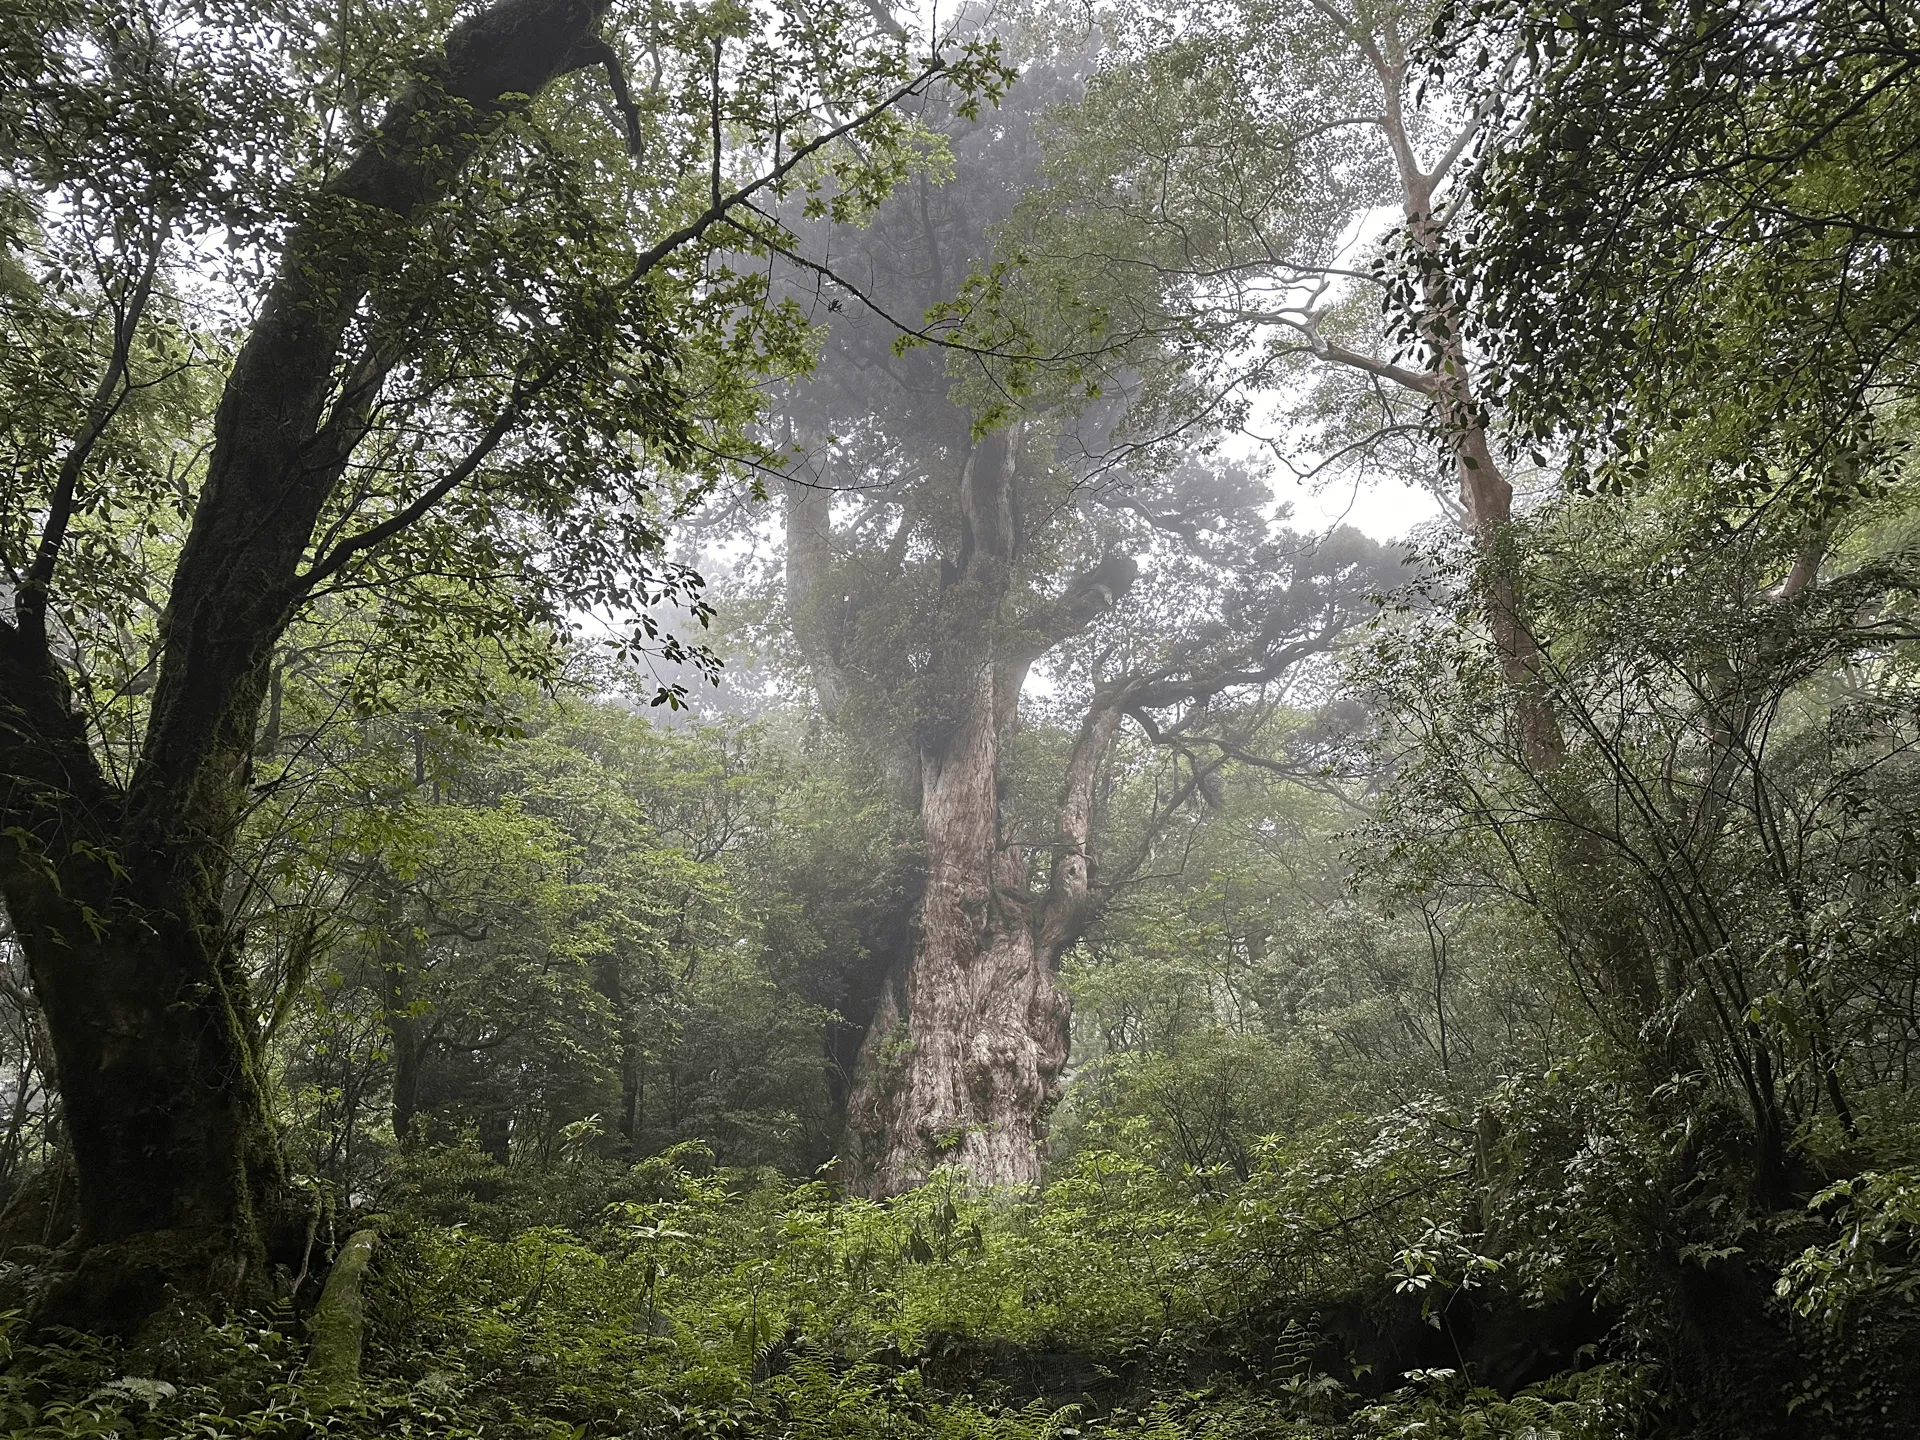
In May of last year I did a 3-day traverse of Yakushima, passing by the southernmost of the 100 Famous Japanese Mountains, Mt Miyanoura (宮之浦岳, Miyanoura-dake), as well as the famous Jomon Sugi, a cedar tree said to be over 7000 years old.
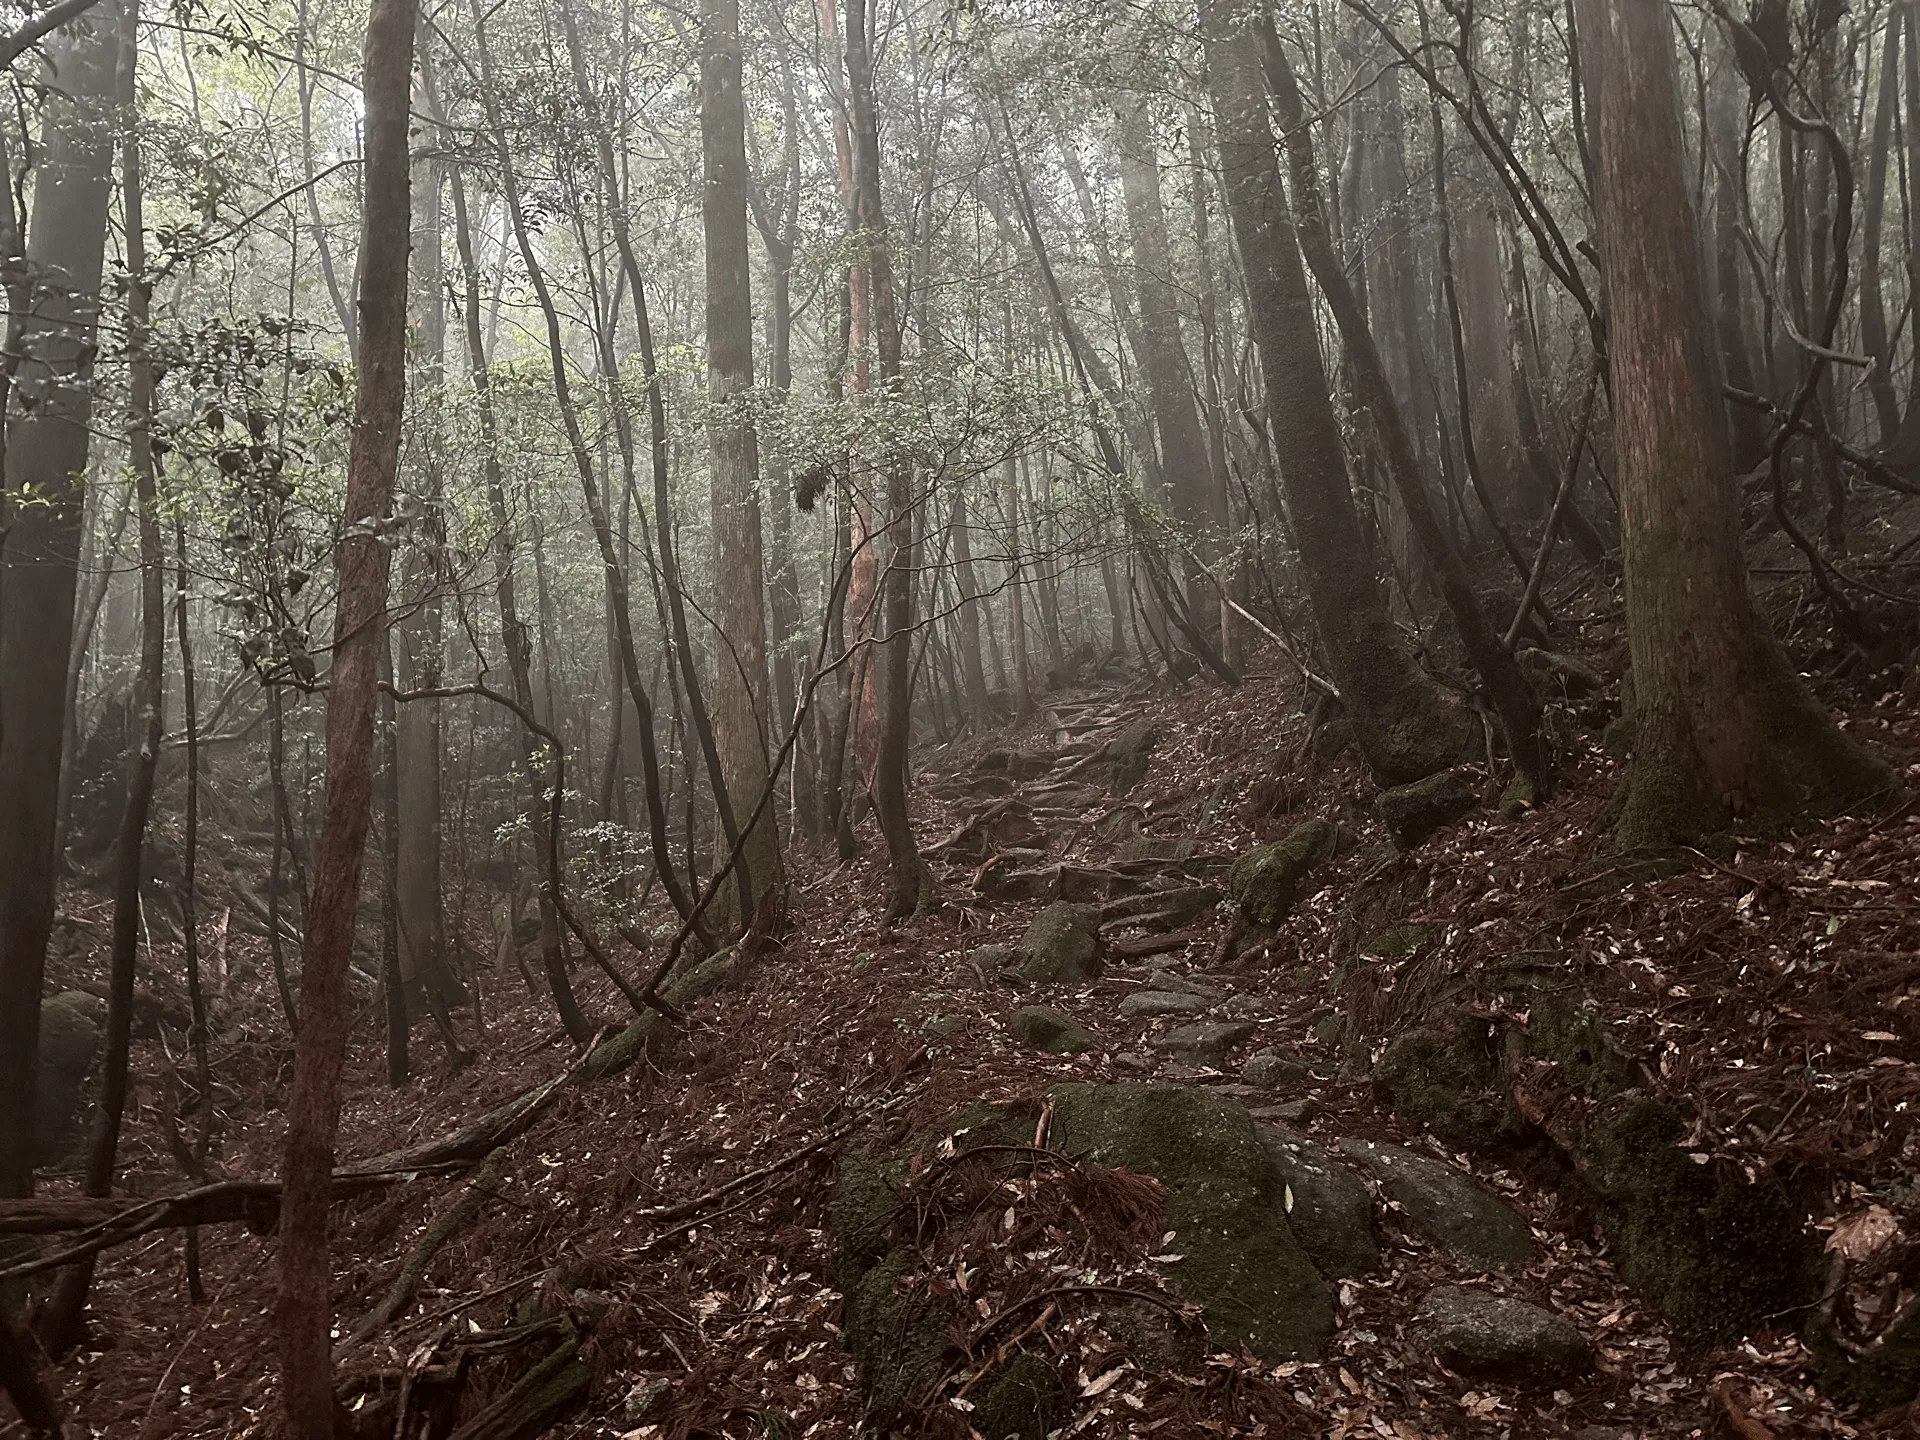
Yakushima’s hiking trails are quite unique in that although they are well-trodden, they are still relatively undeveloped. There are mountain huts available on the trail, but they are all unmanned, and space is limited - so bring a tent, or be prepared for a tight squeeze with your fellow hikers. It’s said that Yakushima rains 35 days a month, so make sure to bring your wet weather gear too. But the trail is absolutely gorgeous, and well-worth the effort, especially if you time your visit to see the pink rhododendron flowers blooming at the end of May each year.
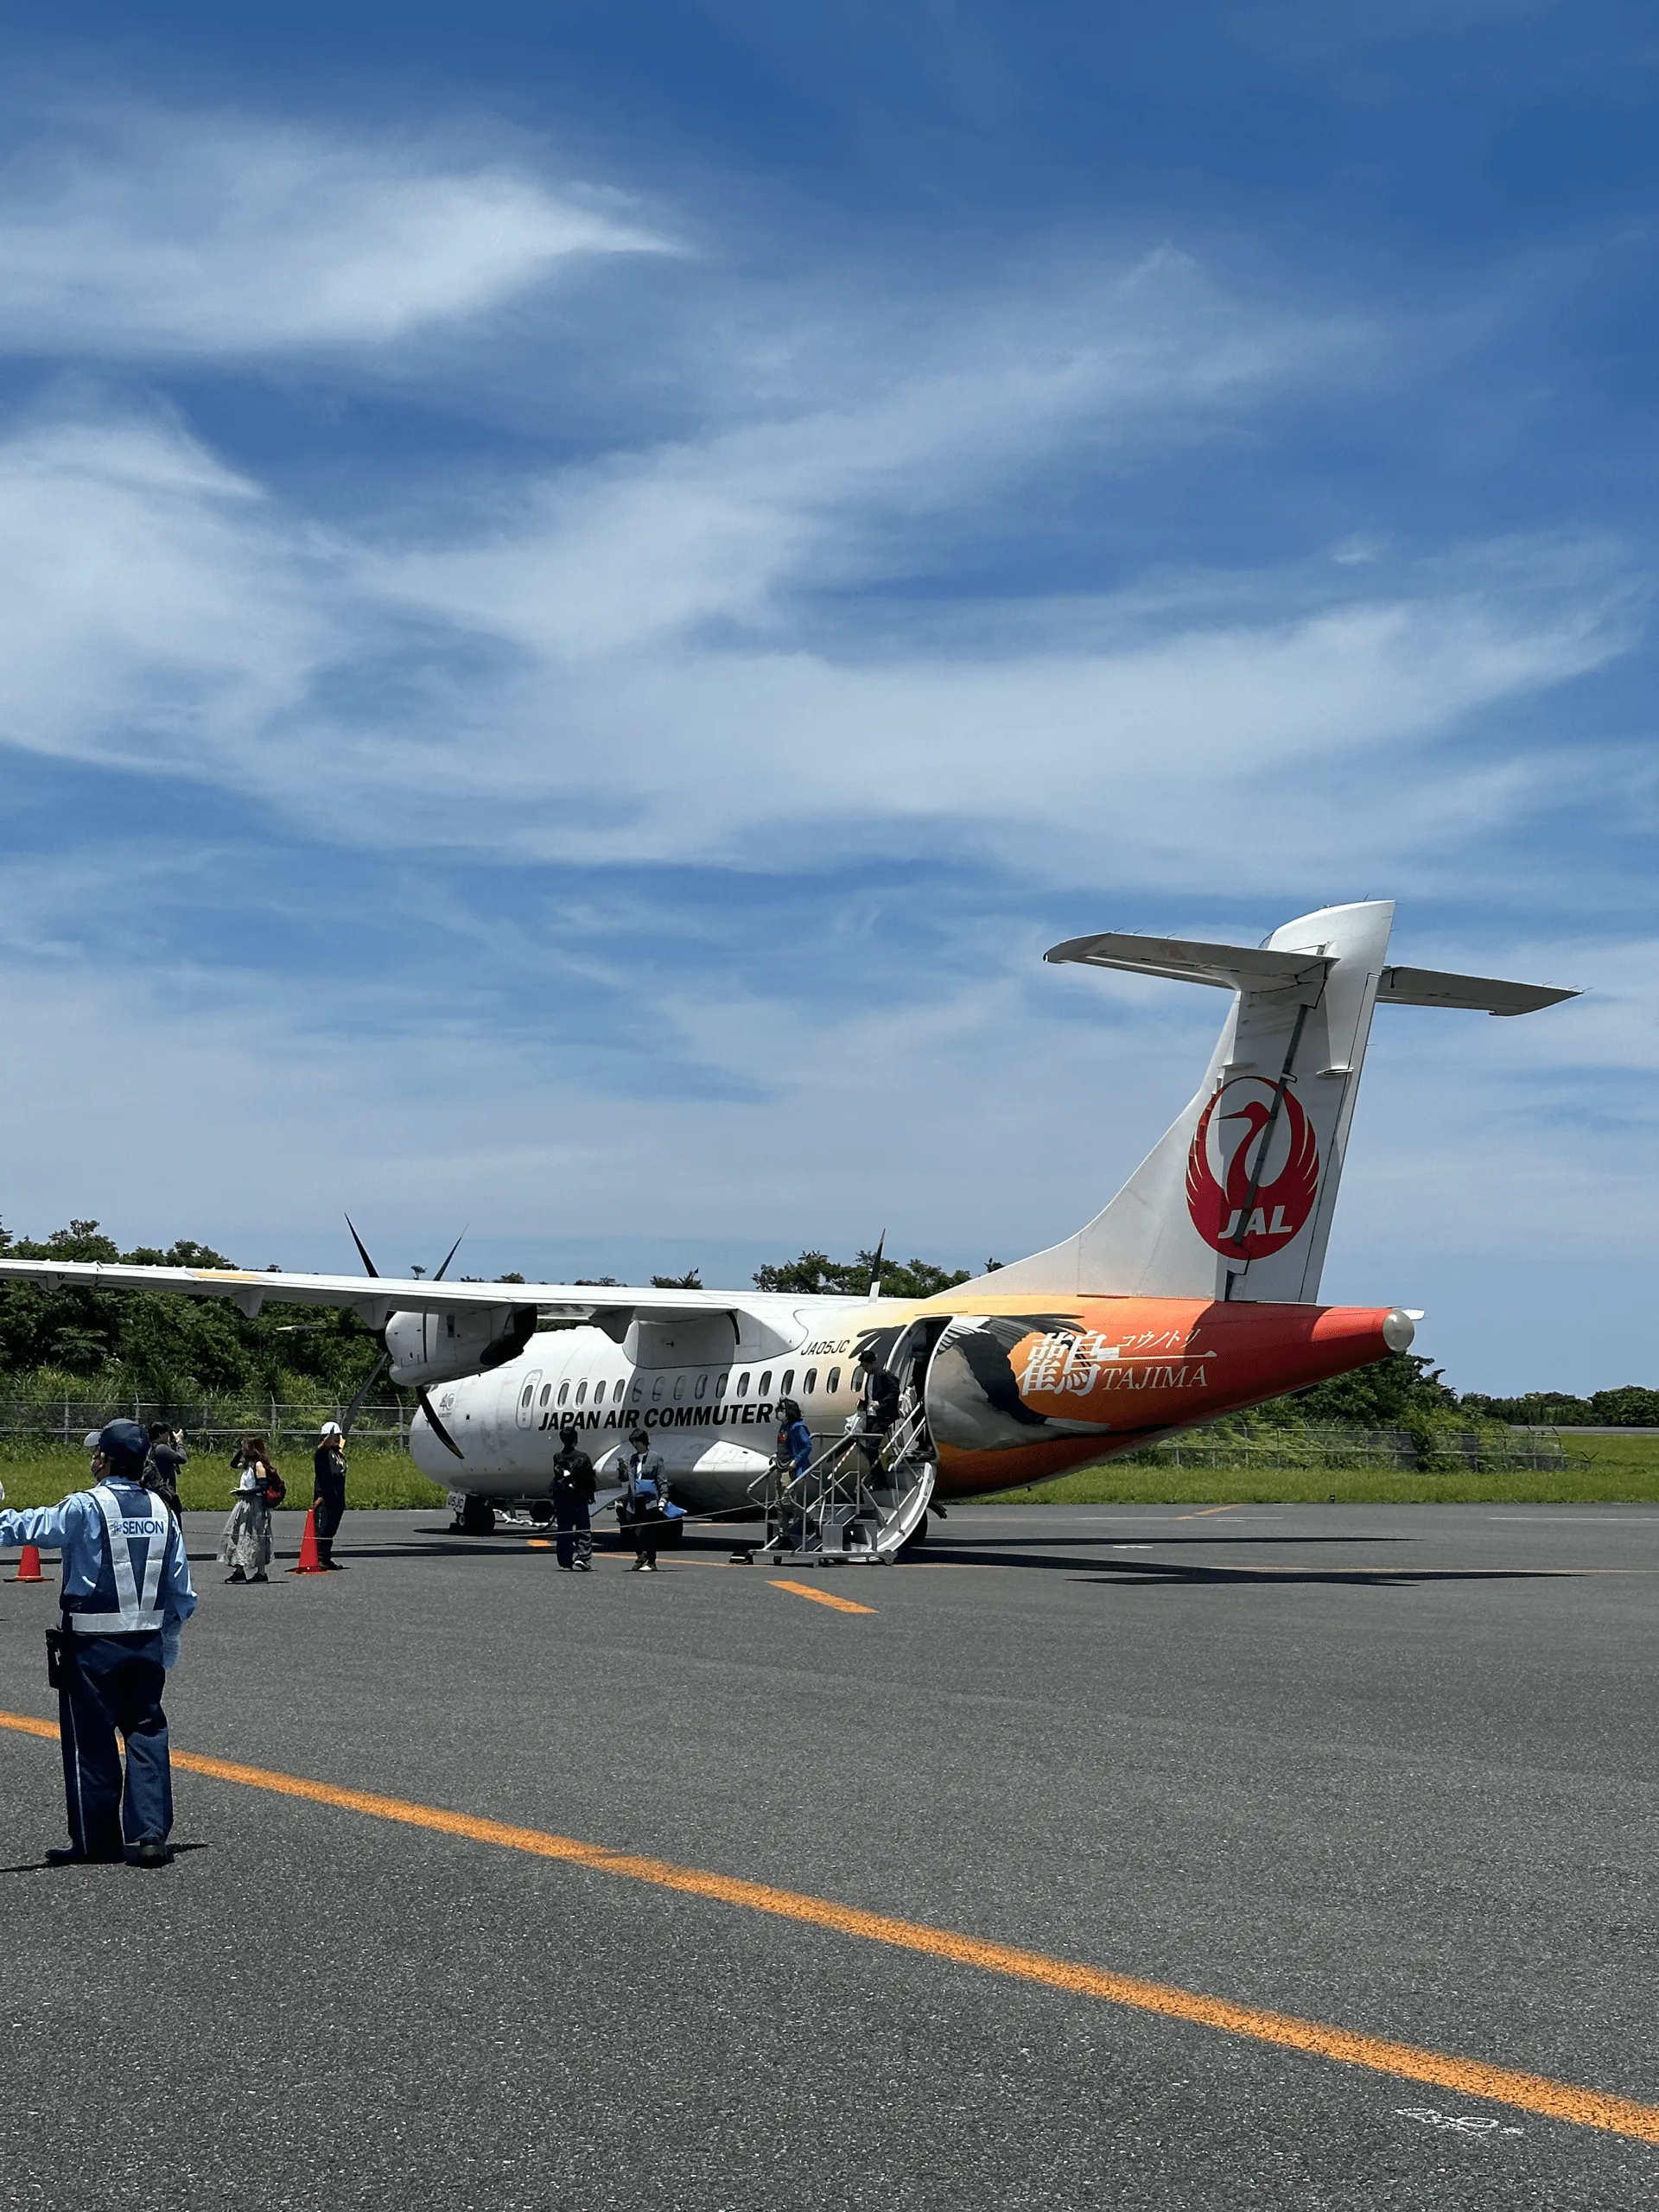
Your first step in beginning your Yakushima hike will be actually getting to the island. You can either get a ferry or plane from Kagoshima. We opted for the latter, and got on a cute little propeller plane to Yakushima airport.
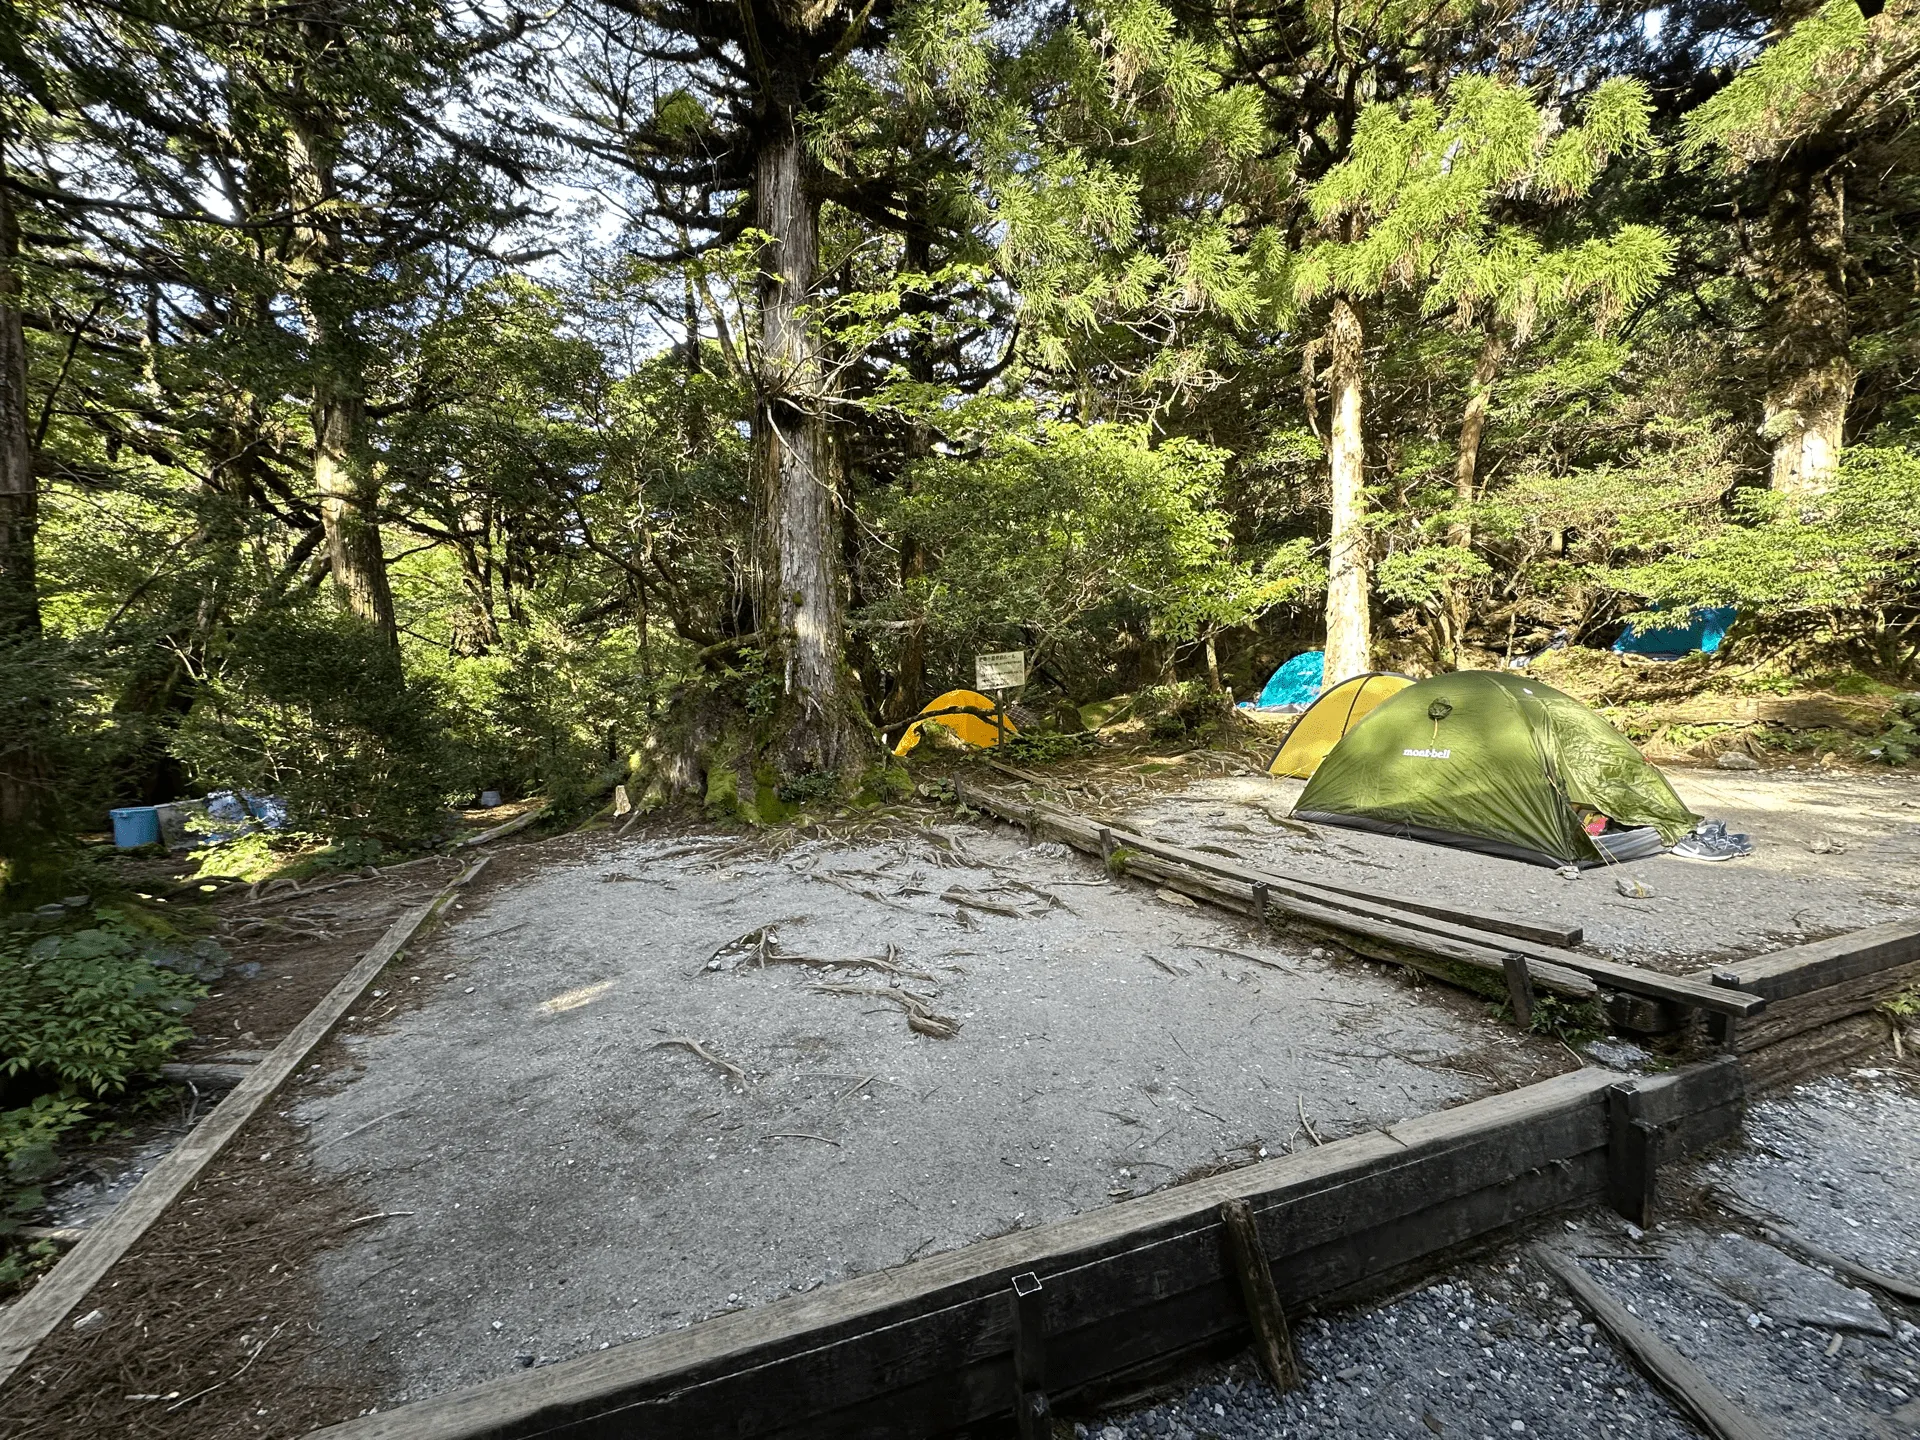
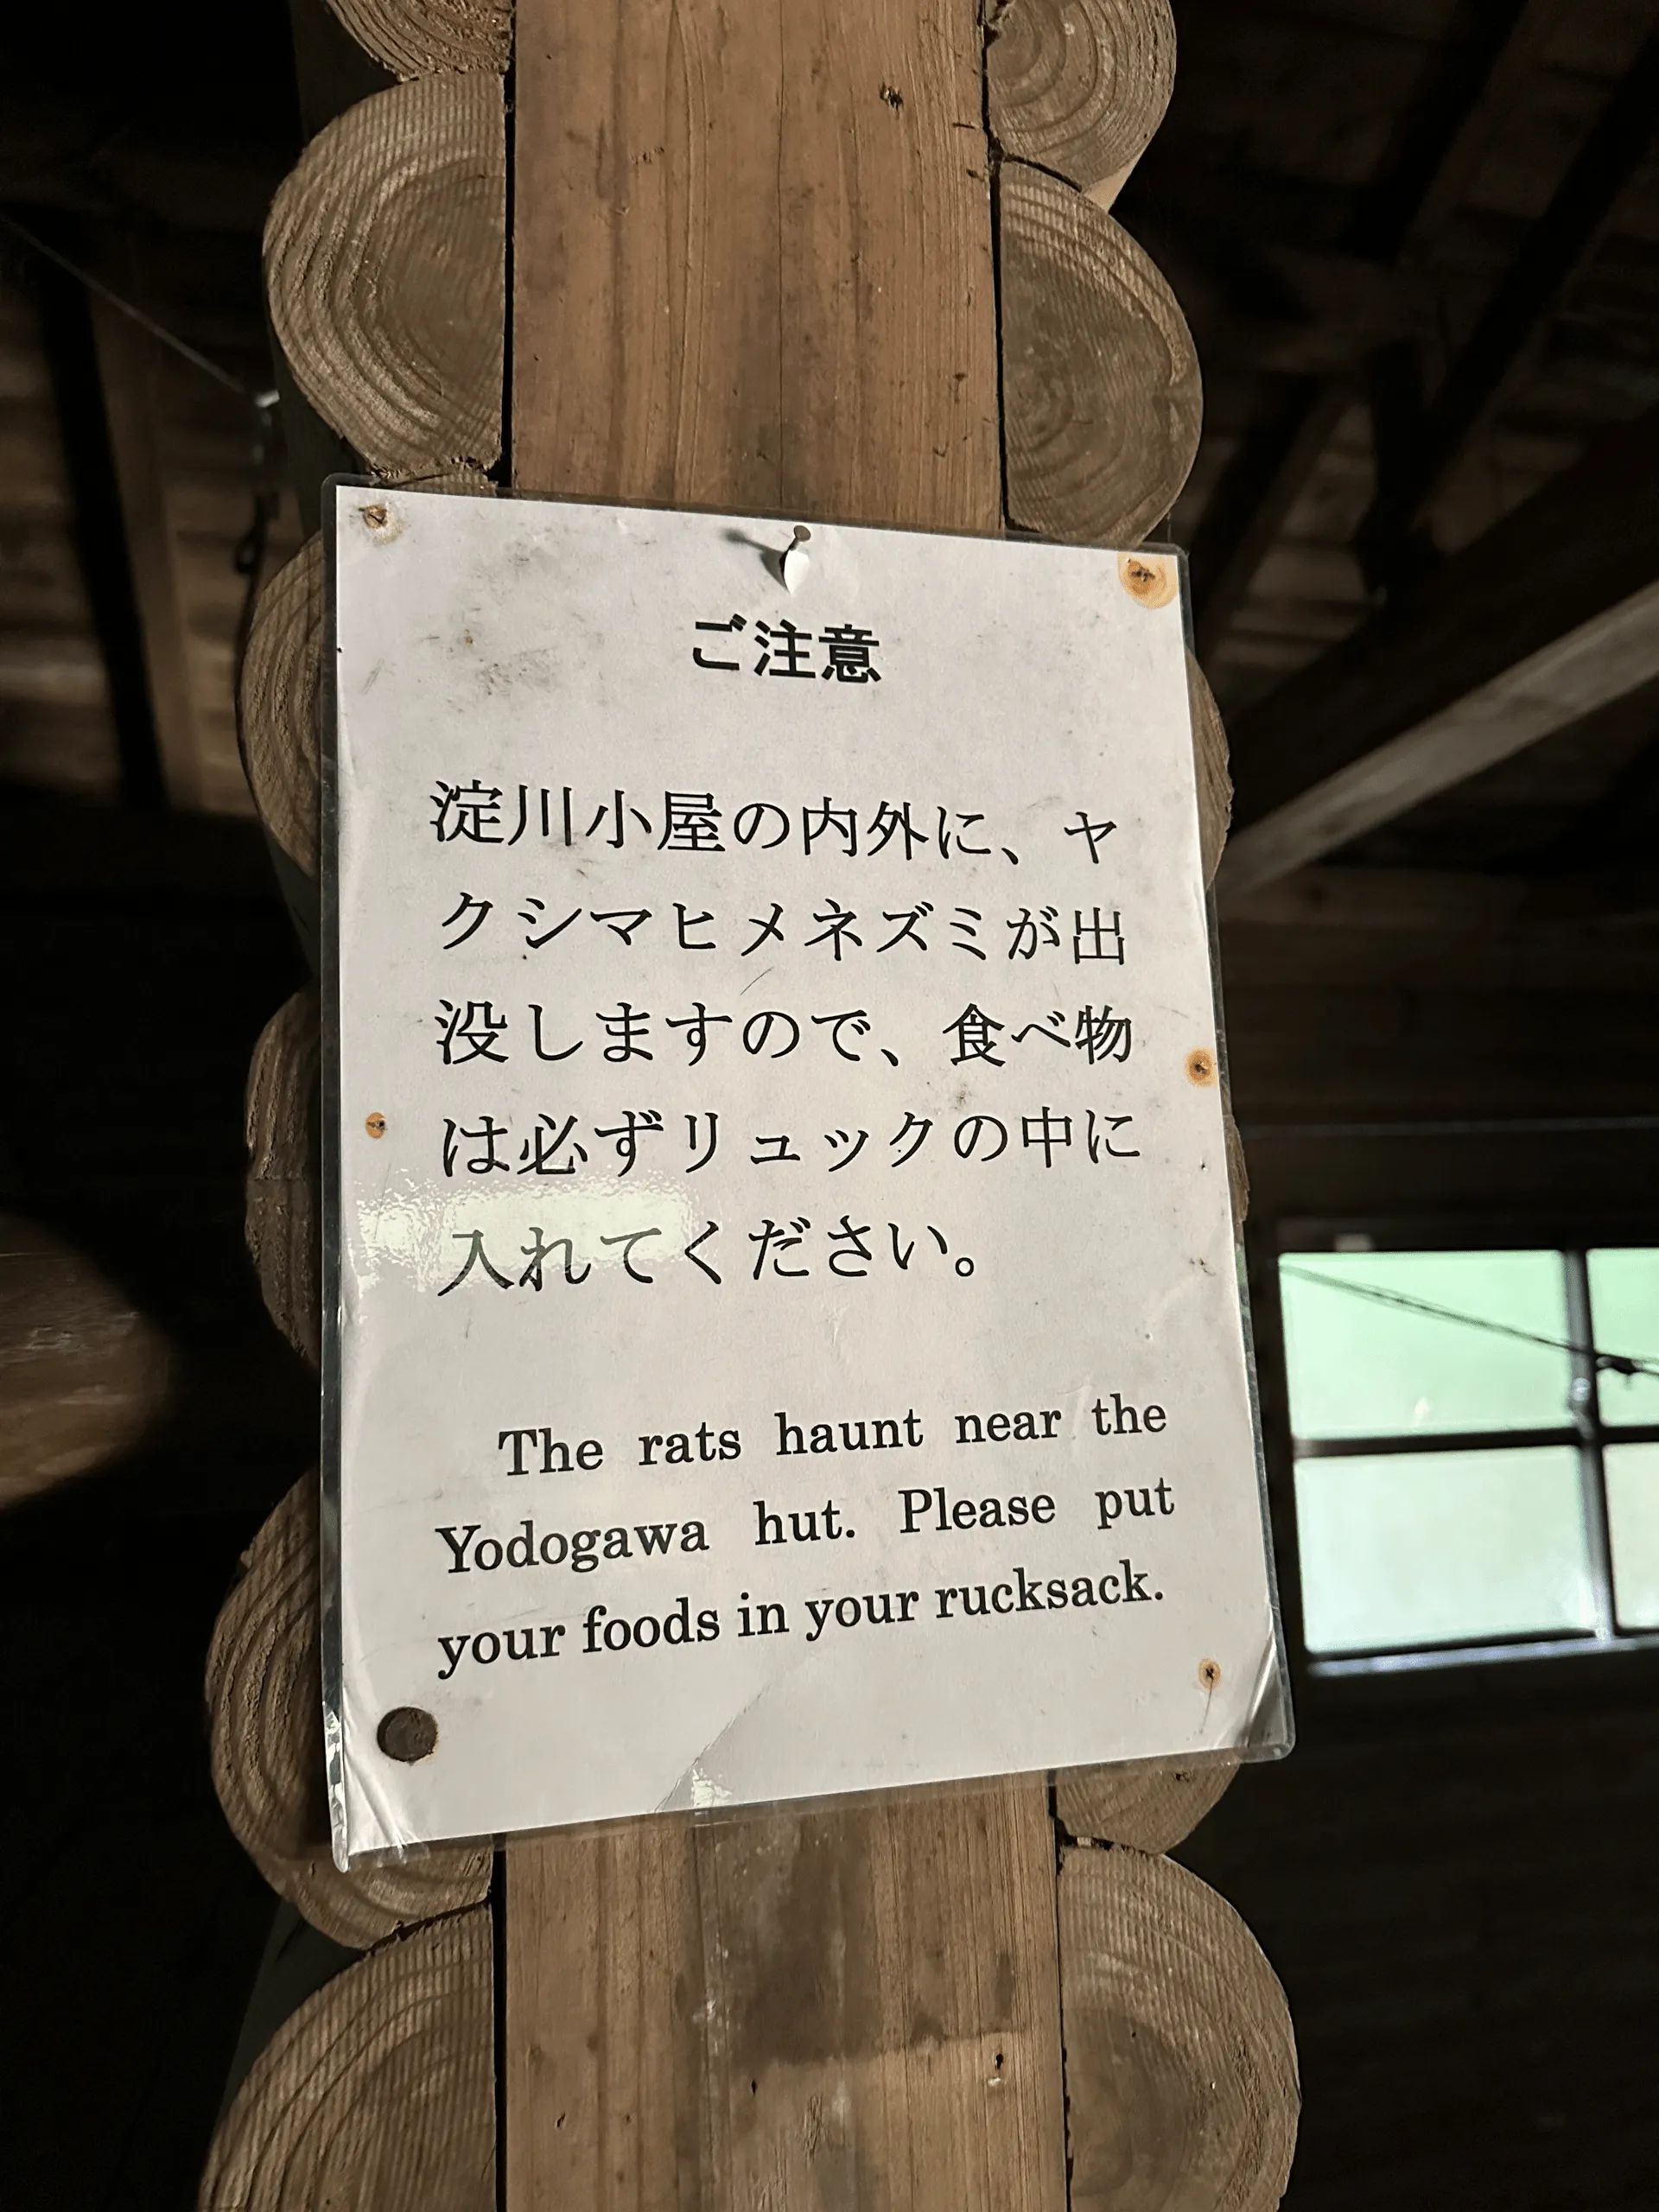
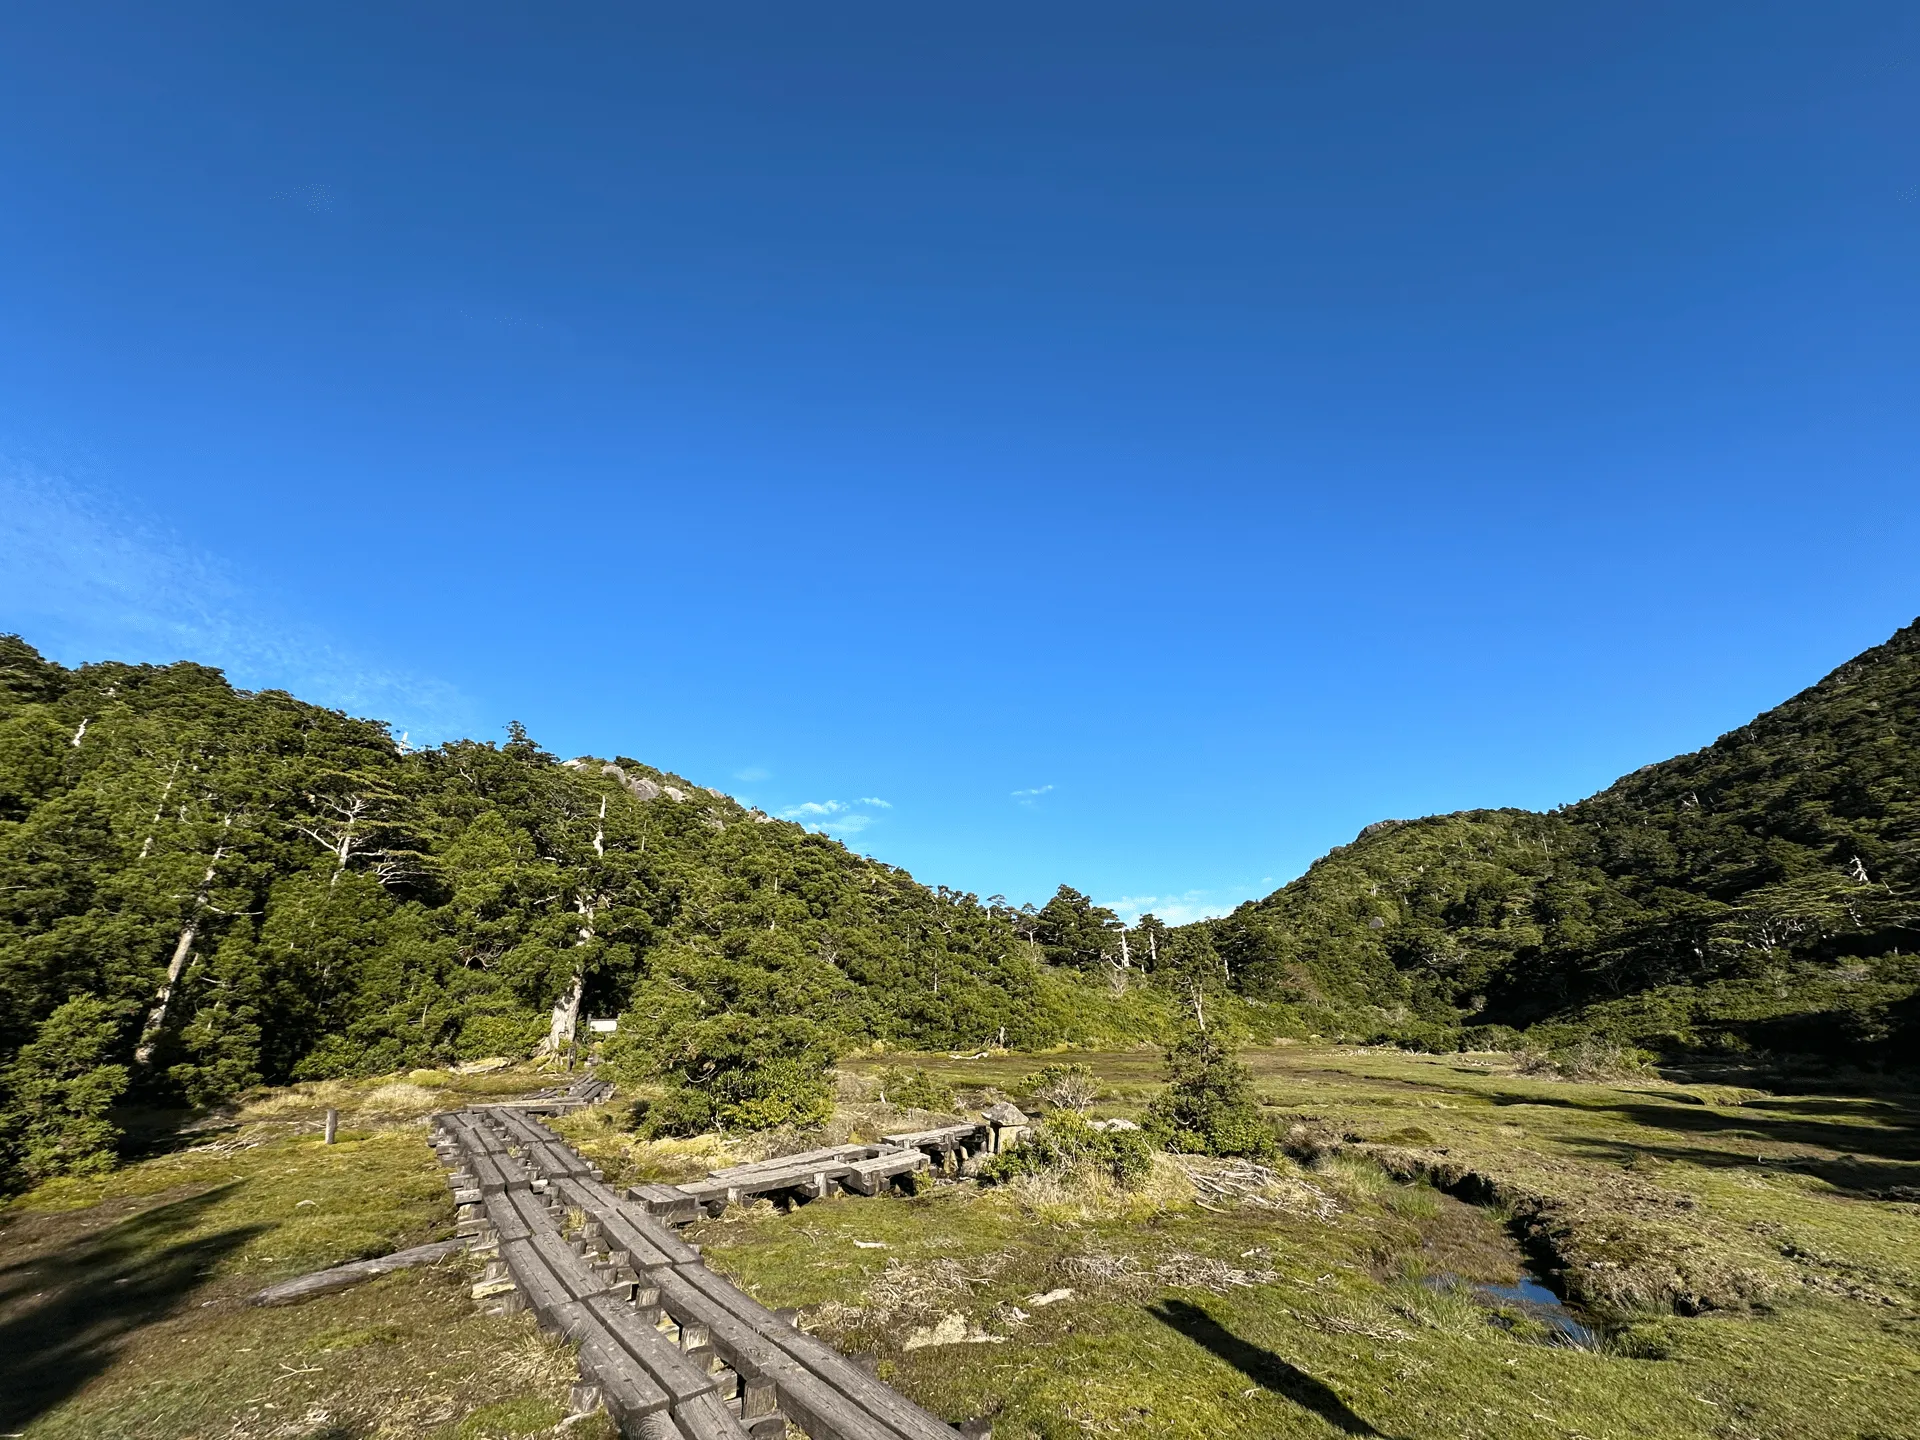
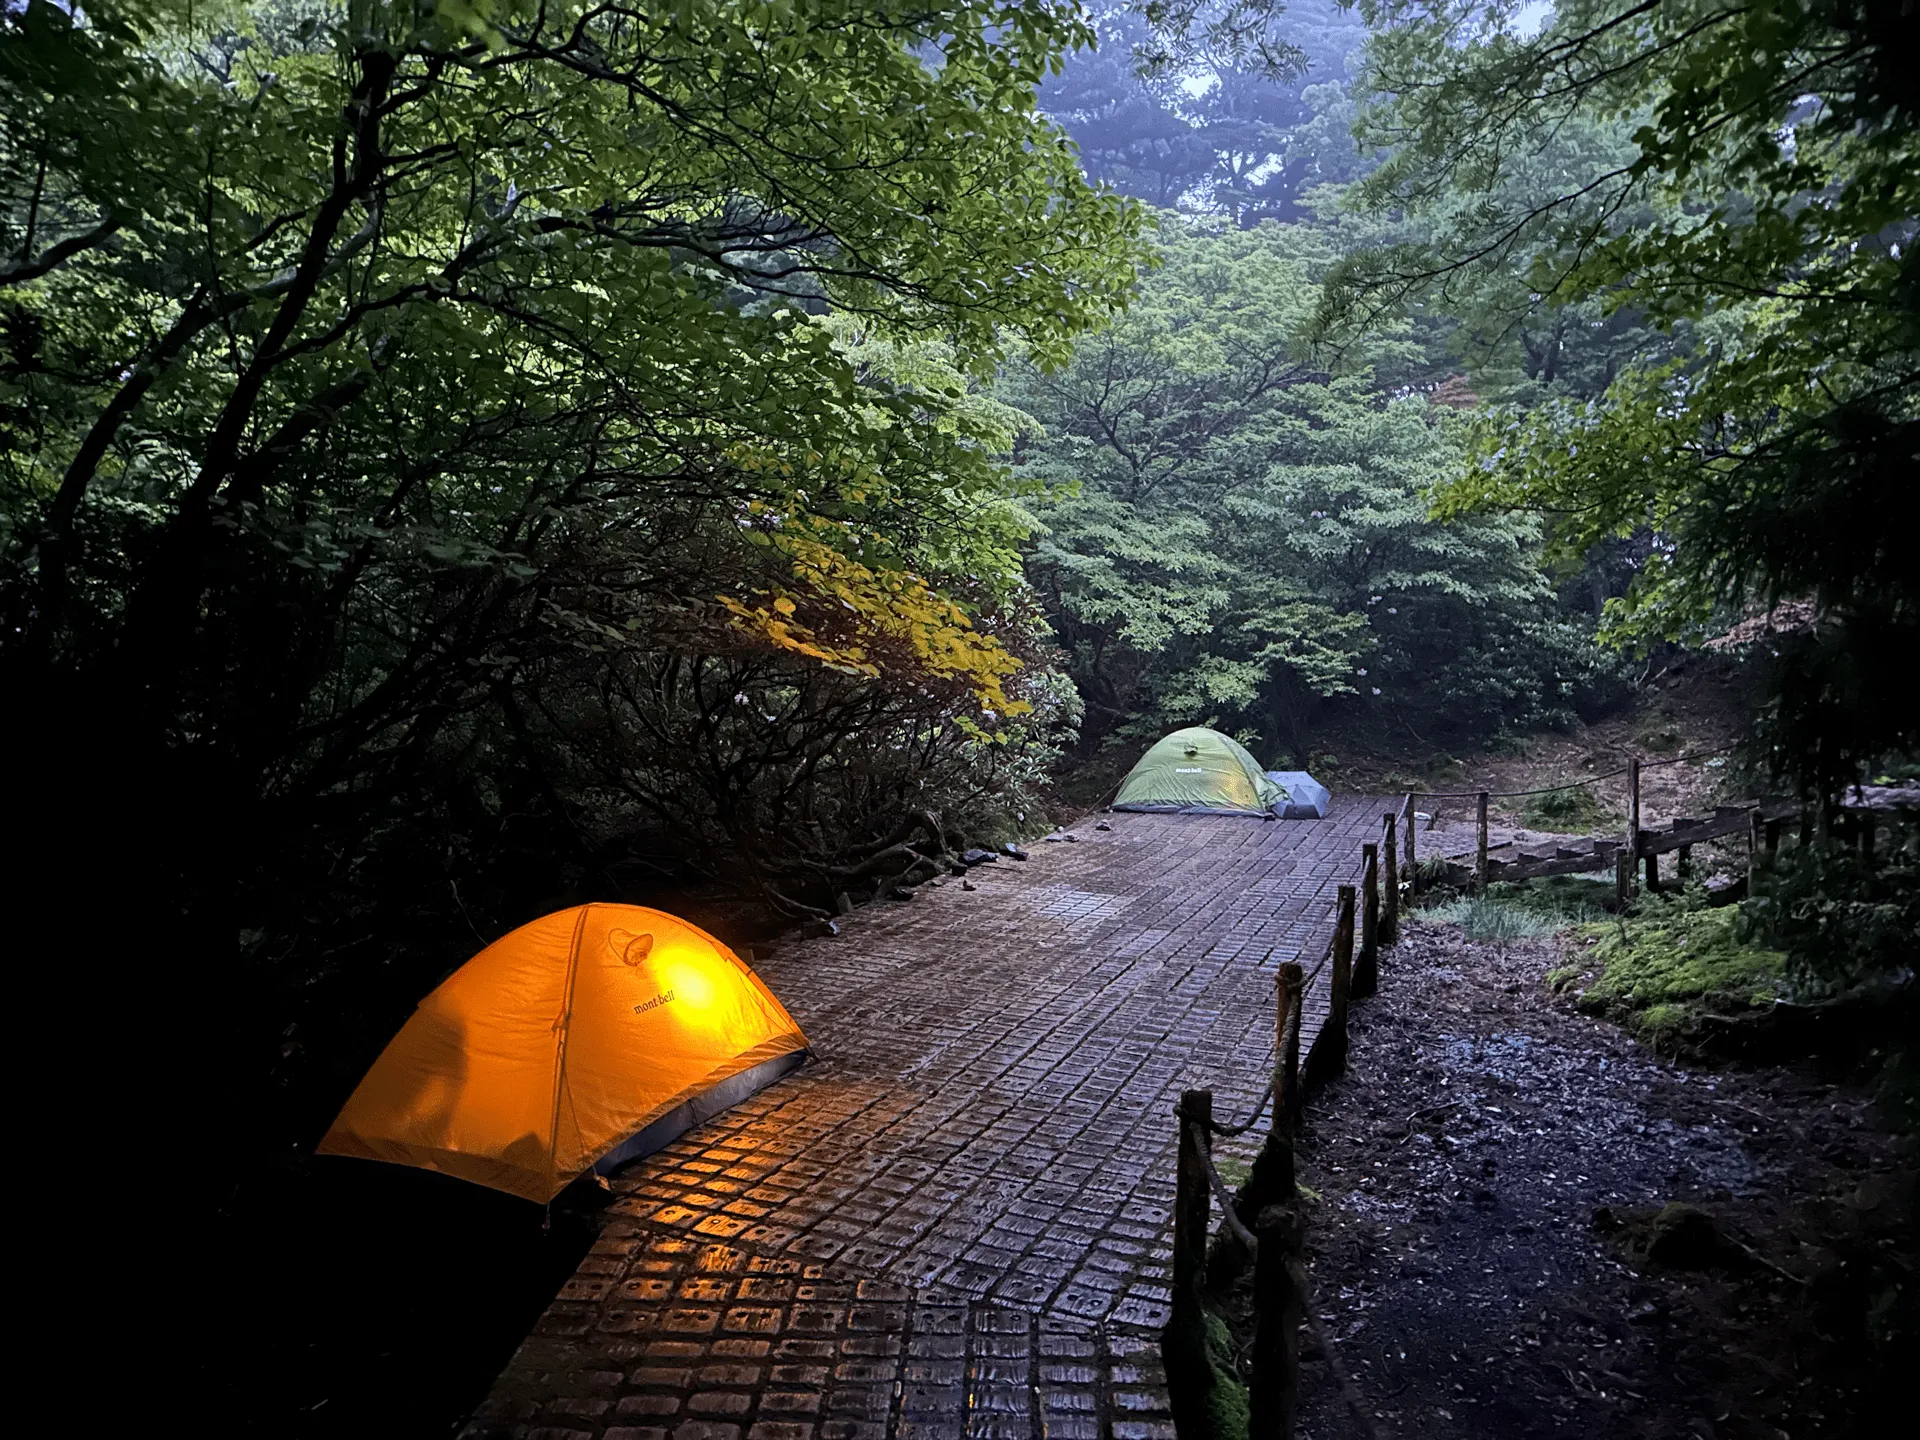
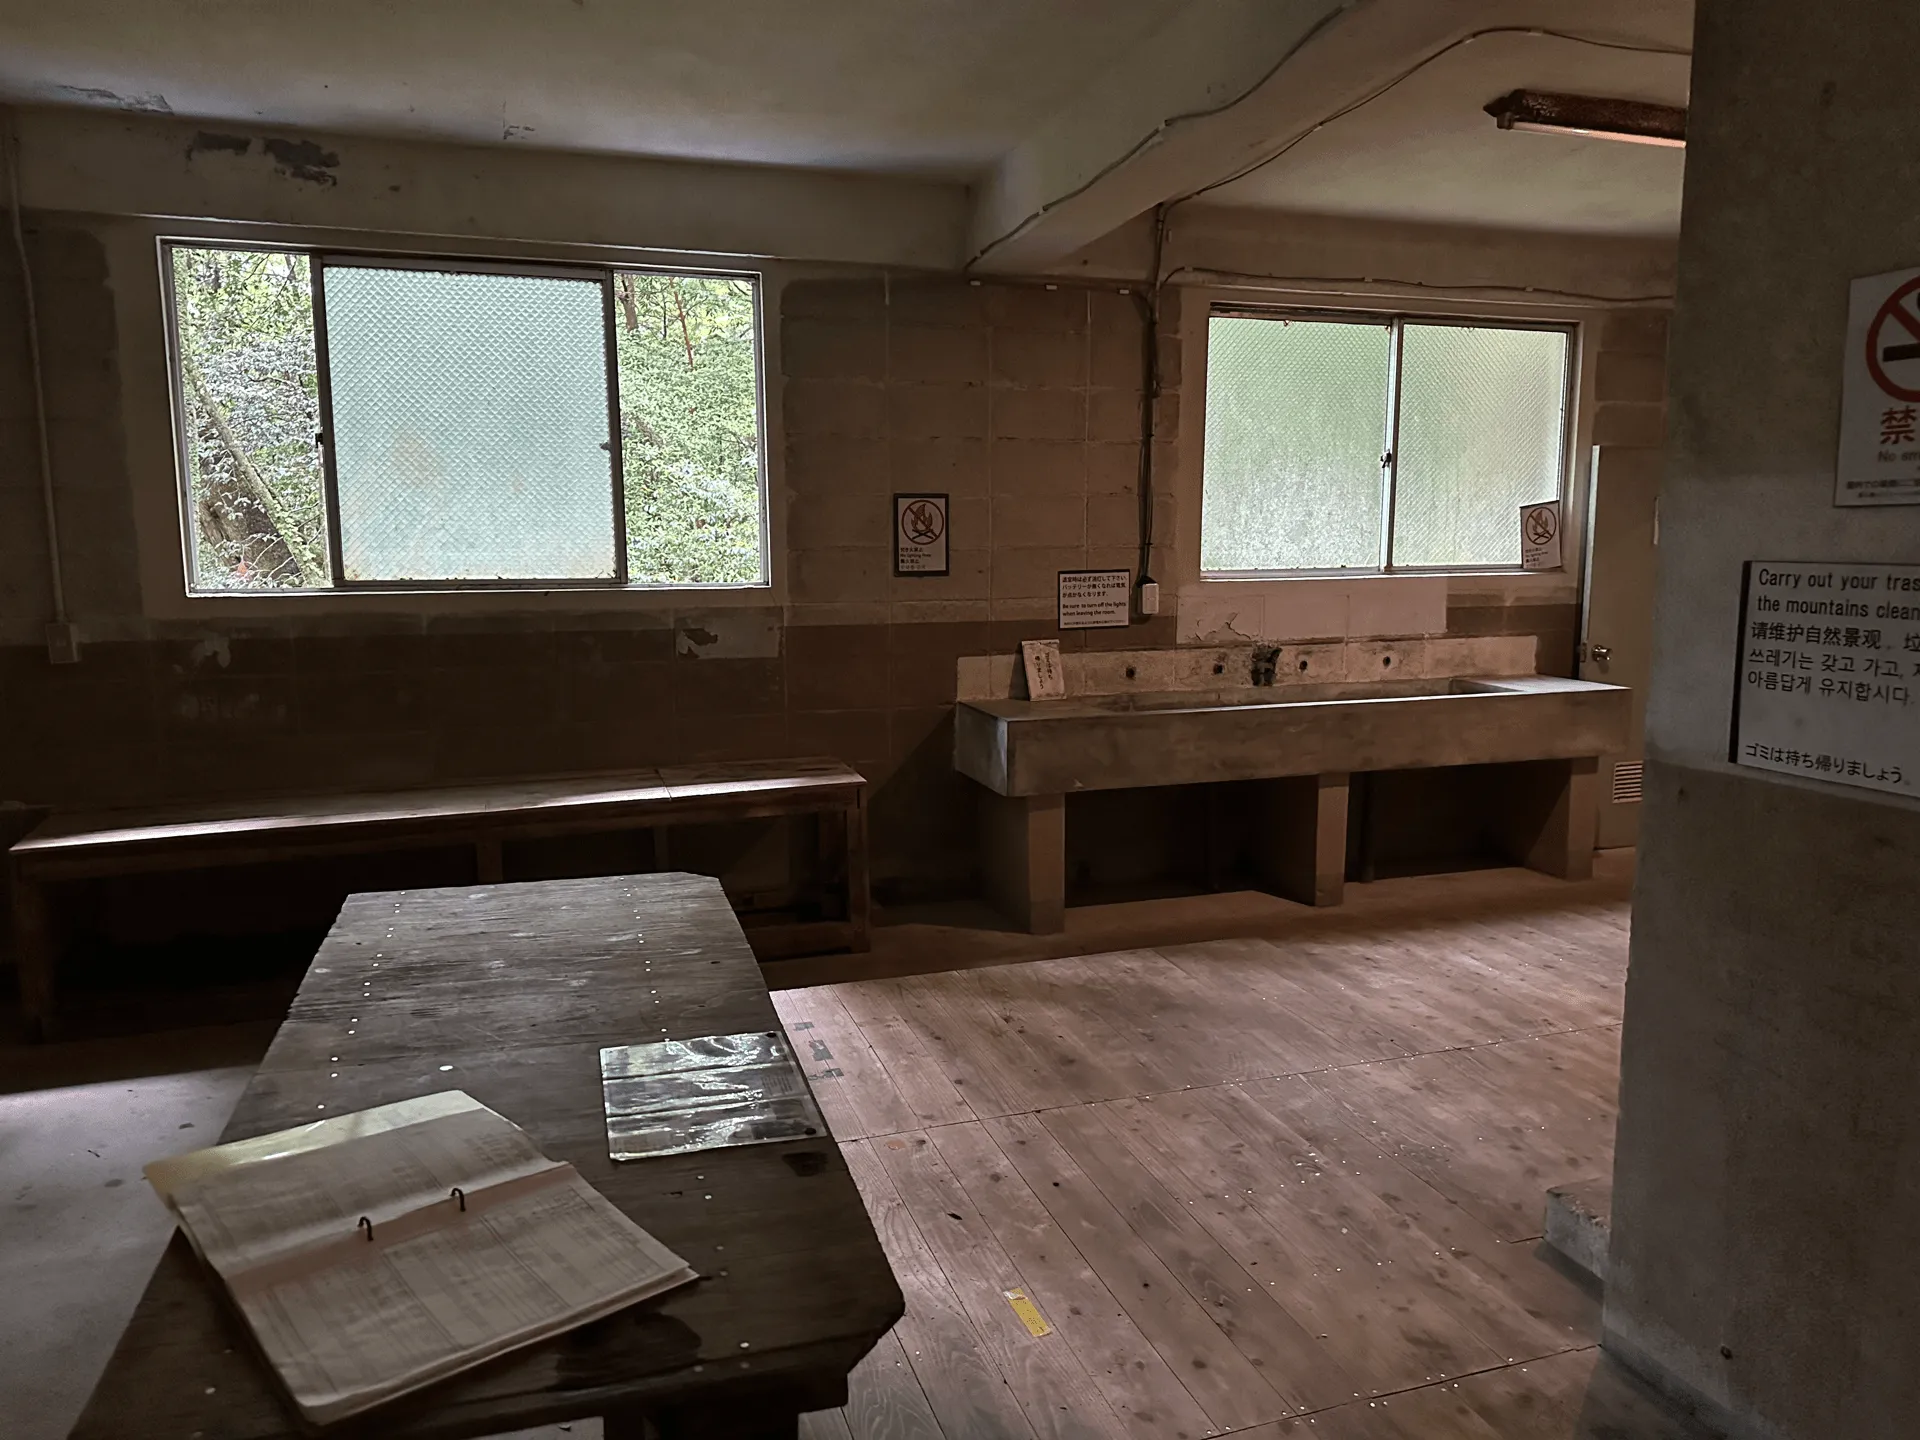
From the airport we took a bus and walked 3km to our mountain hut for the night at Yodagawa (淀川小屋). The huts on Yakushima are unstaffed and free to use, but the main catch is that there’s also no way to make a reservation so they can fill up depending on the season. For that reason, we made sure to also bring tents in case we couldn’t stay in the huts.

The mountain hut was set up in a loft-style to maximise space, and have sections taped out to indicate where each person can sleep. Since we arrived on a Friday there were 10 people total (including the 4 in our group) staying in the hut, plus probably 7 or 8 people who opted to stay in their tents outside.
The main downside was the toilet, which smelt absolutely horrendous. Even if you didn’t breathe in the smell via your nose, you could feel the fumes just from inhaling the air. The upside though was that every toilet we used after that felt luxurious in comparison (even though they weren’t that great either).
With the hut only a quarter-full, it was pretty cosy and I managed to sleep really well. We were up bright and early for a 5:30am start the next day.
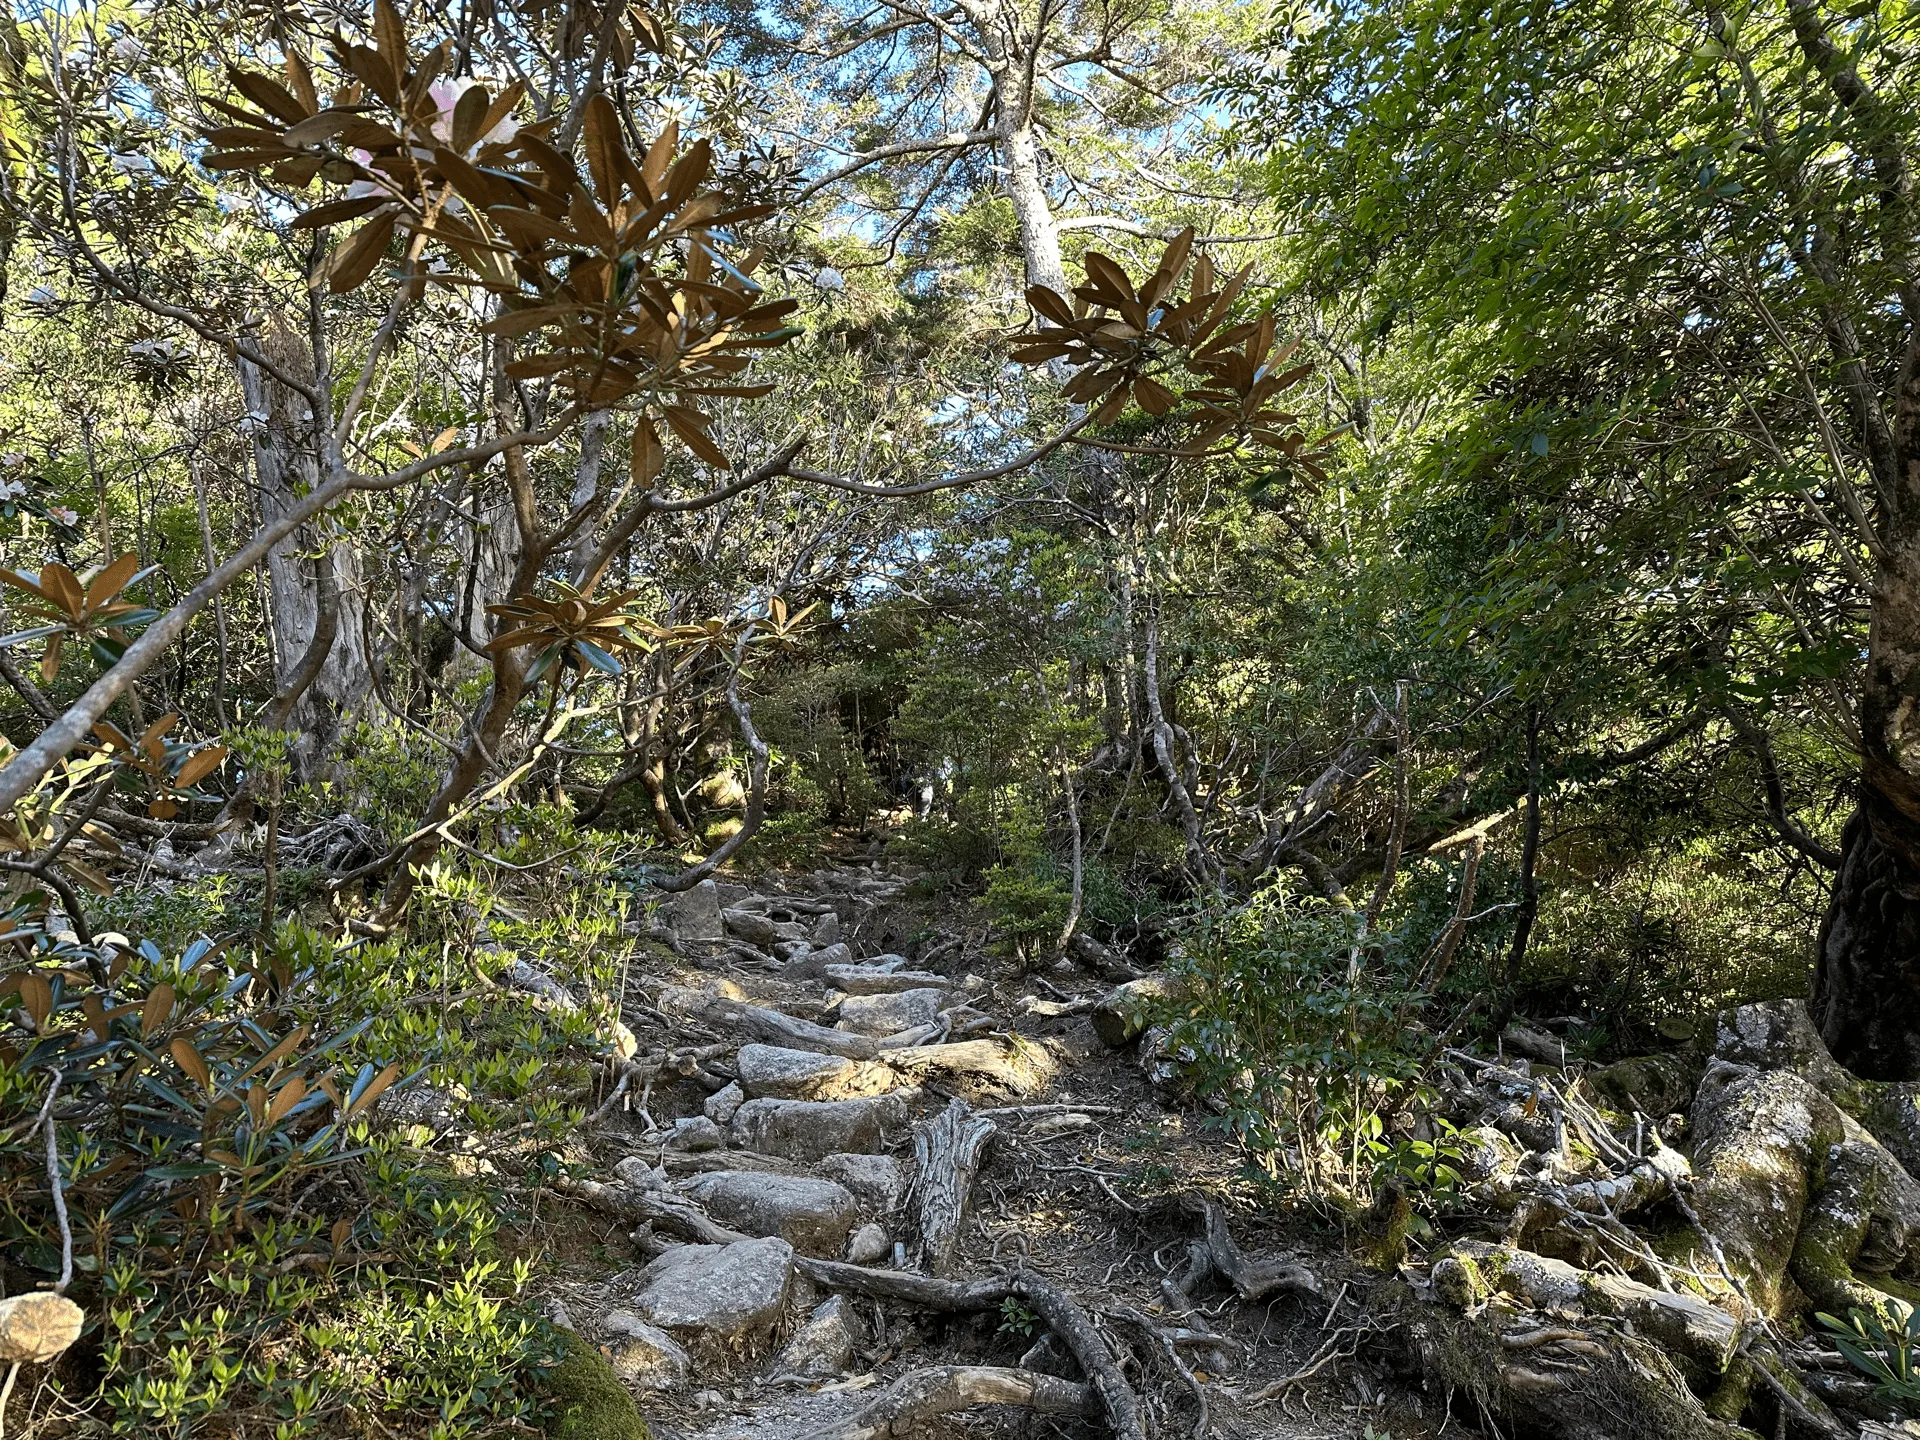
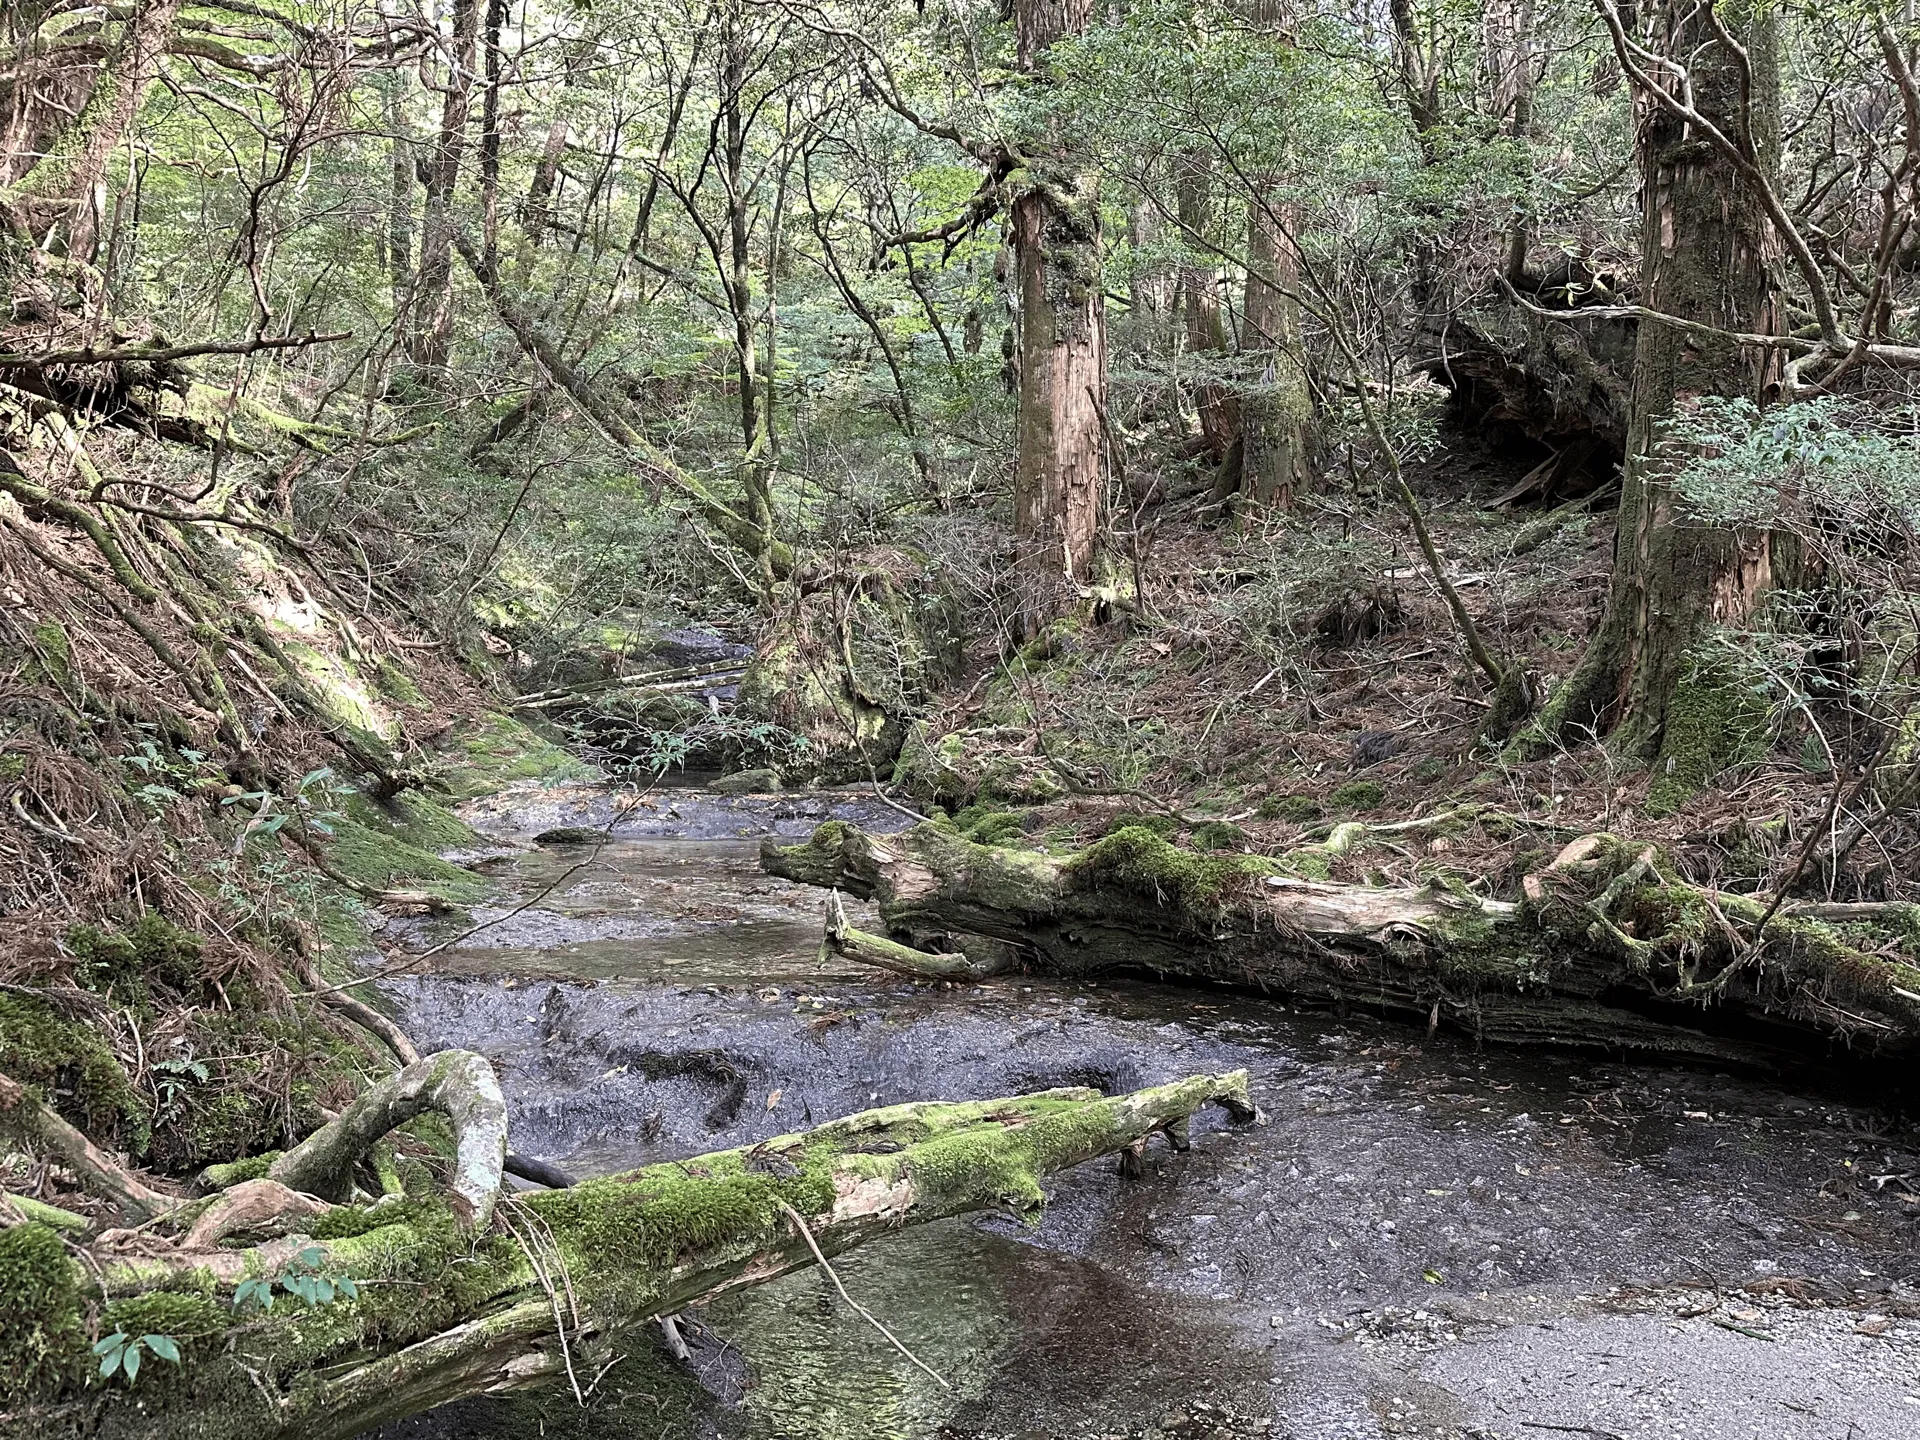
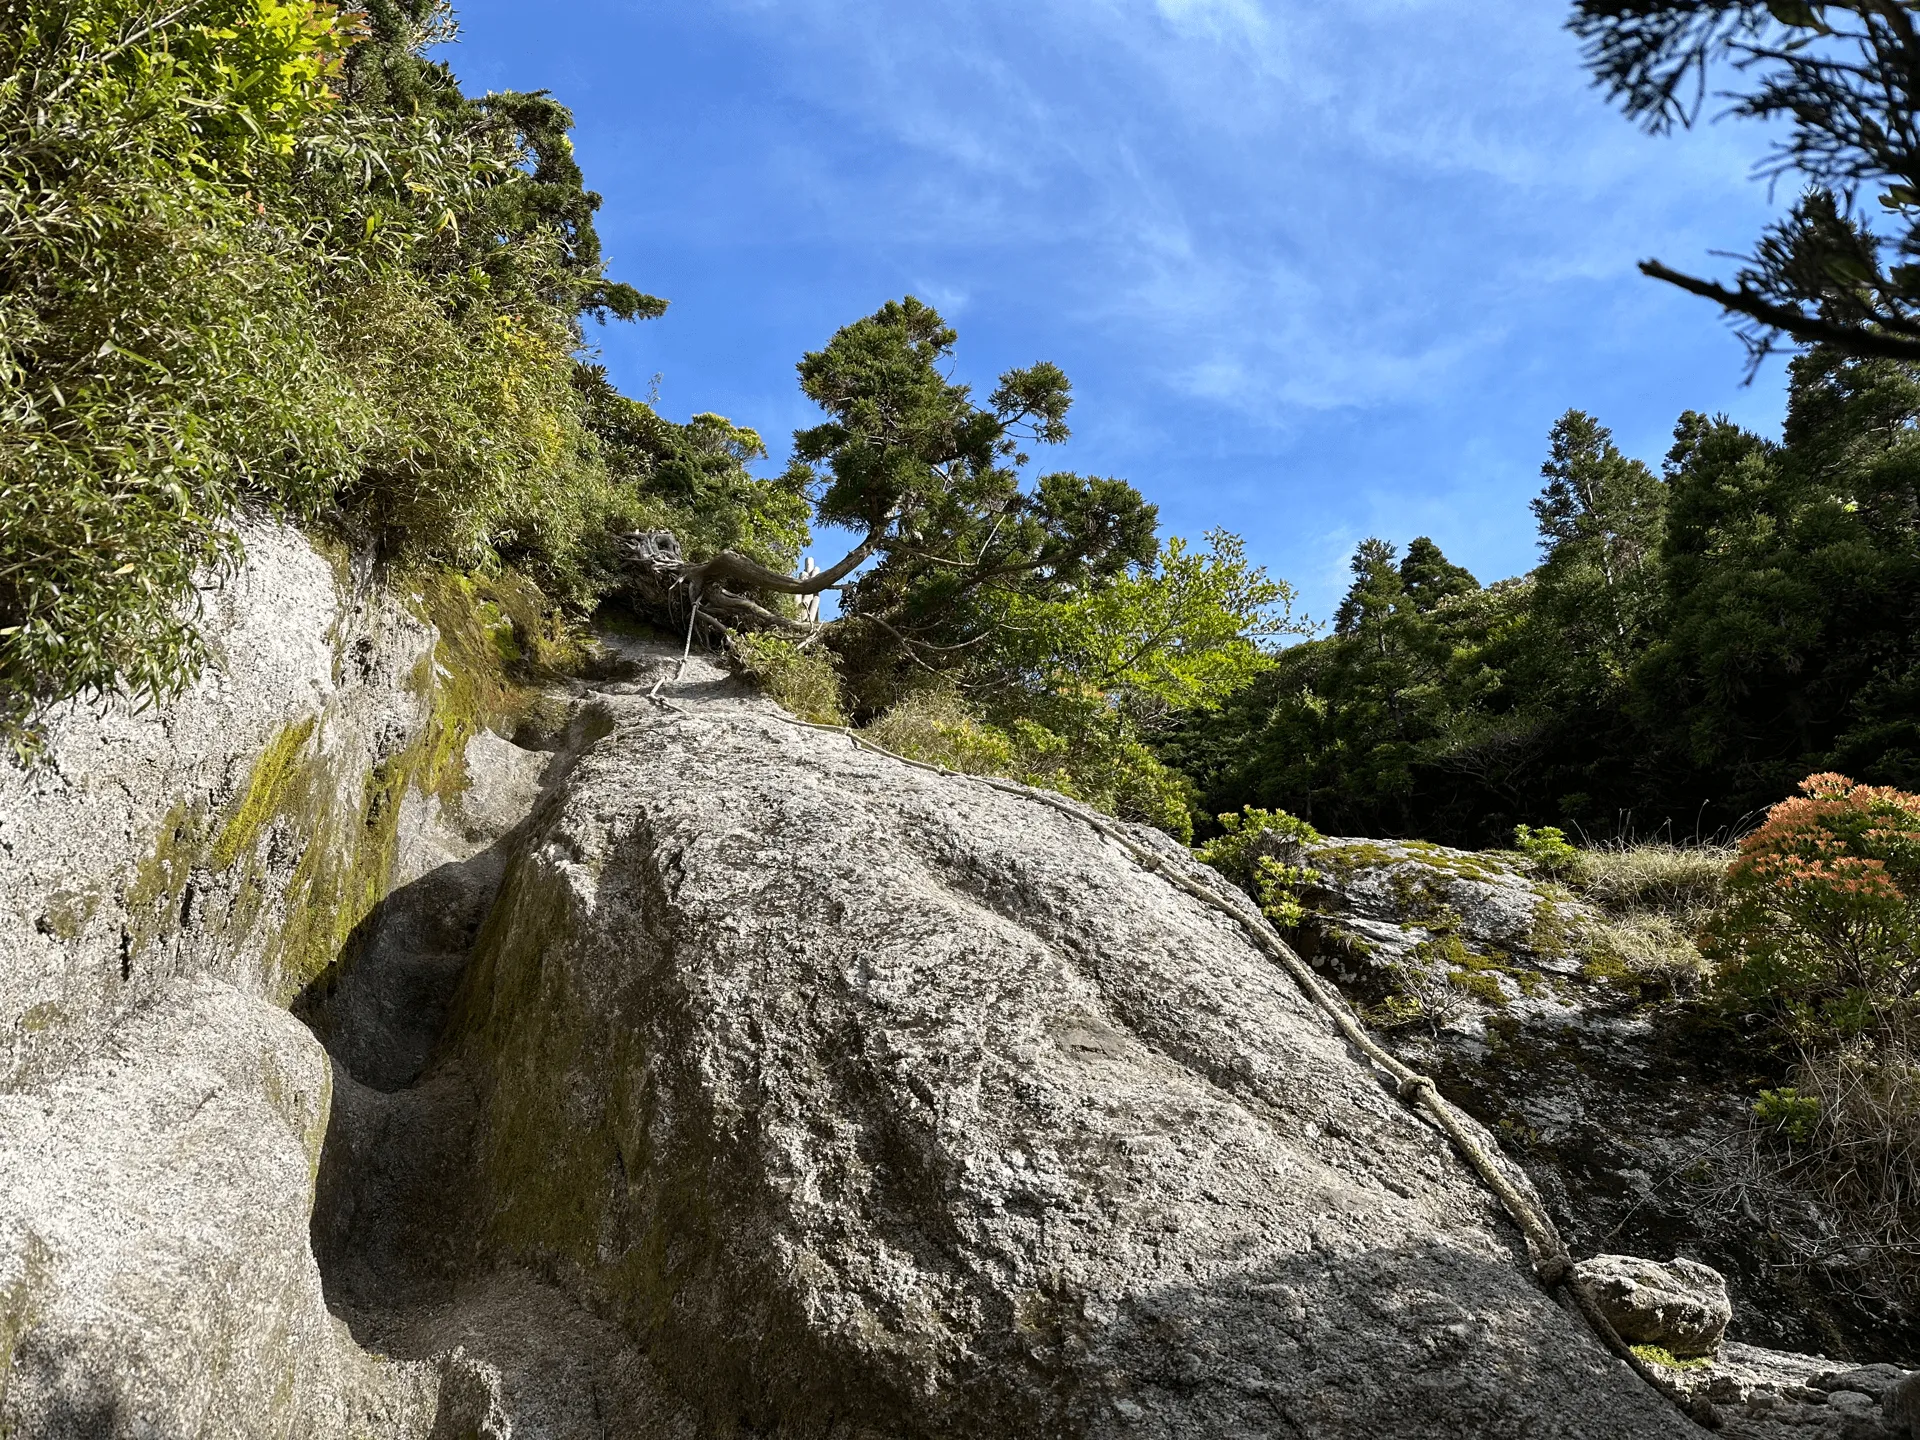
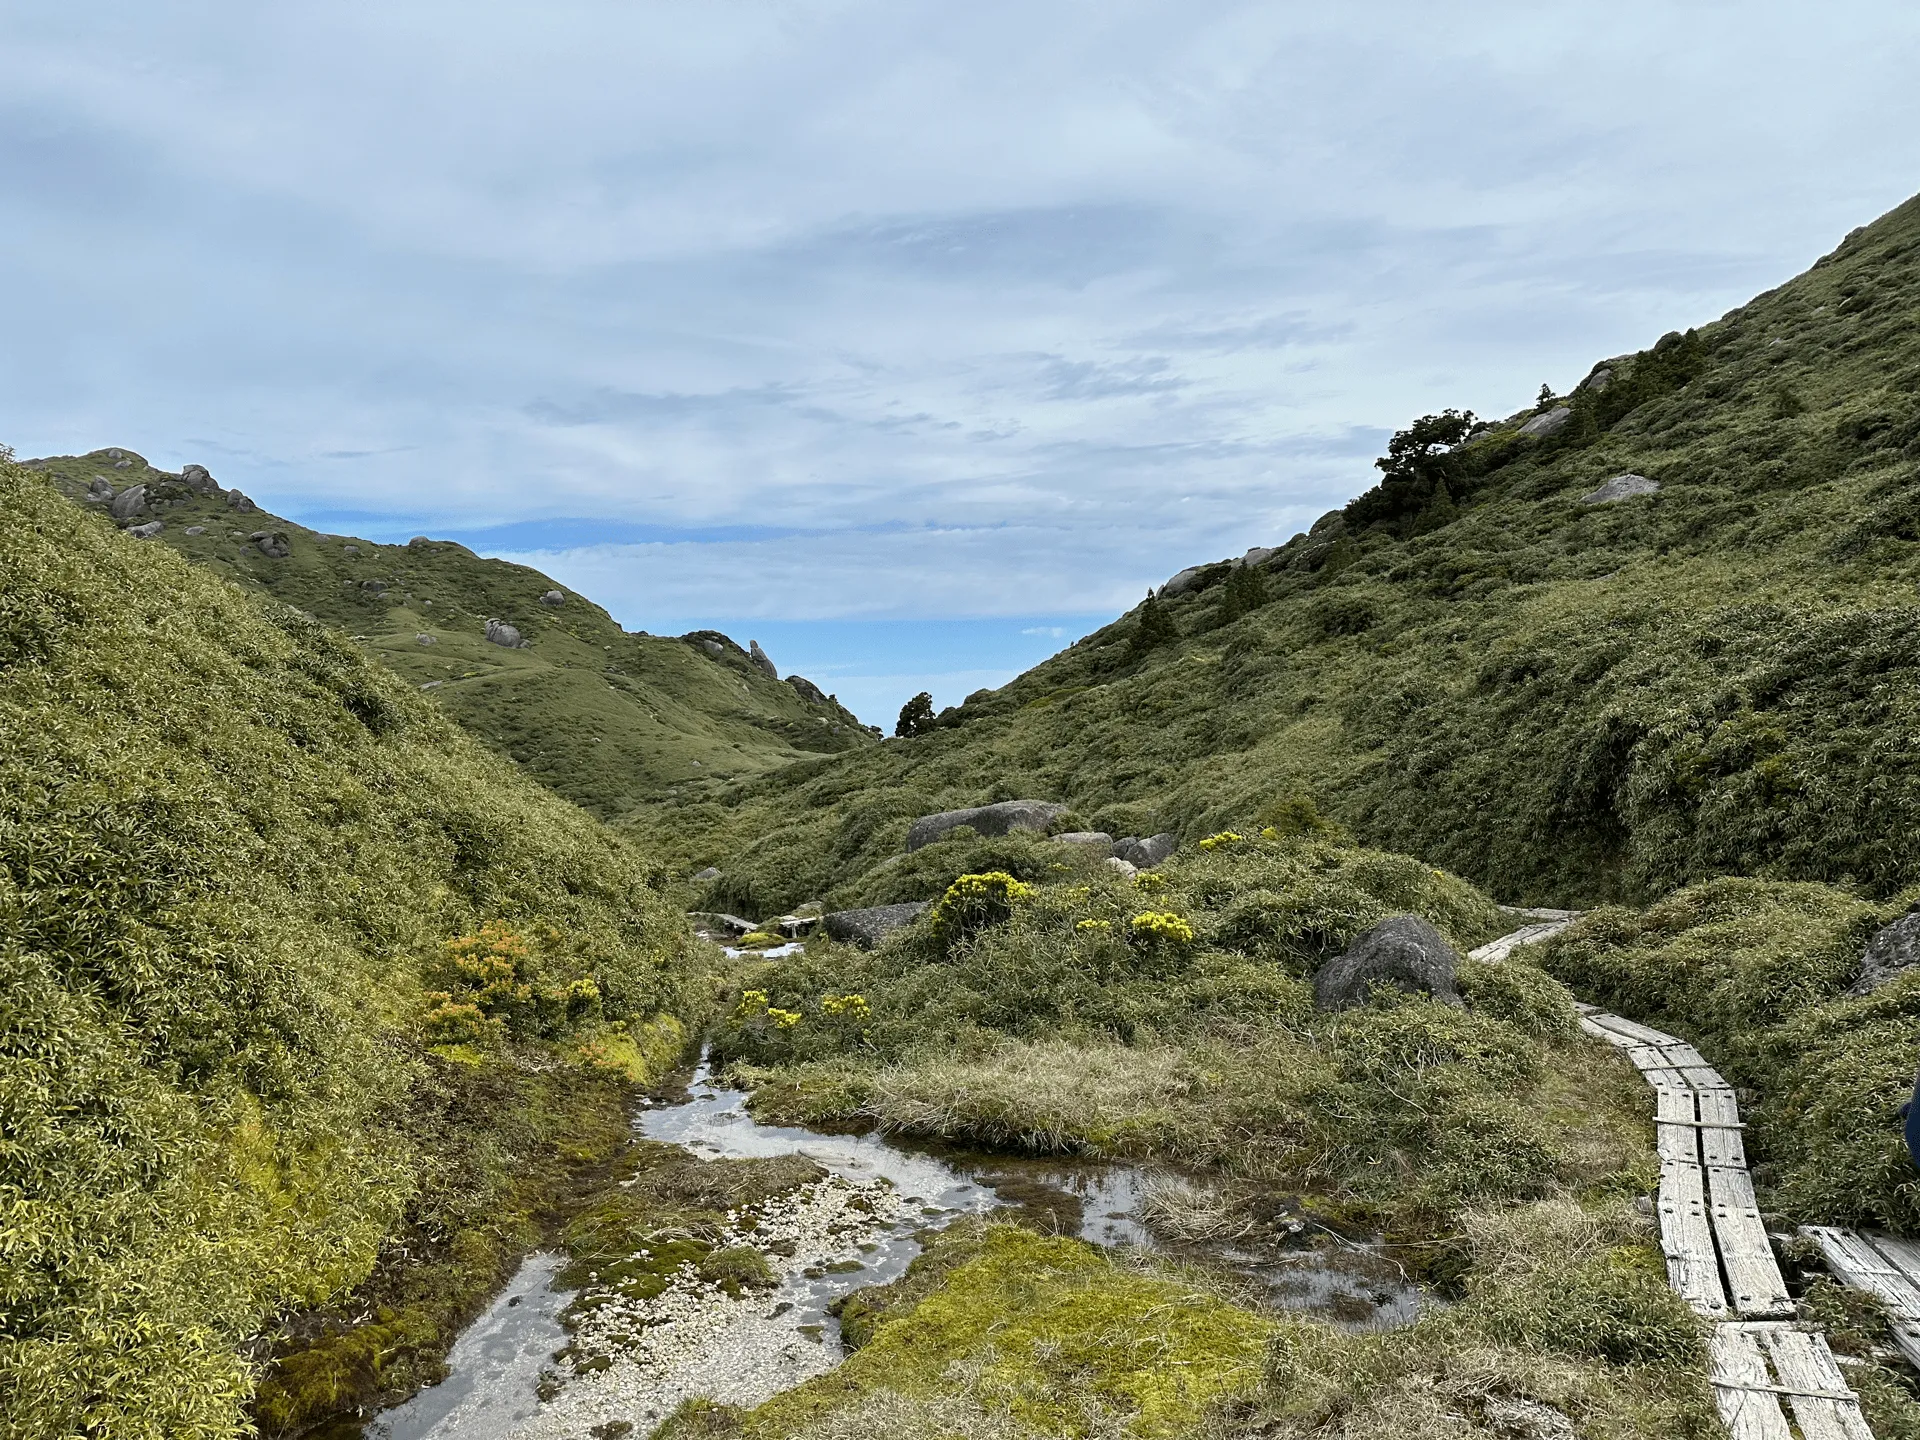
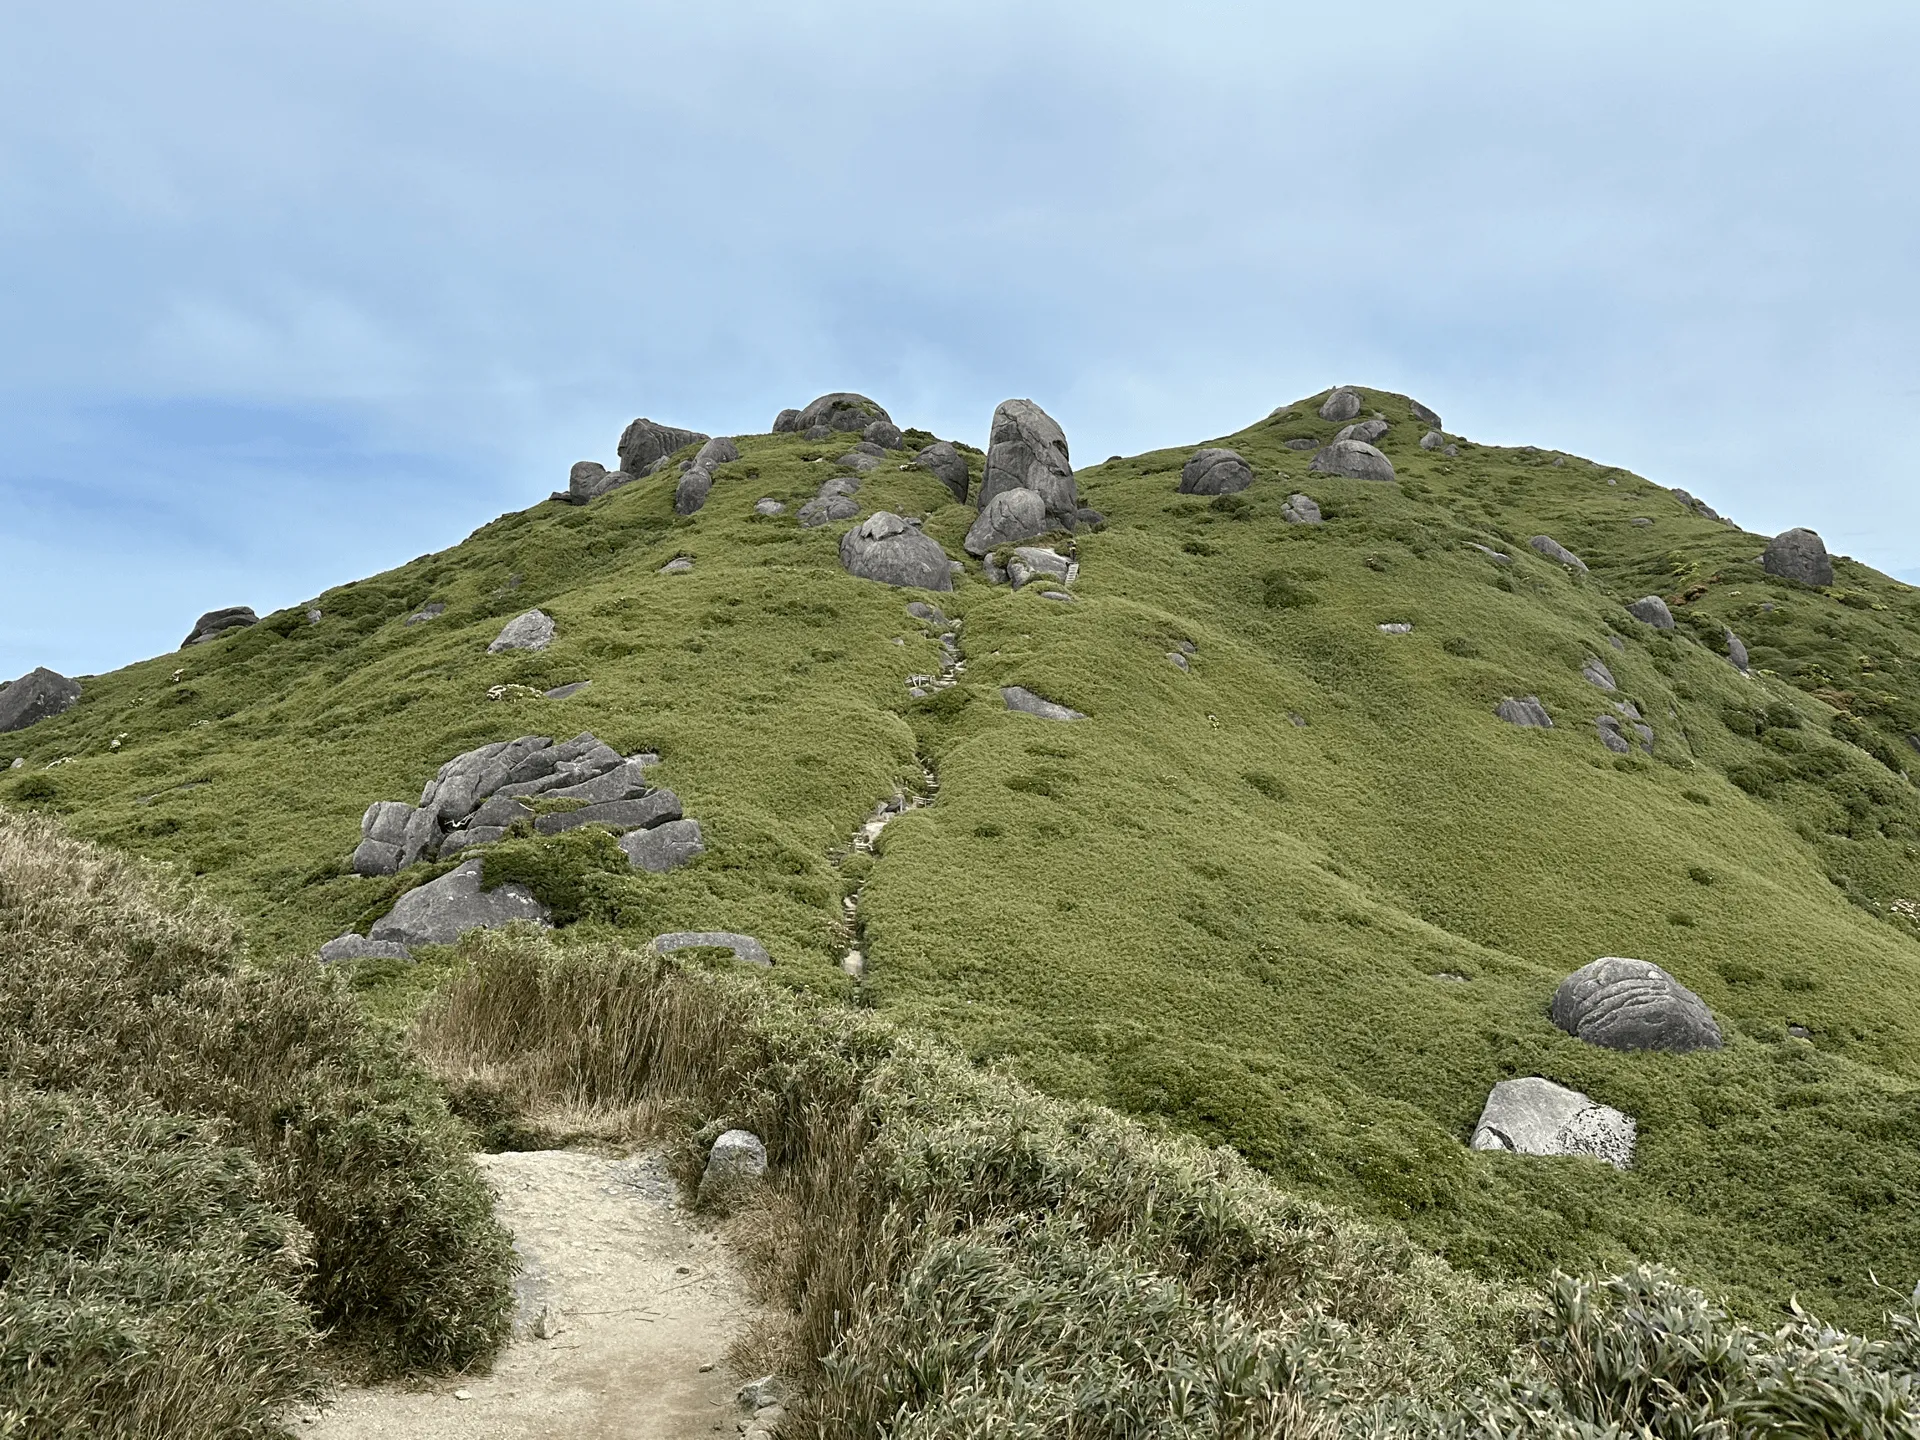
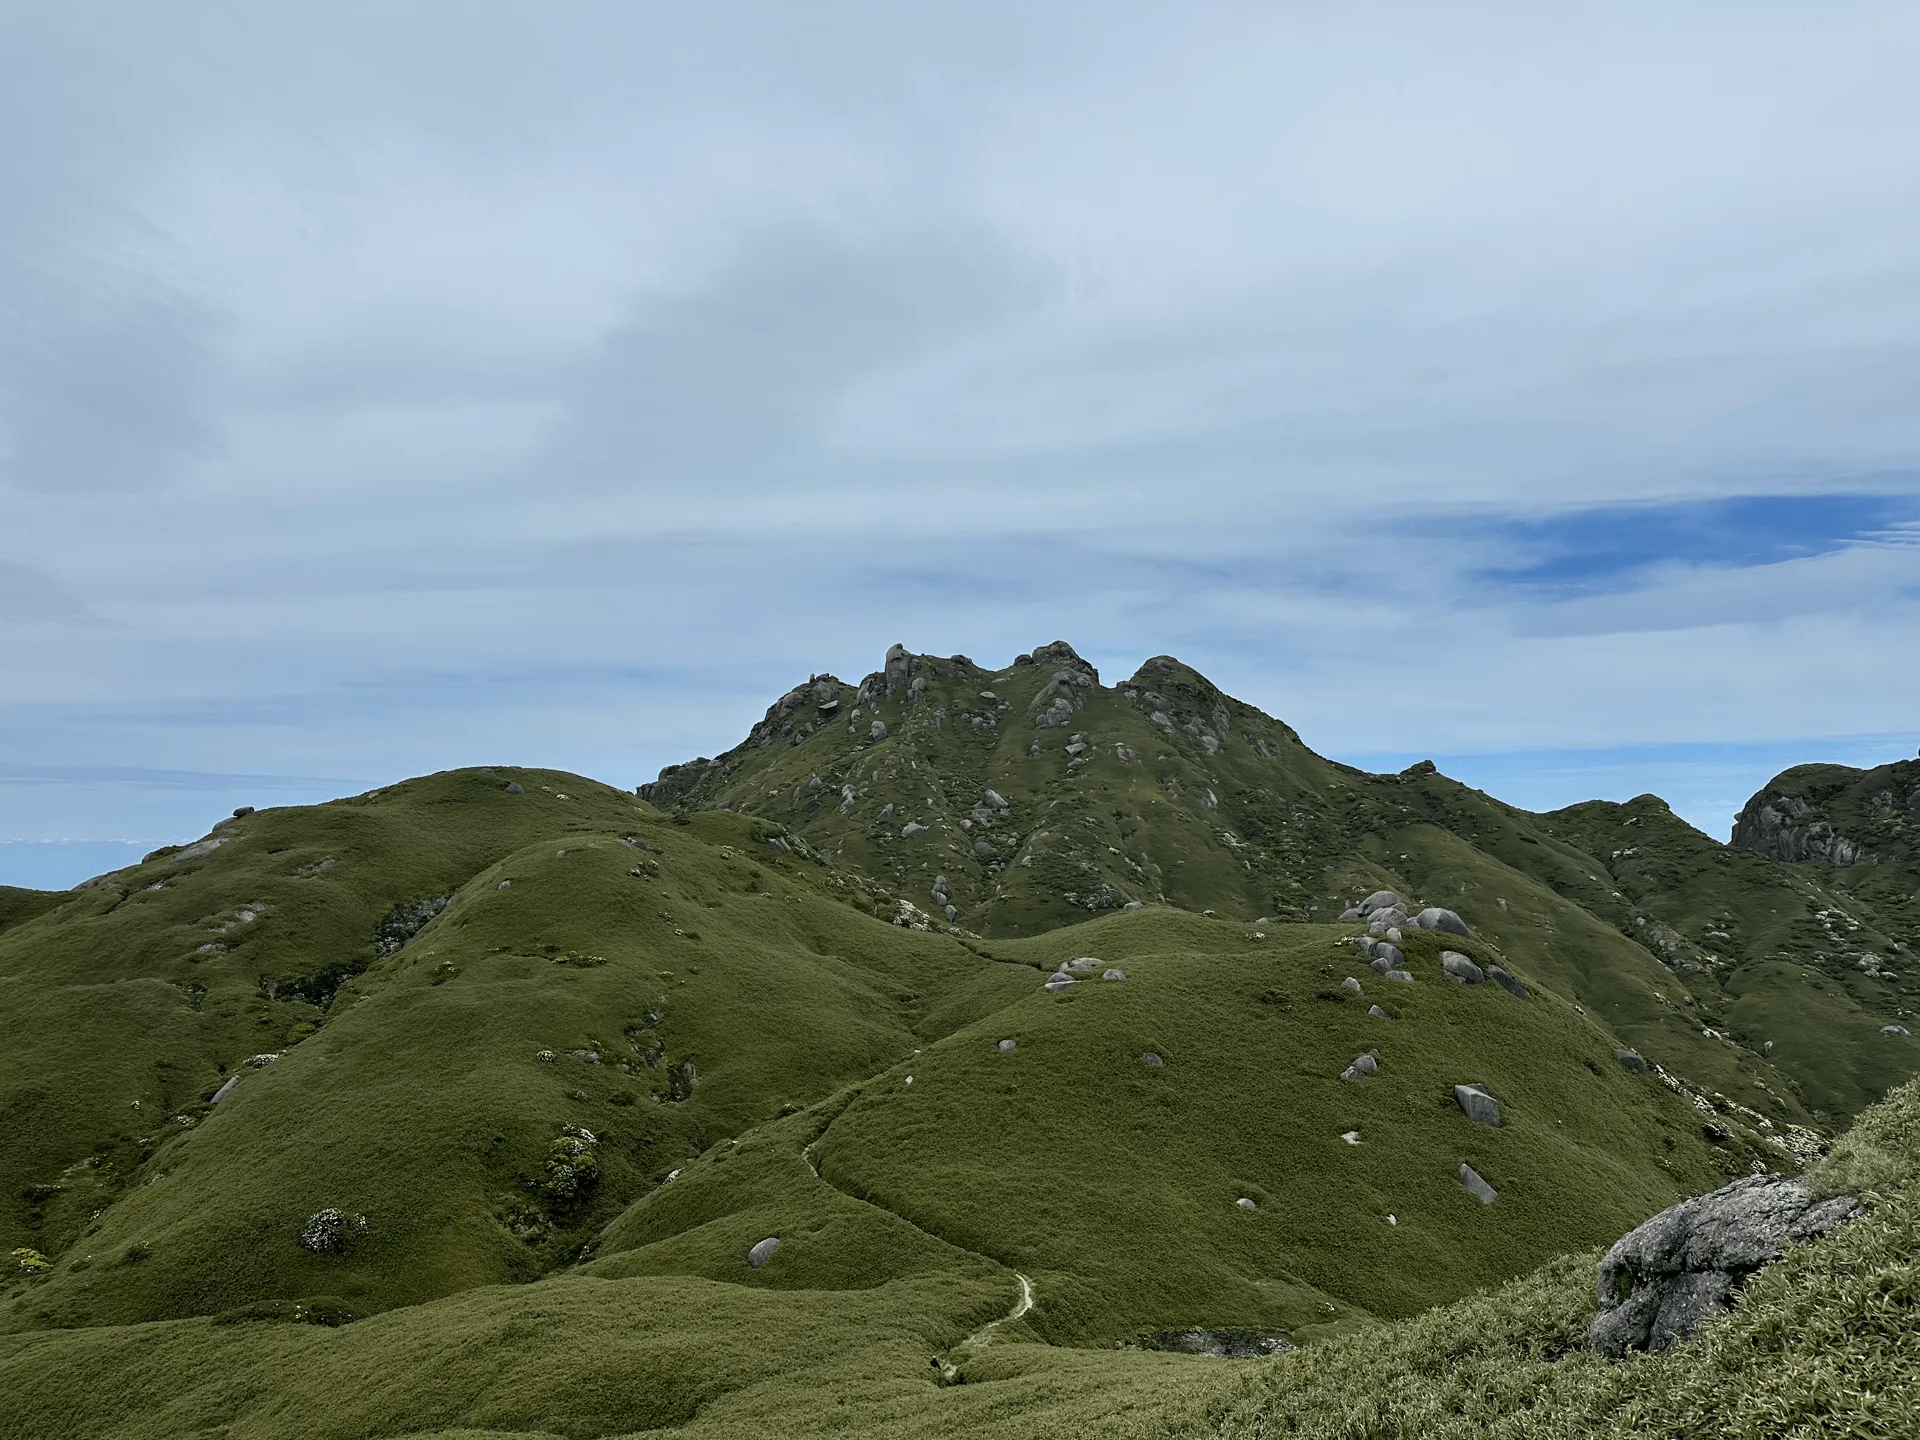
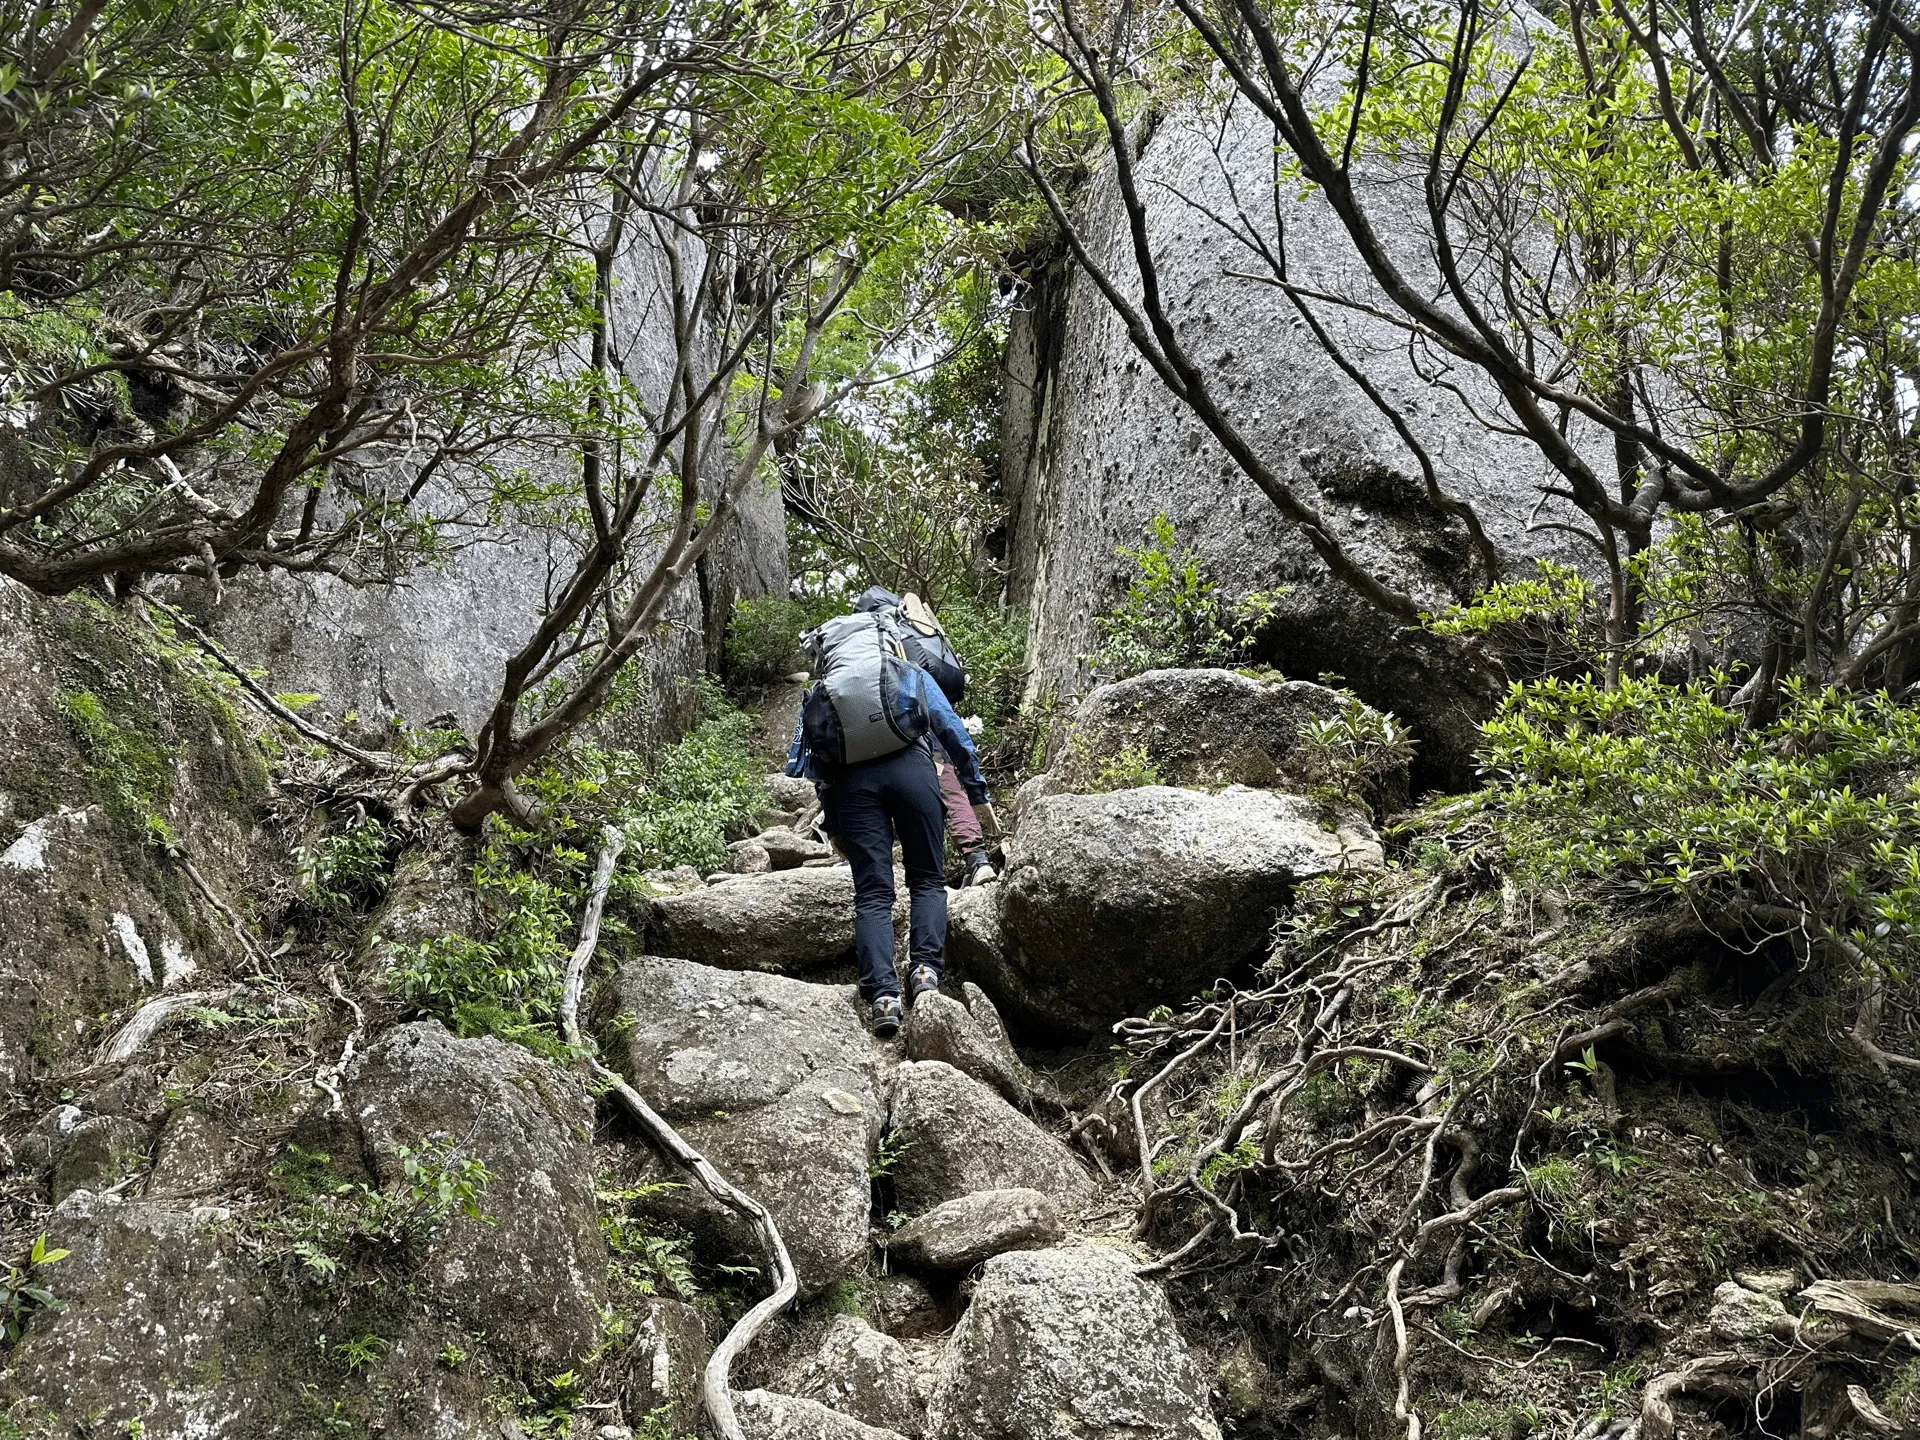
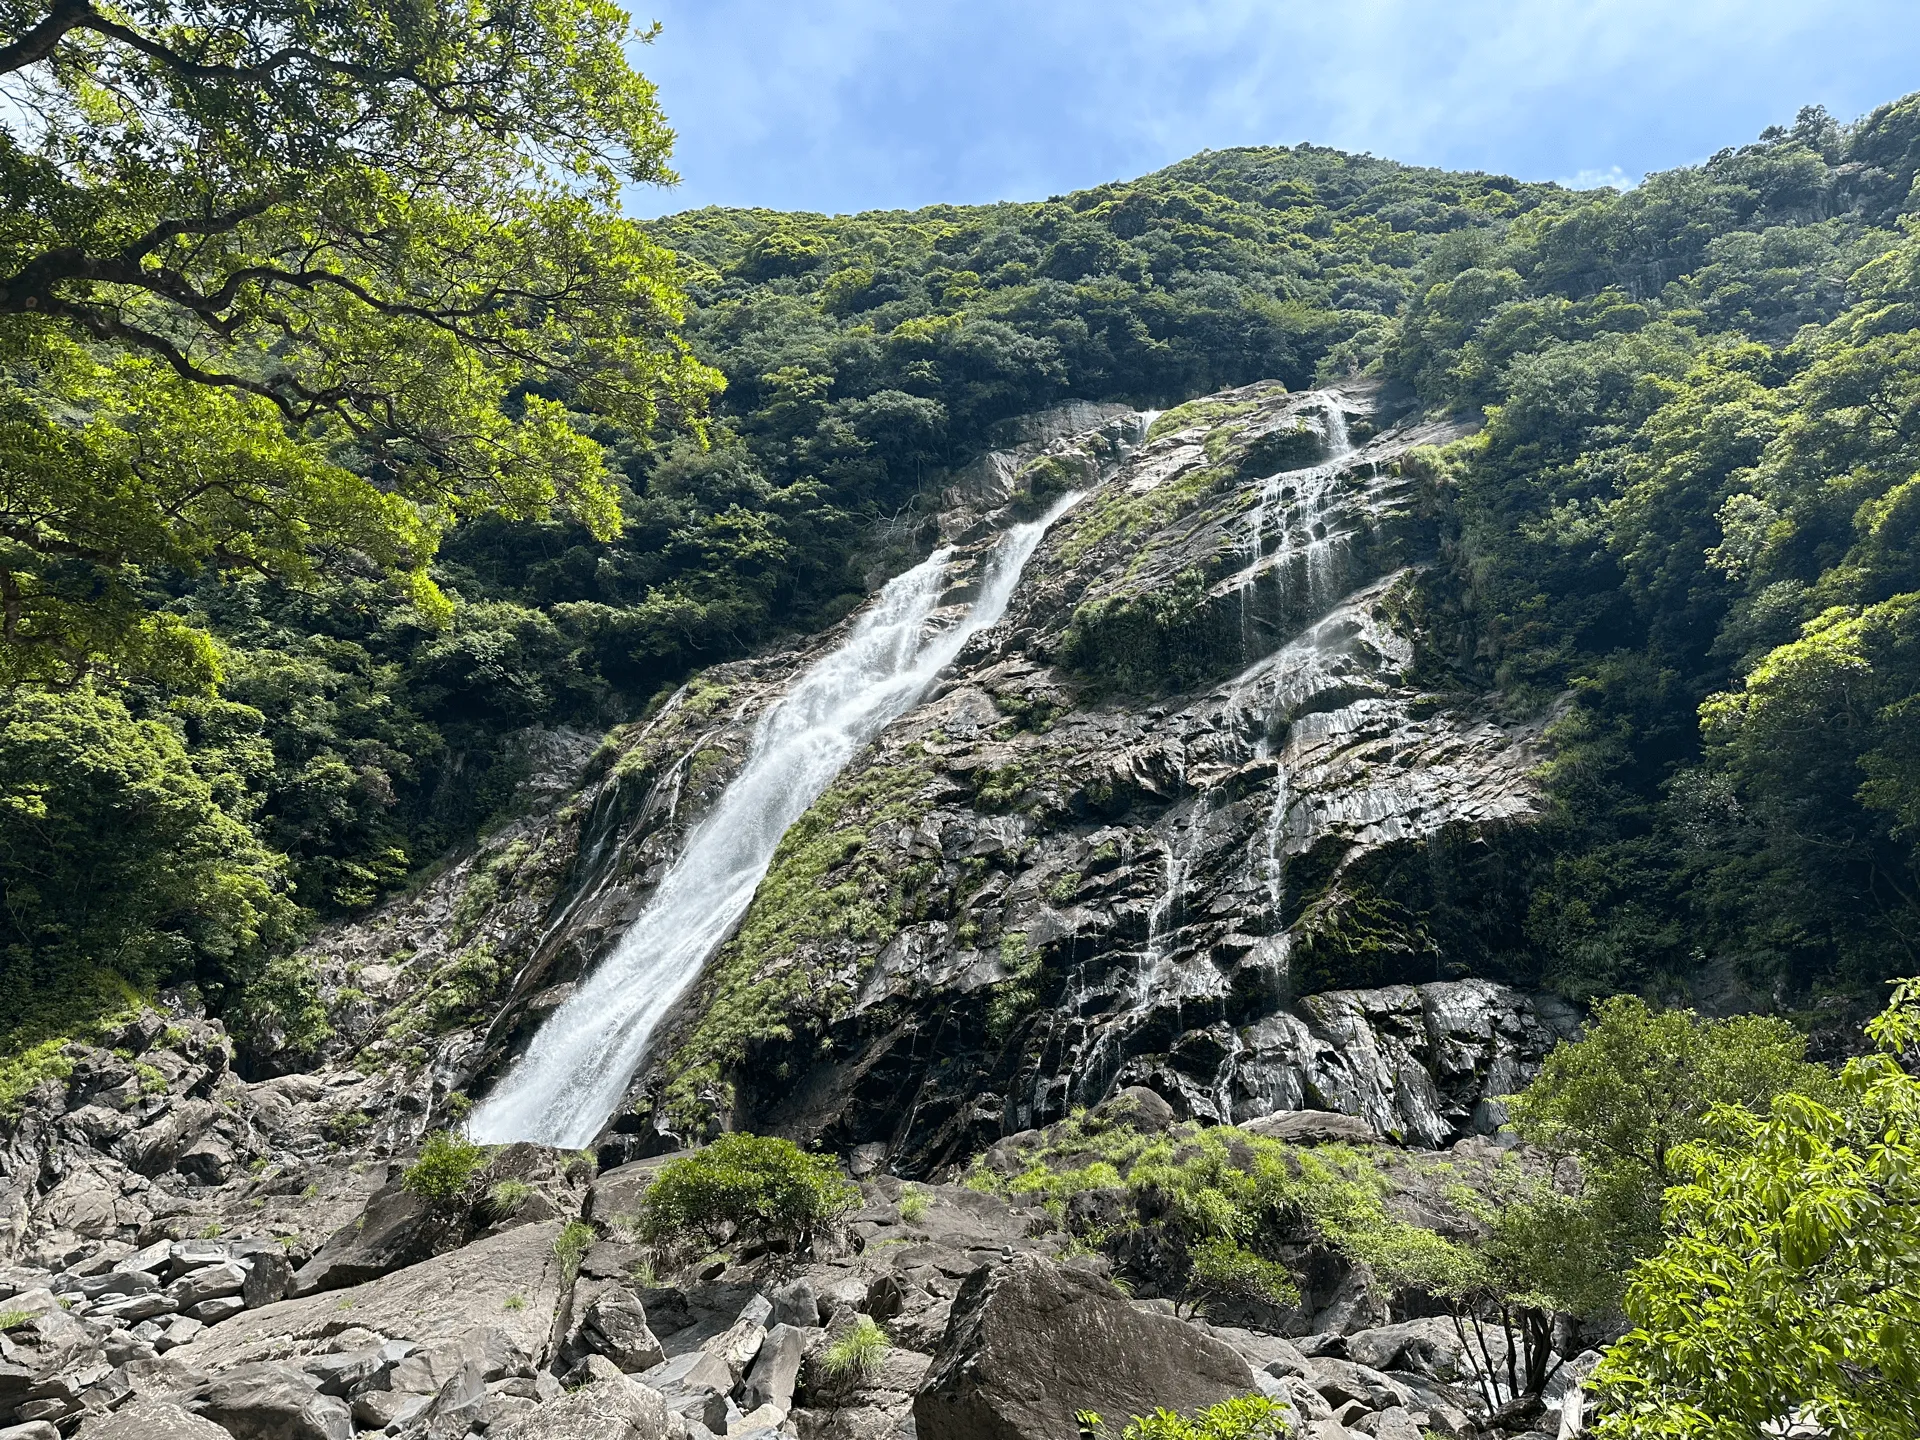
The trail starts off for the first couple of hours in the forest, but as you start to gain in elevation we passed through some marsh and rocky areas.
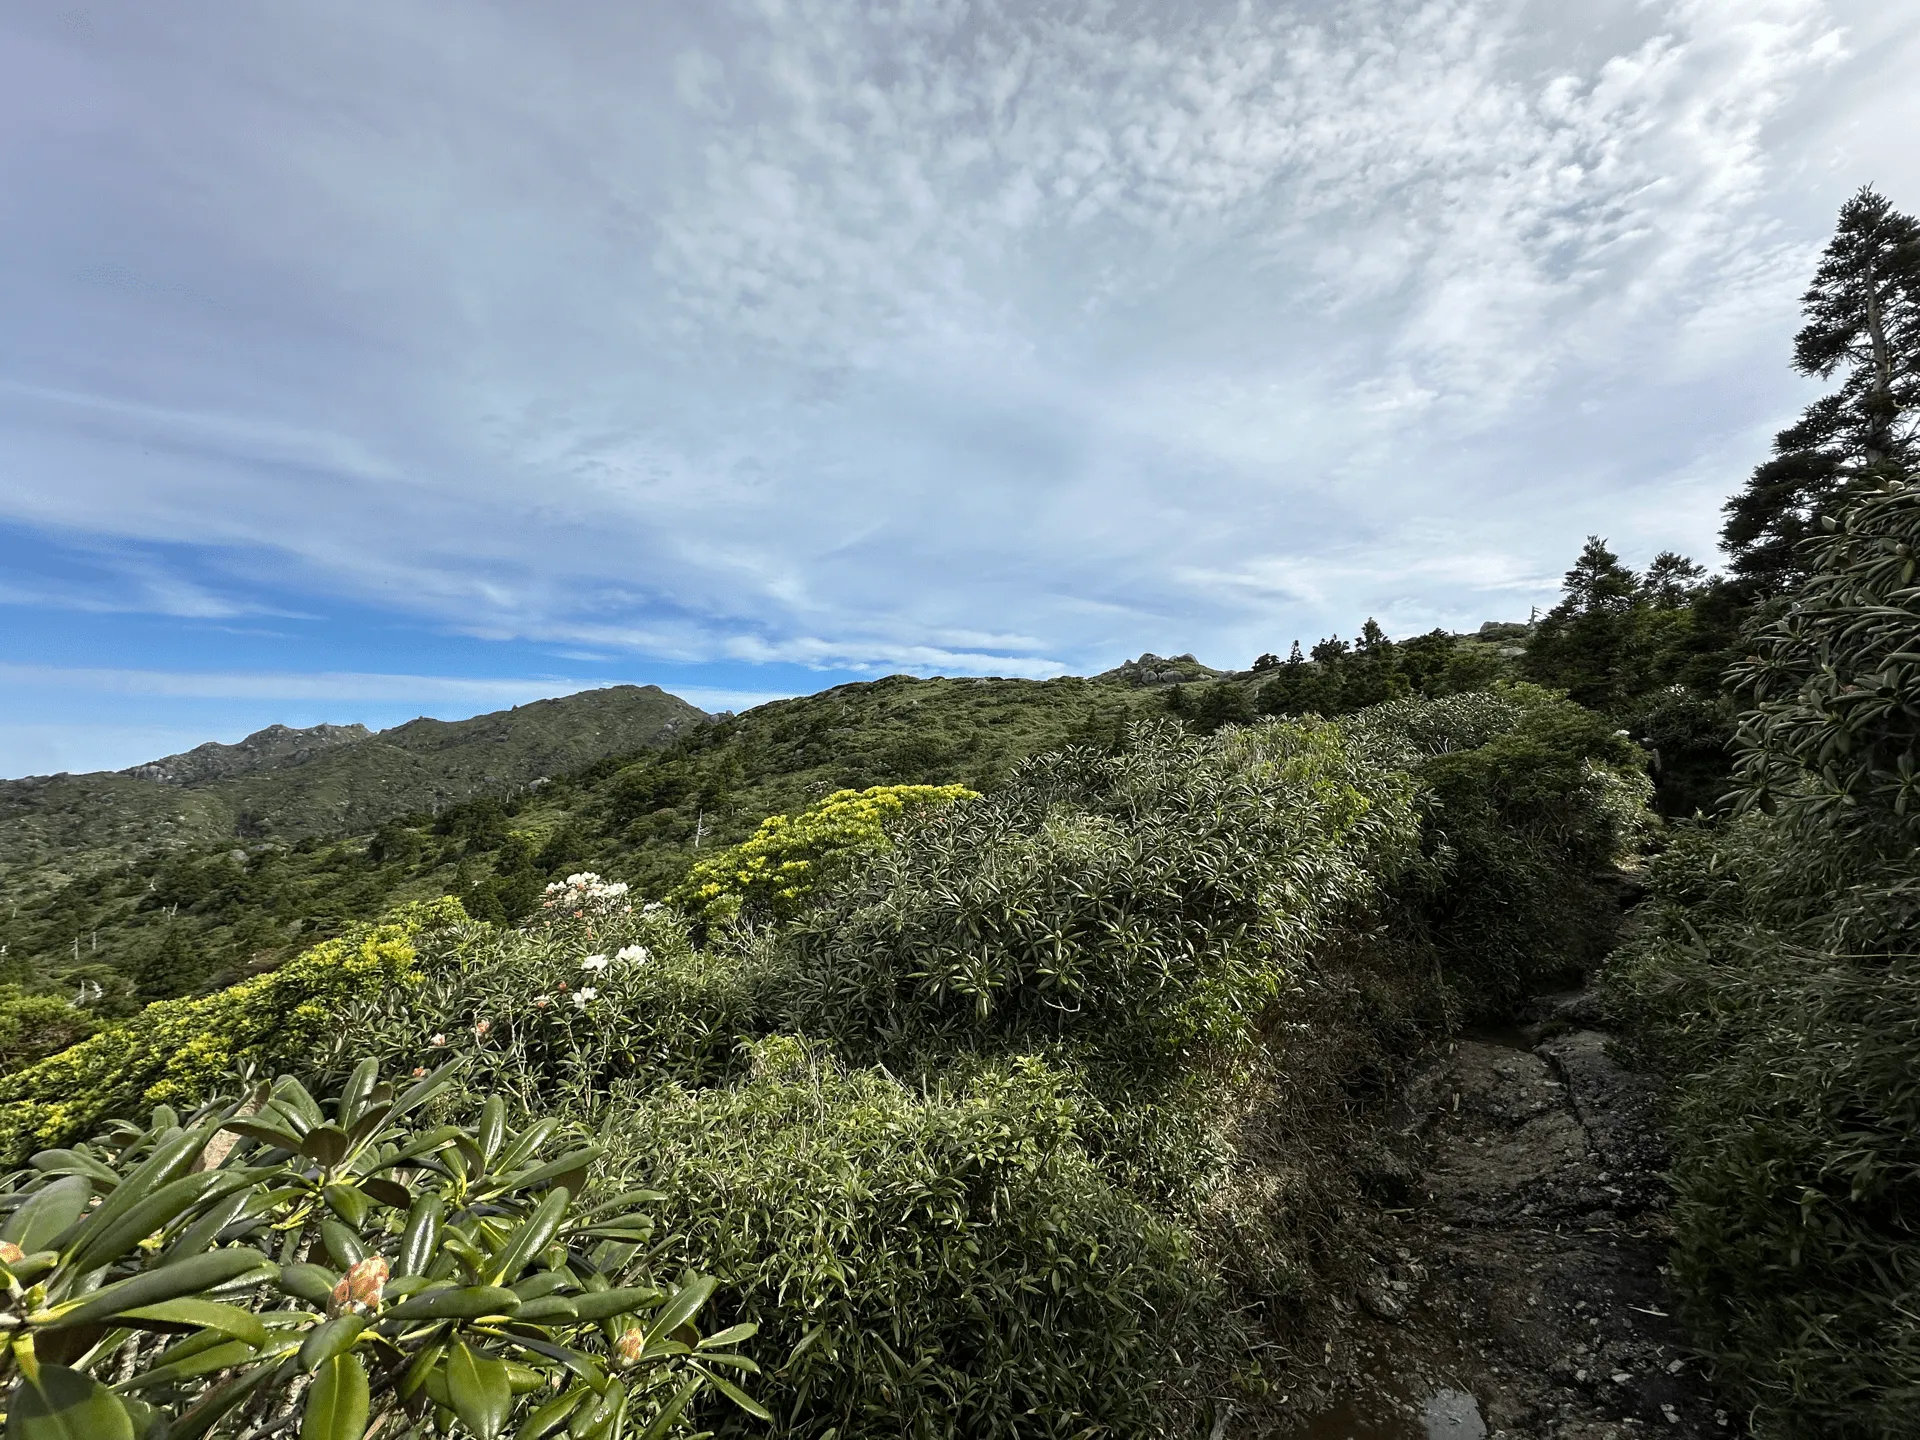
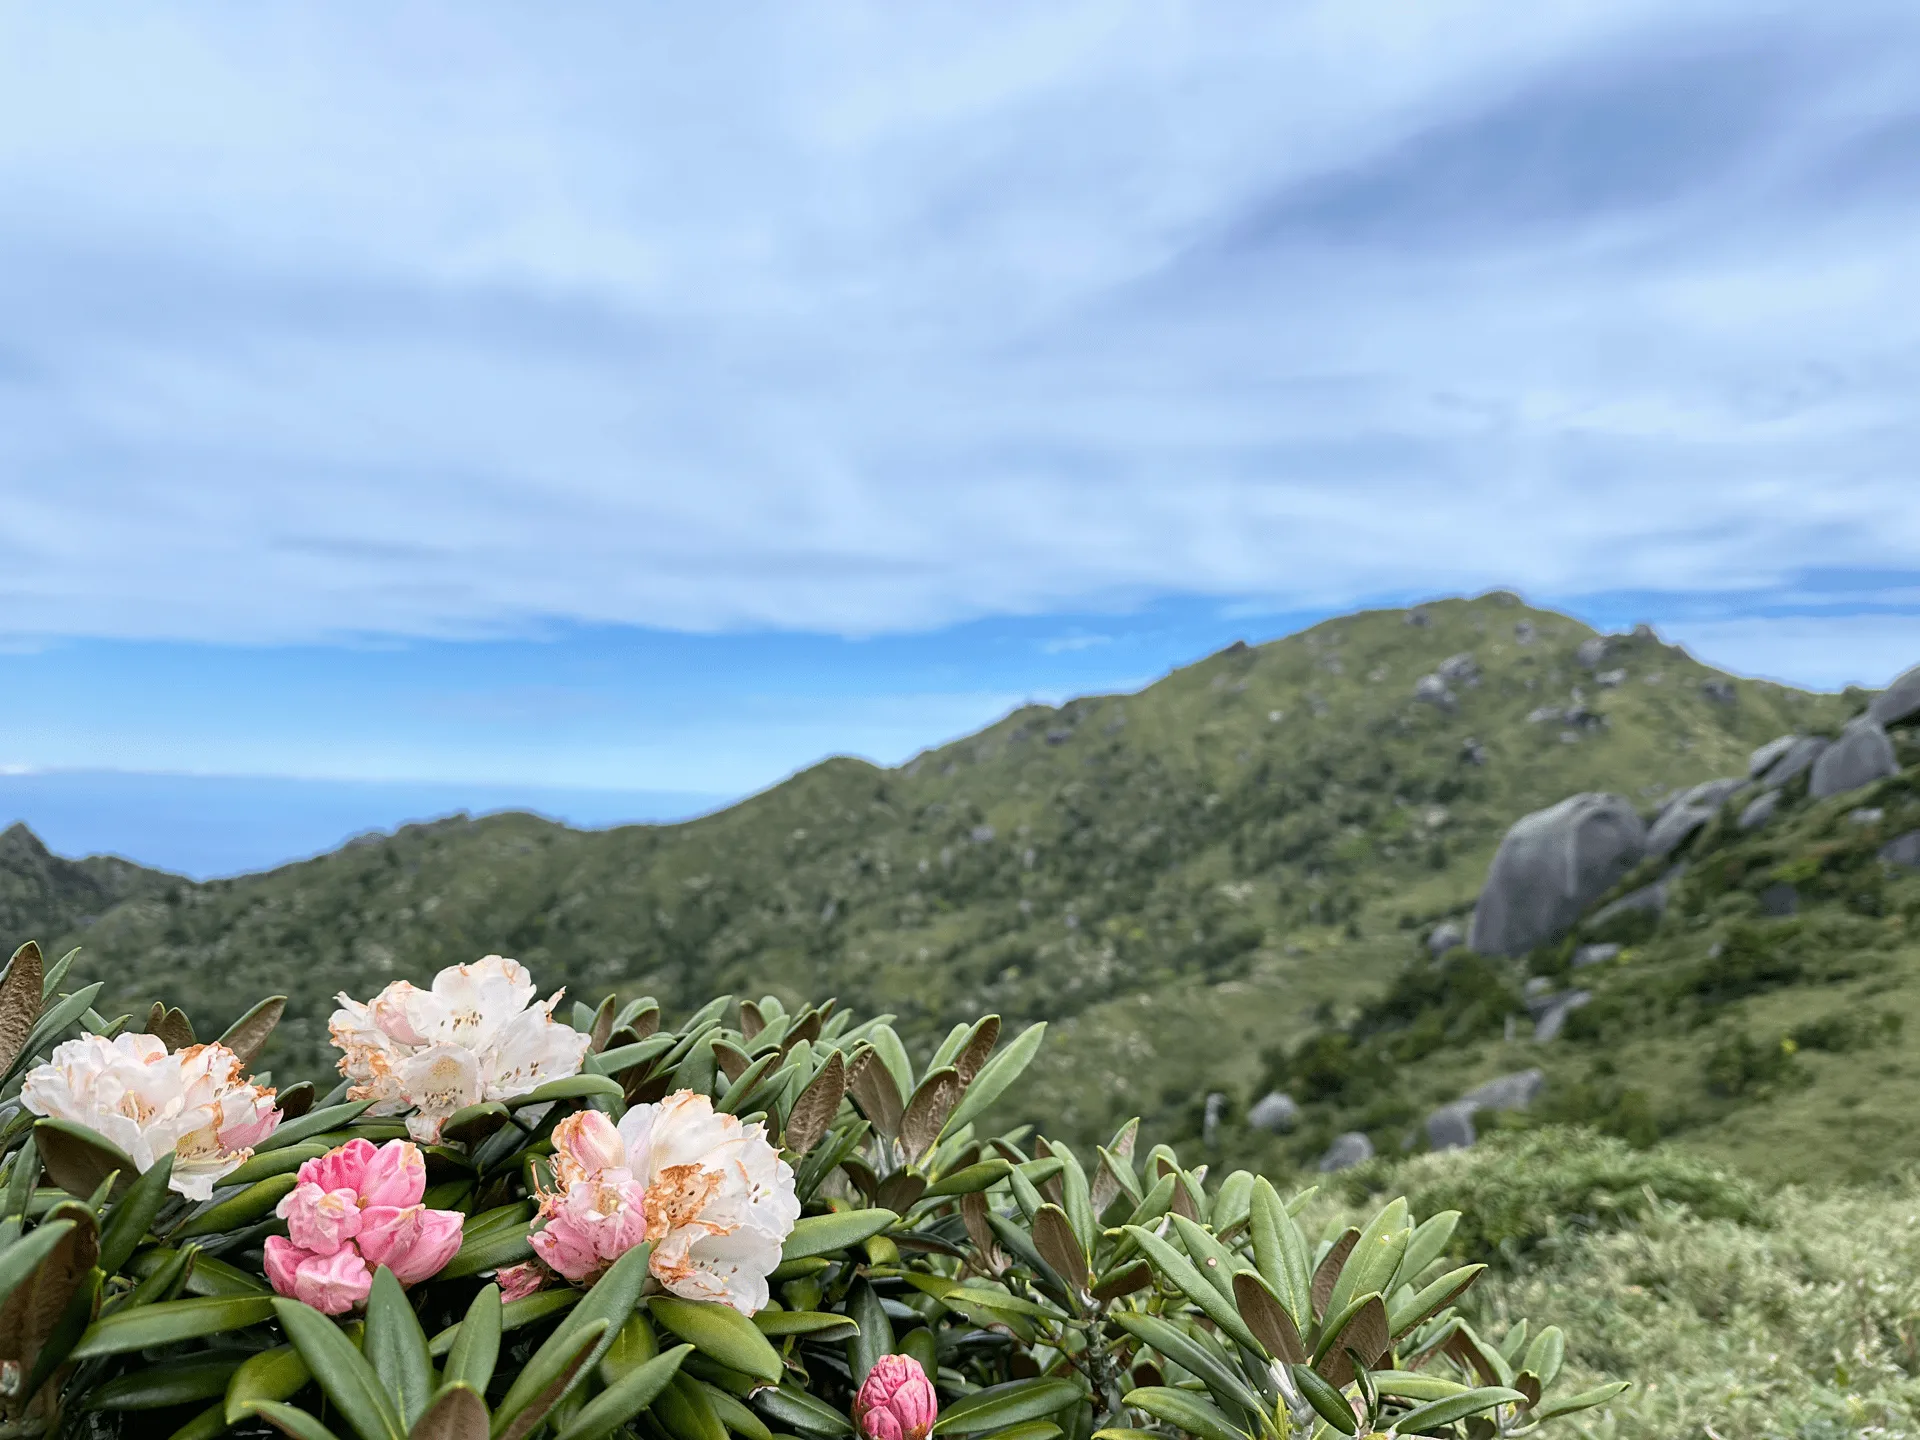
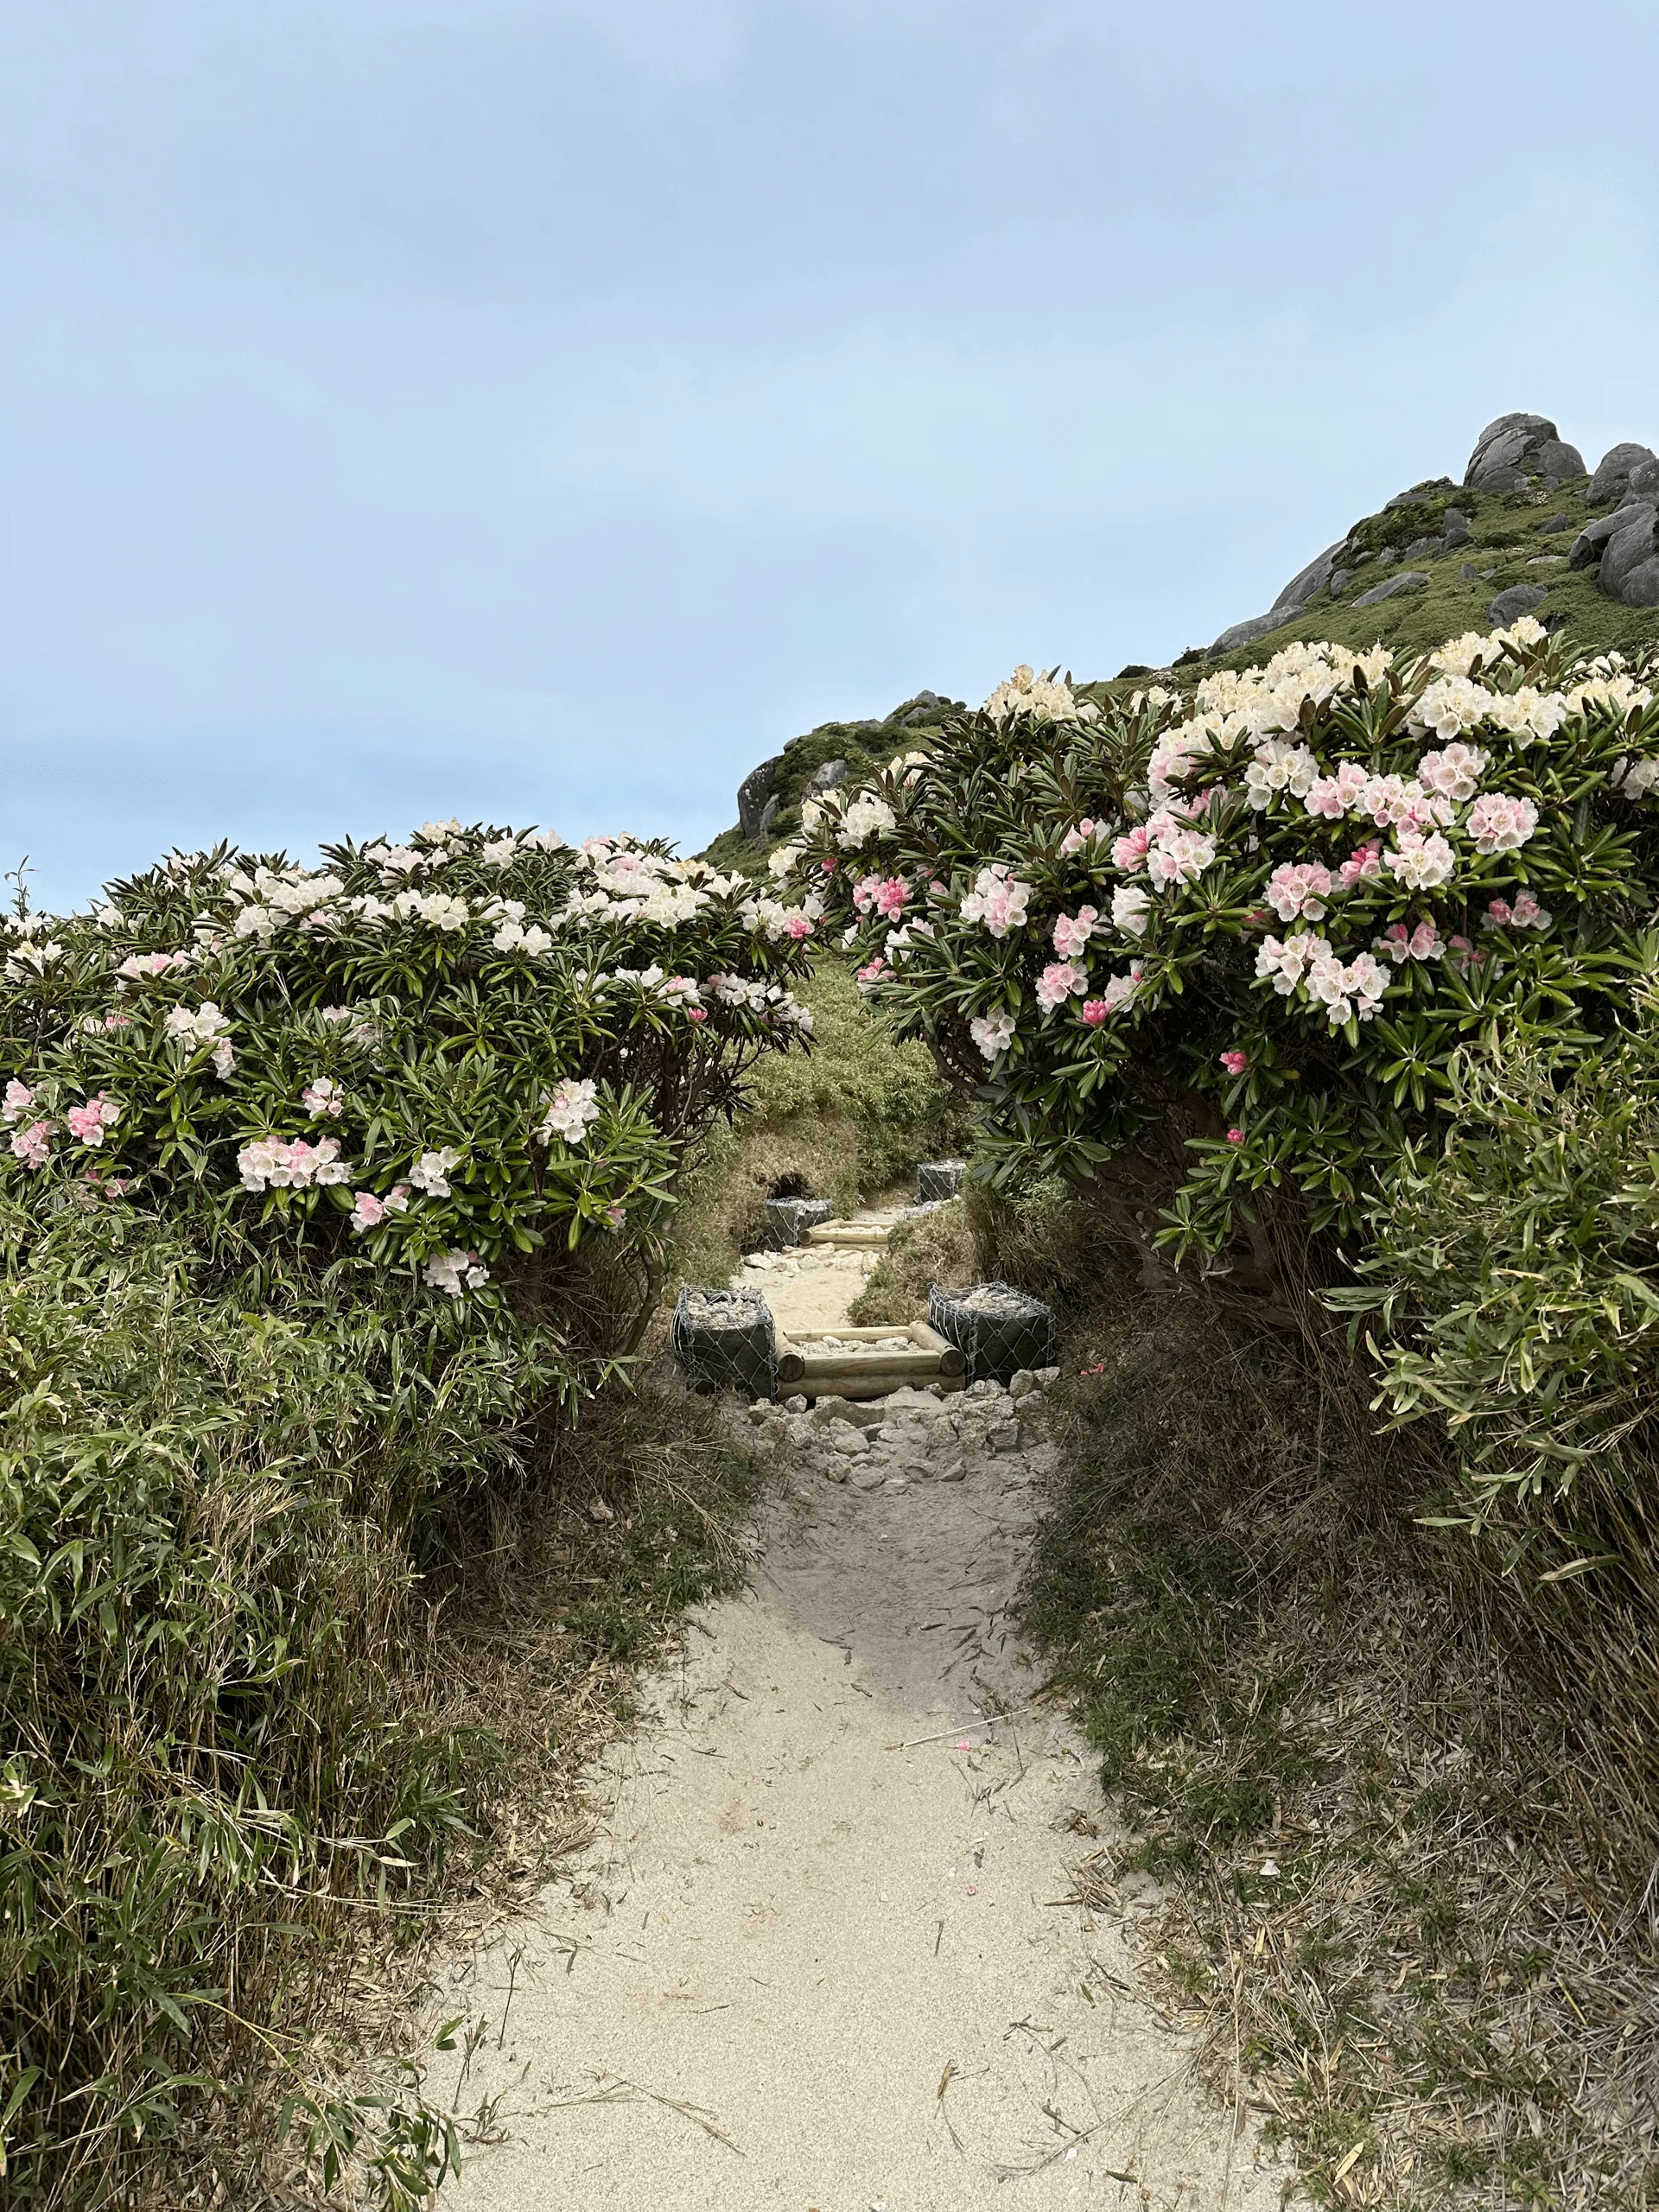
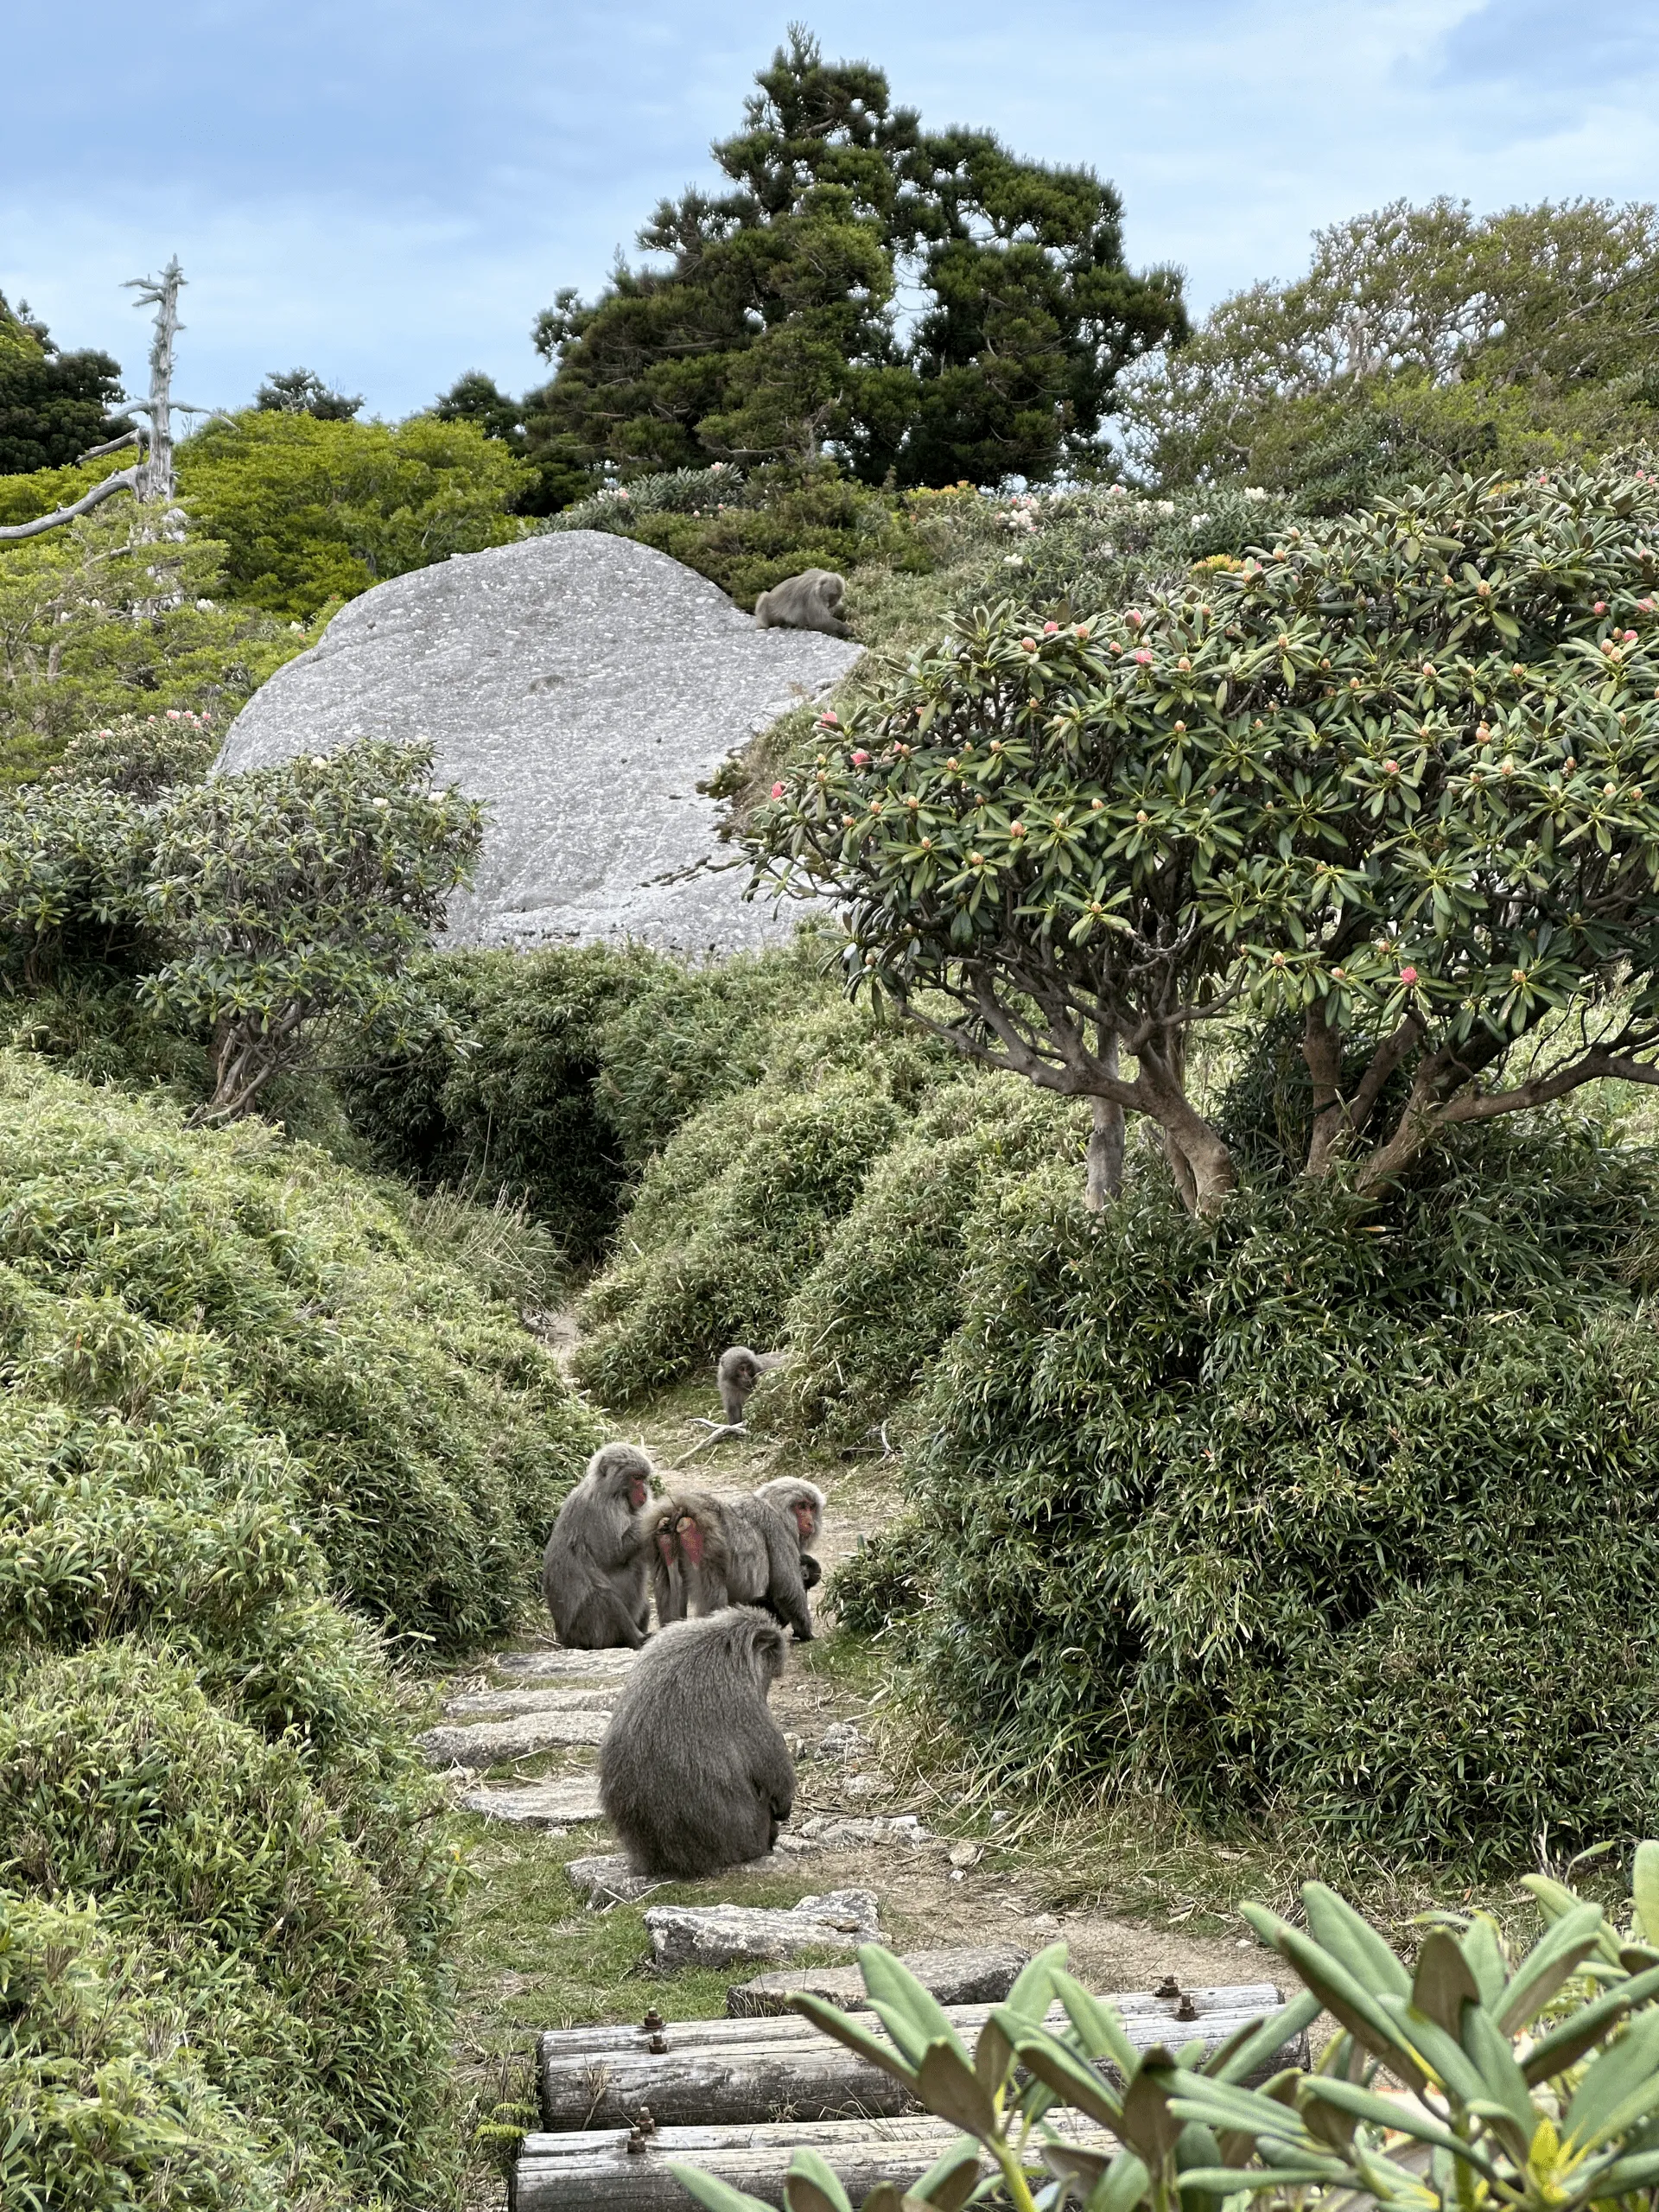
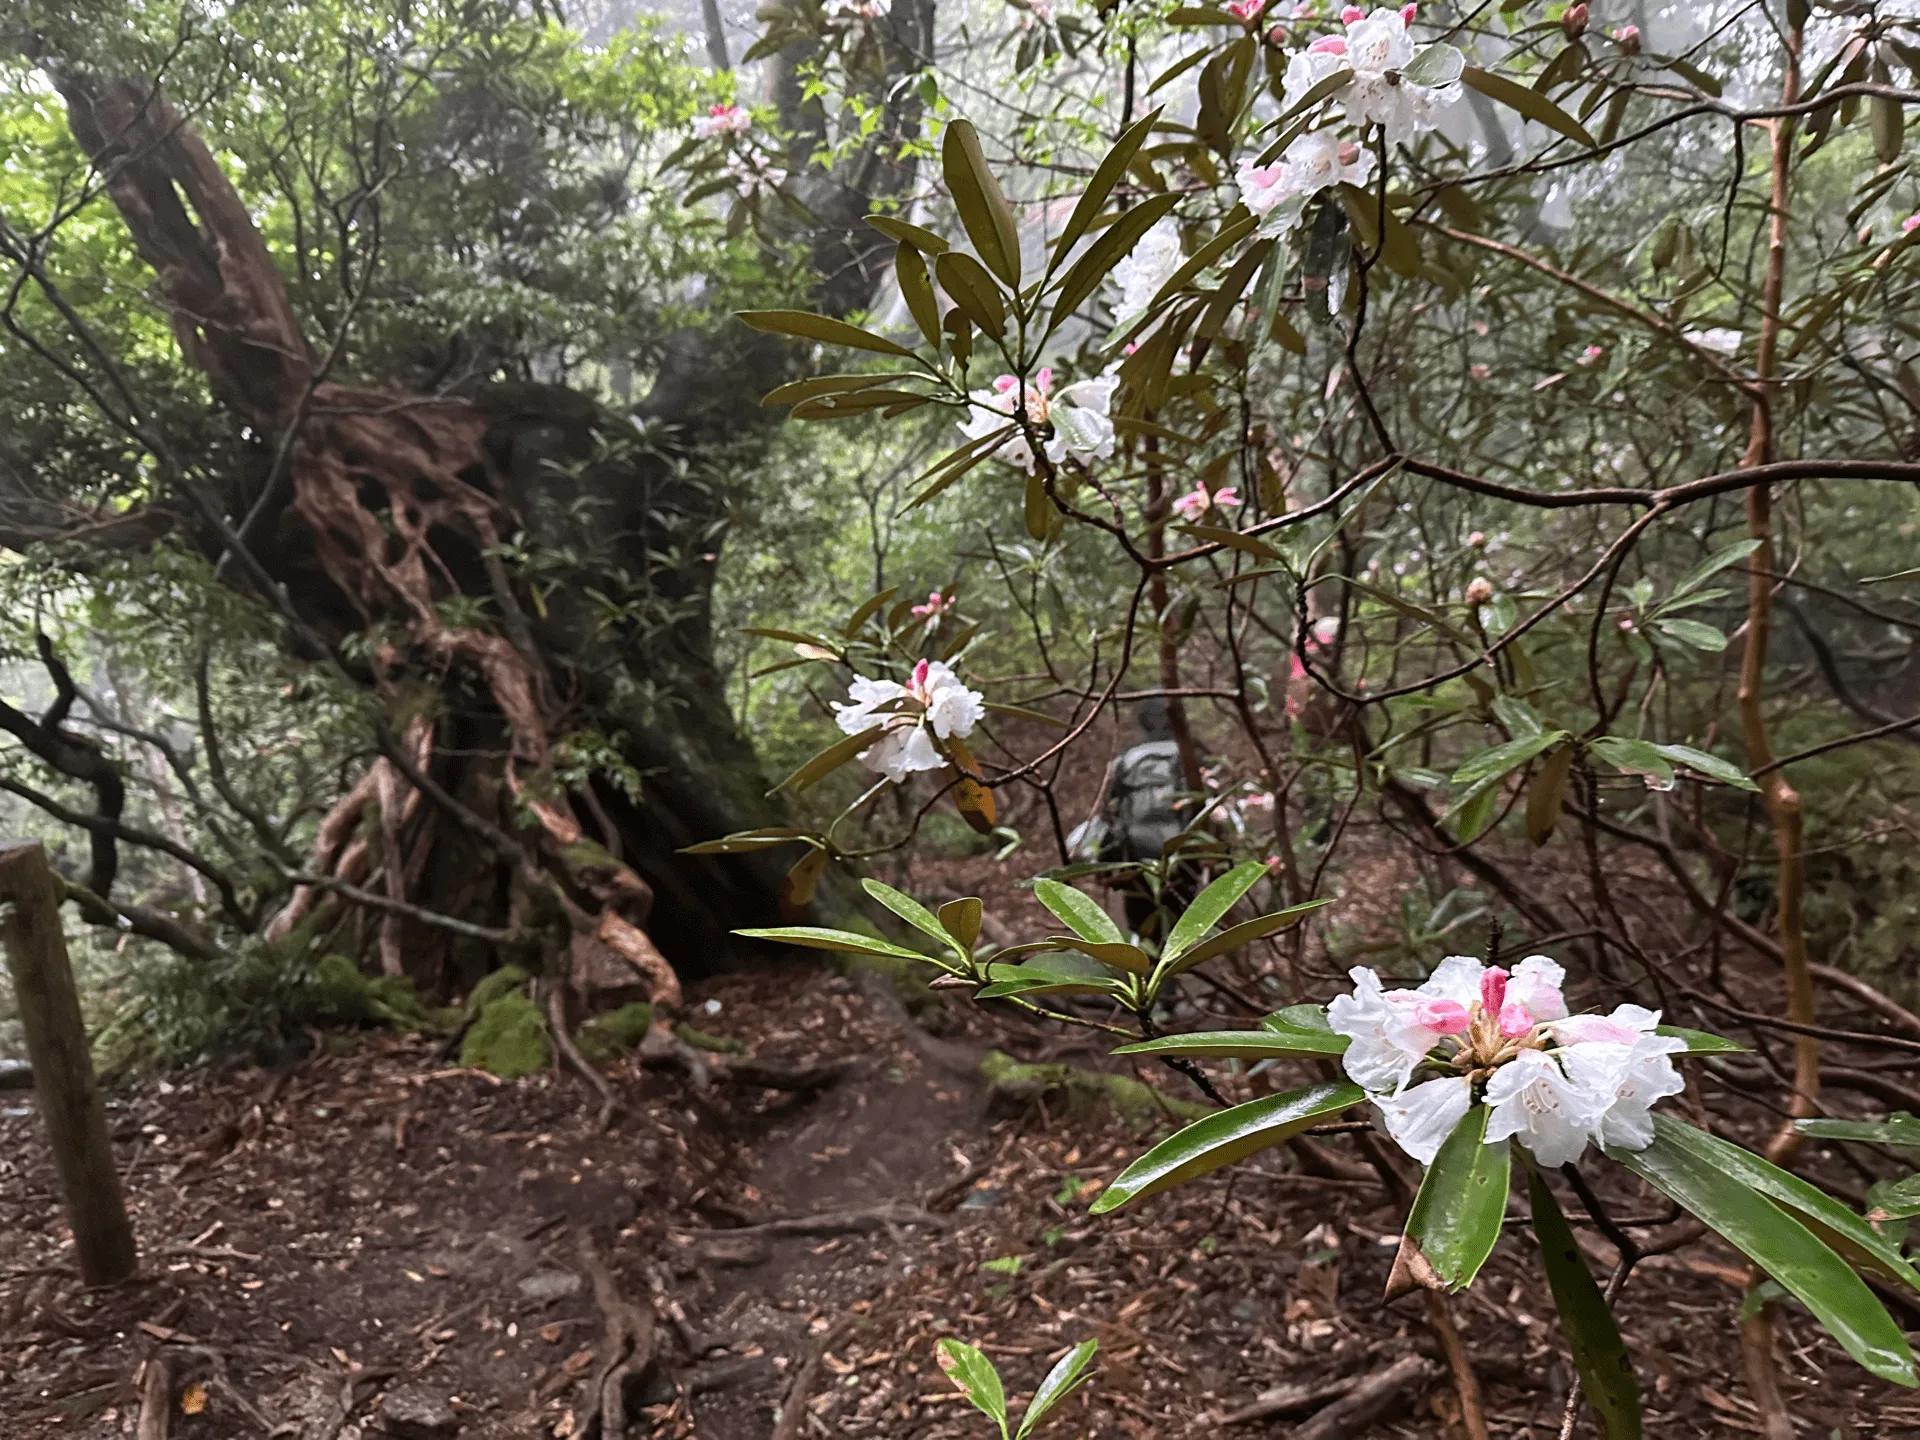
One particular highlight was the pink rhododendron flowers native to Yakushima island. They bloom towards the end of May, so we had the perfect timing to see them scattered across the nearby mountaintops.
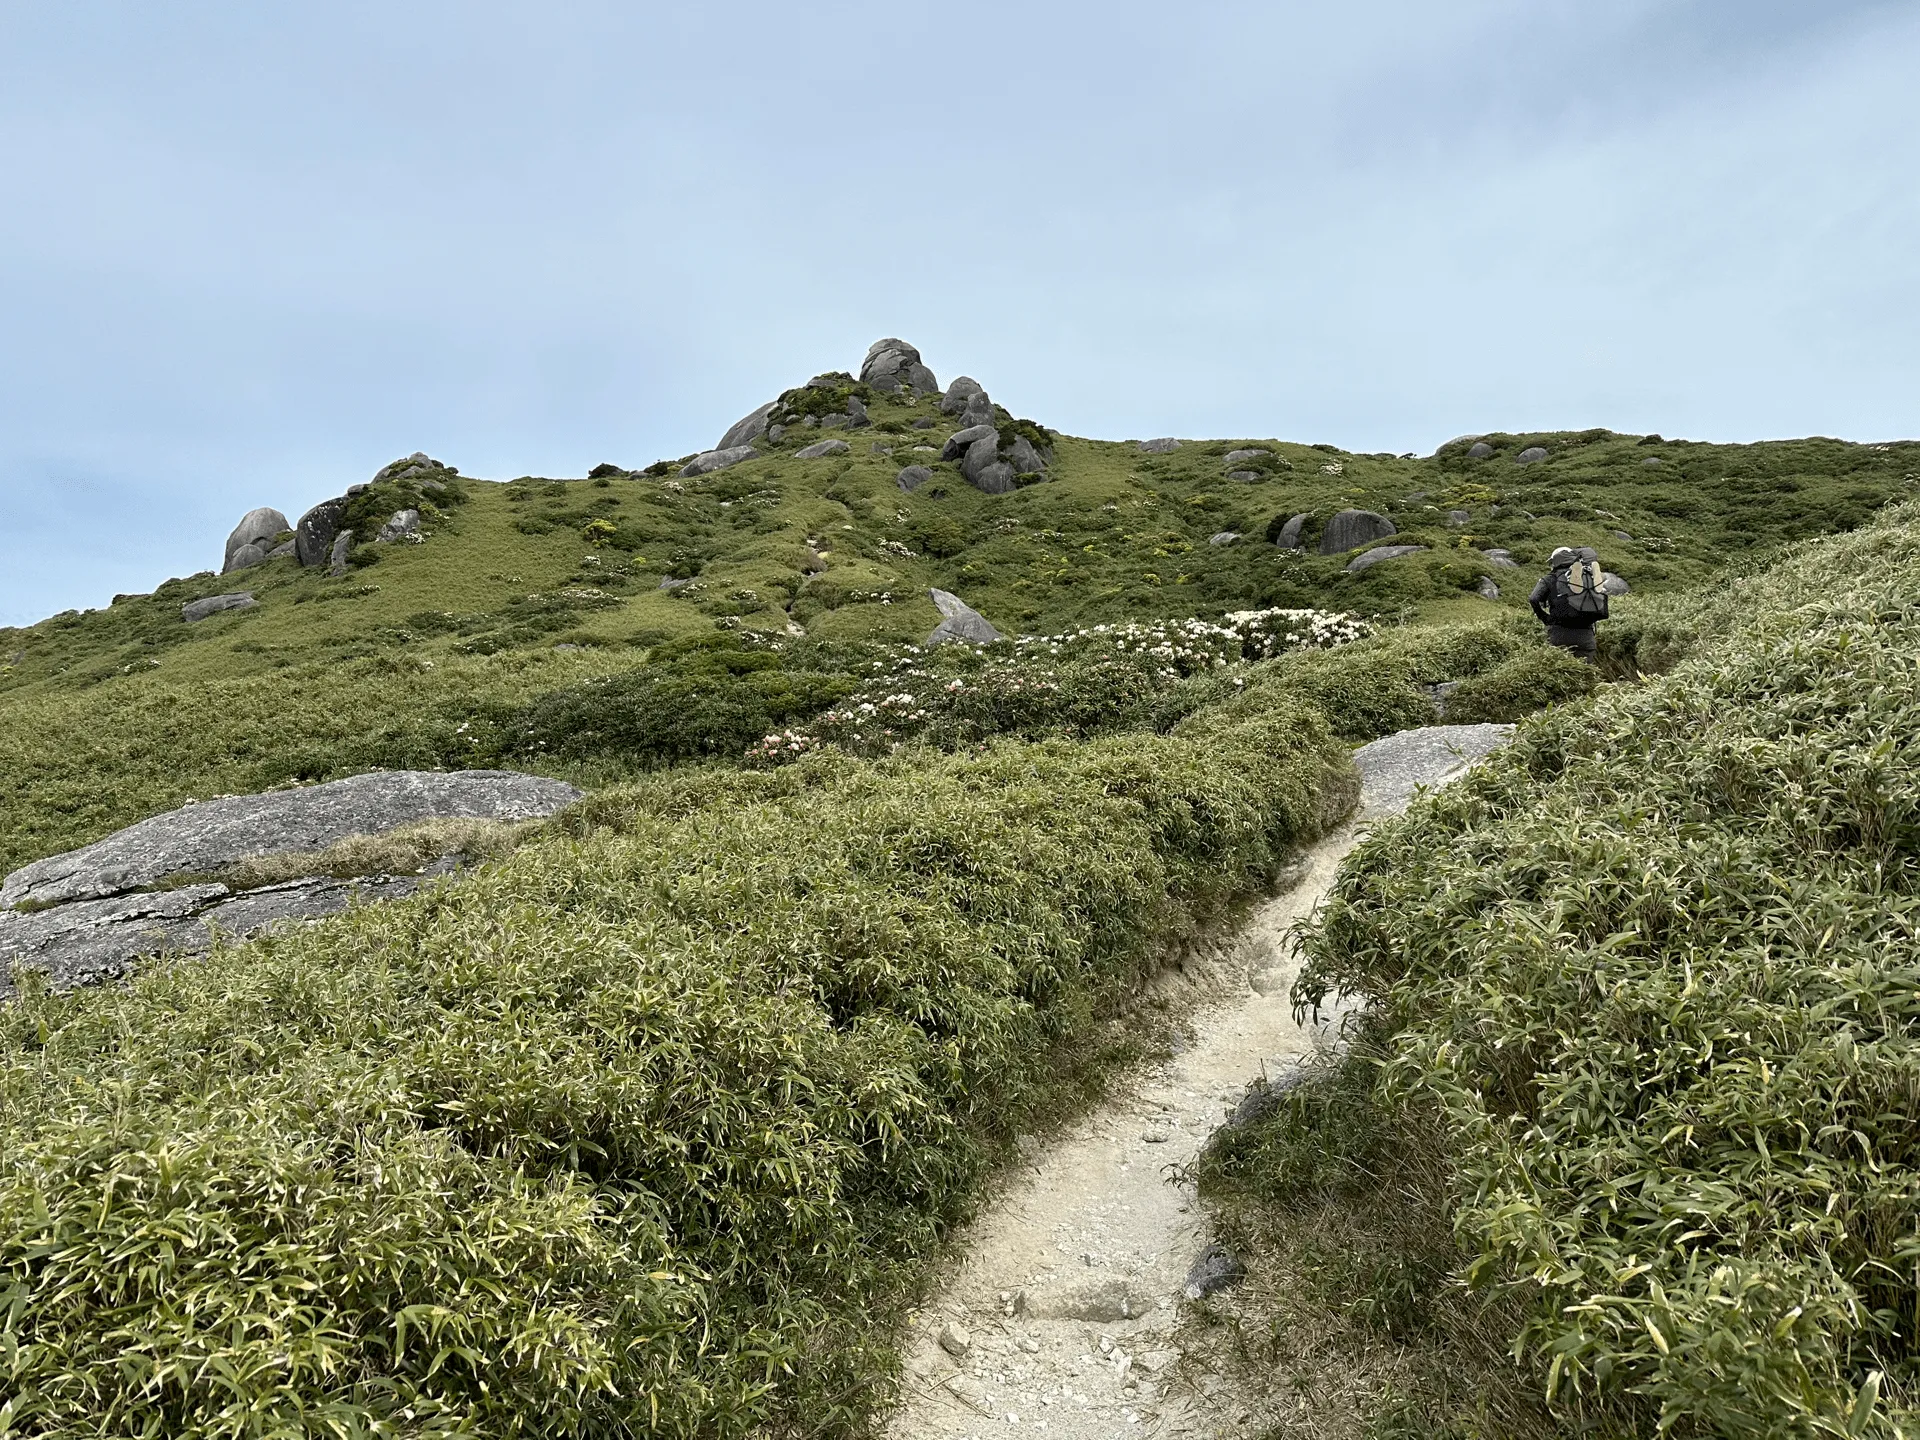
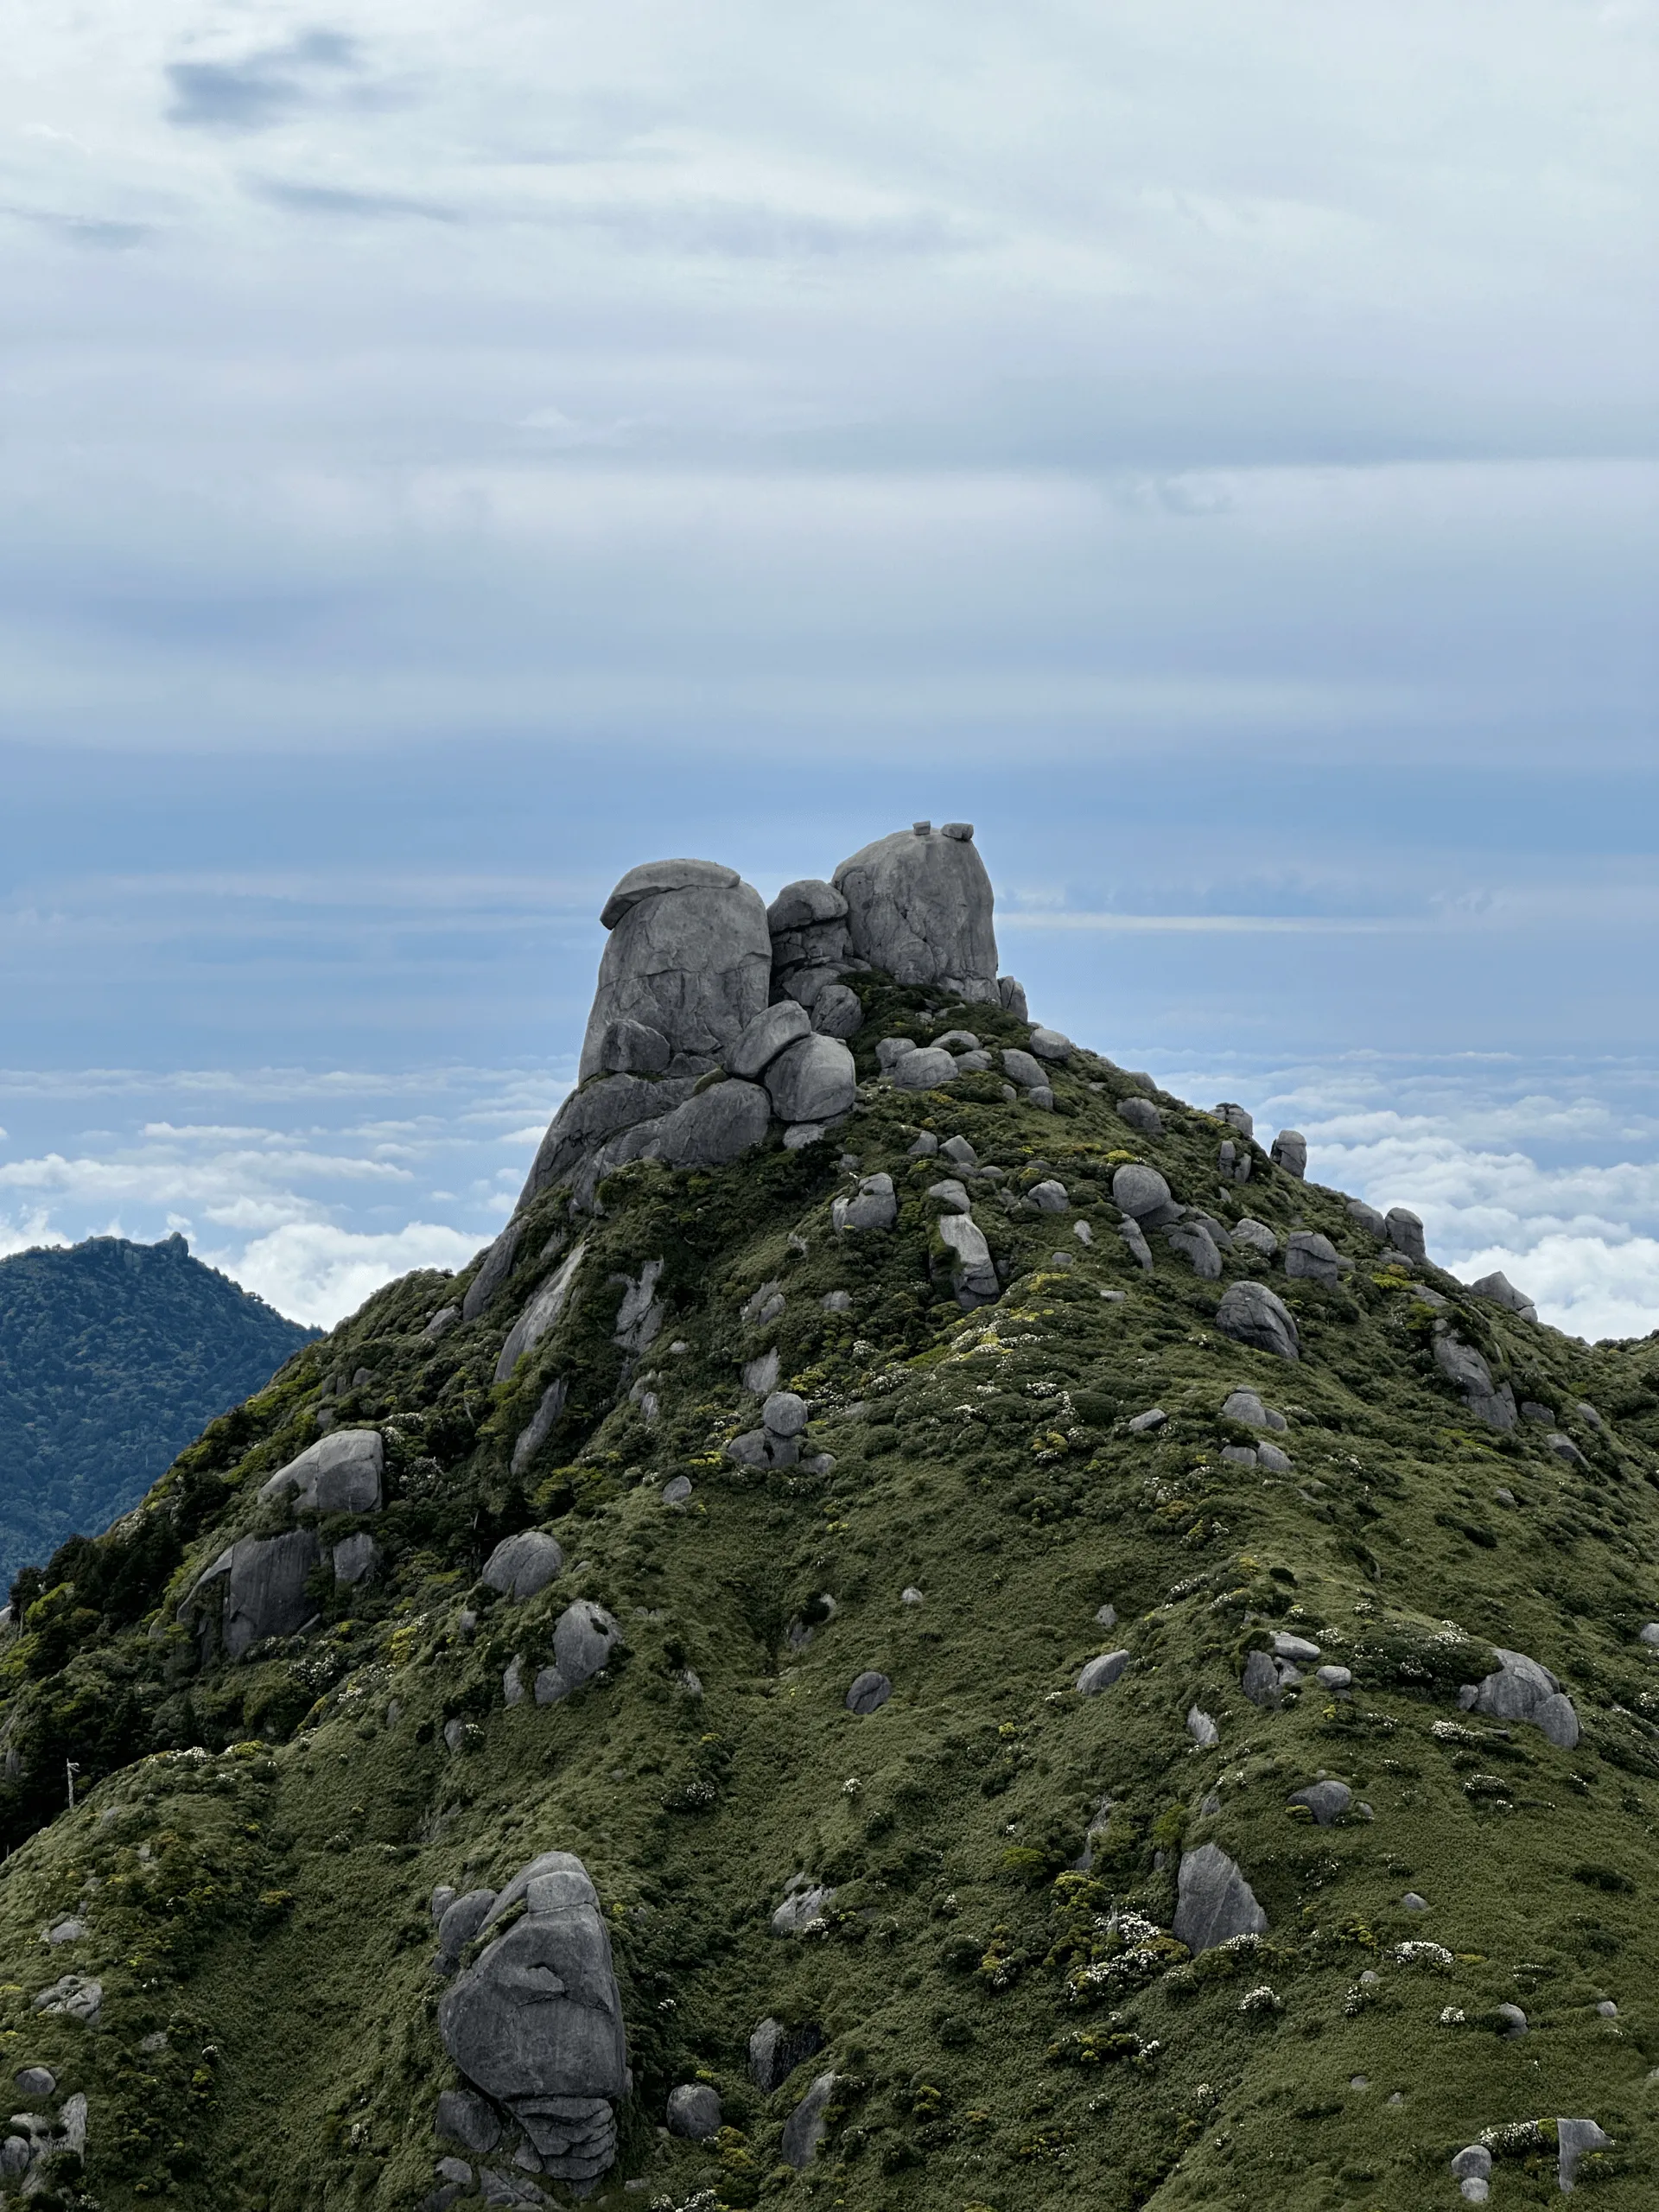
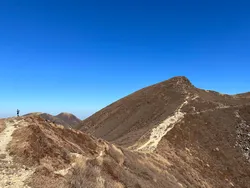
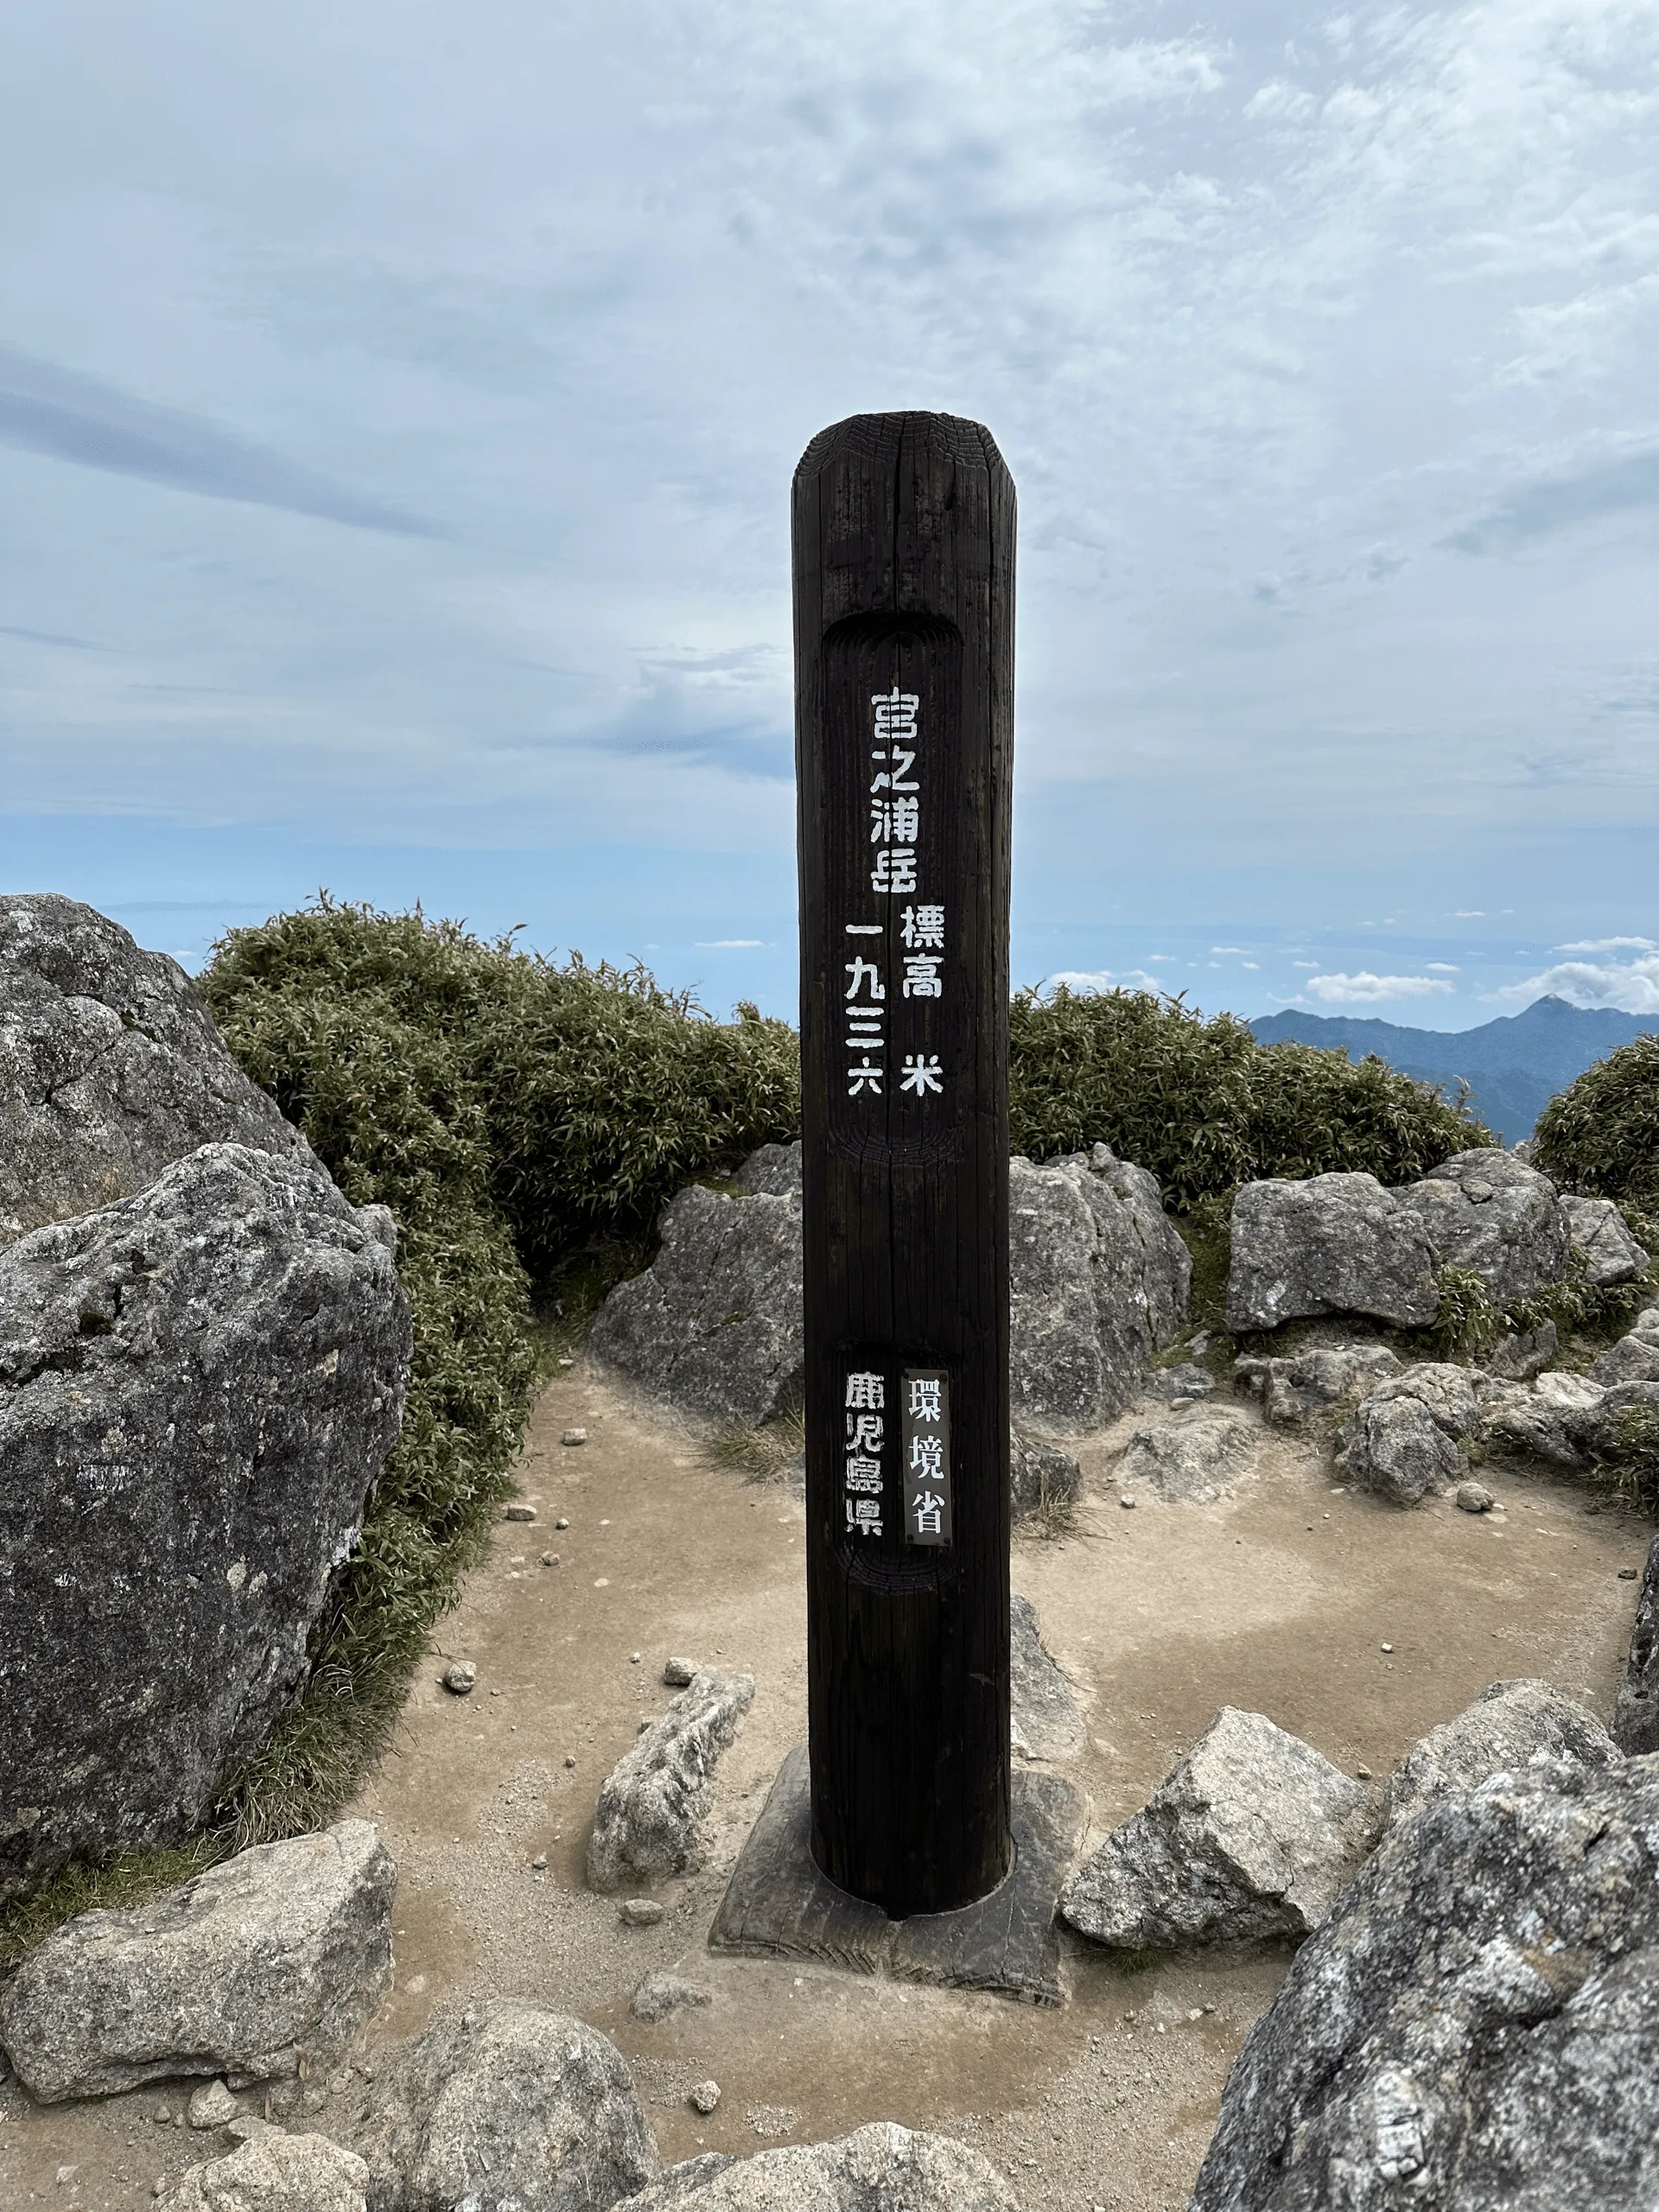
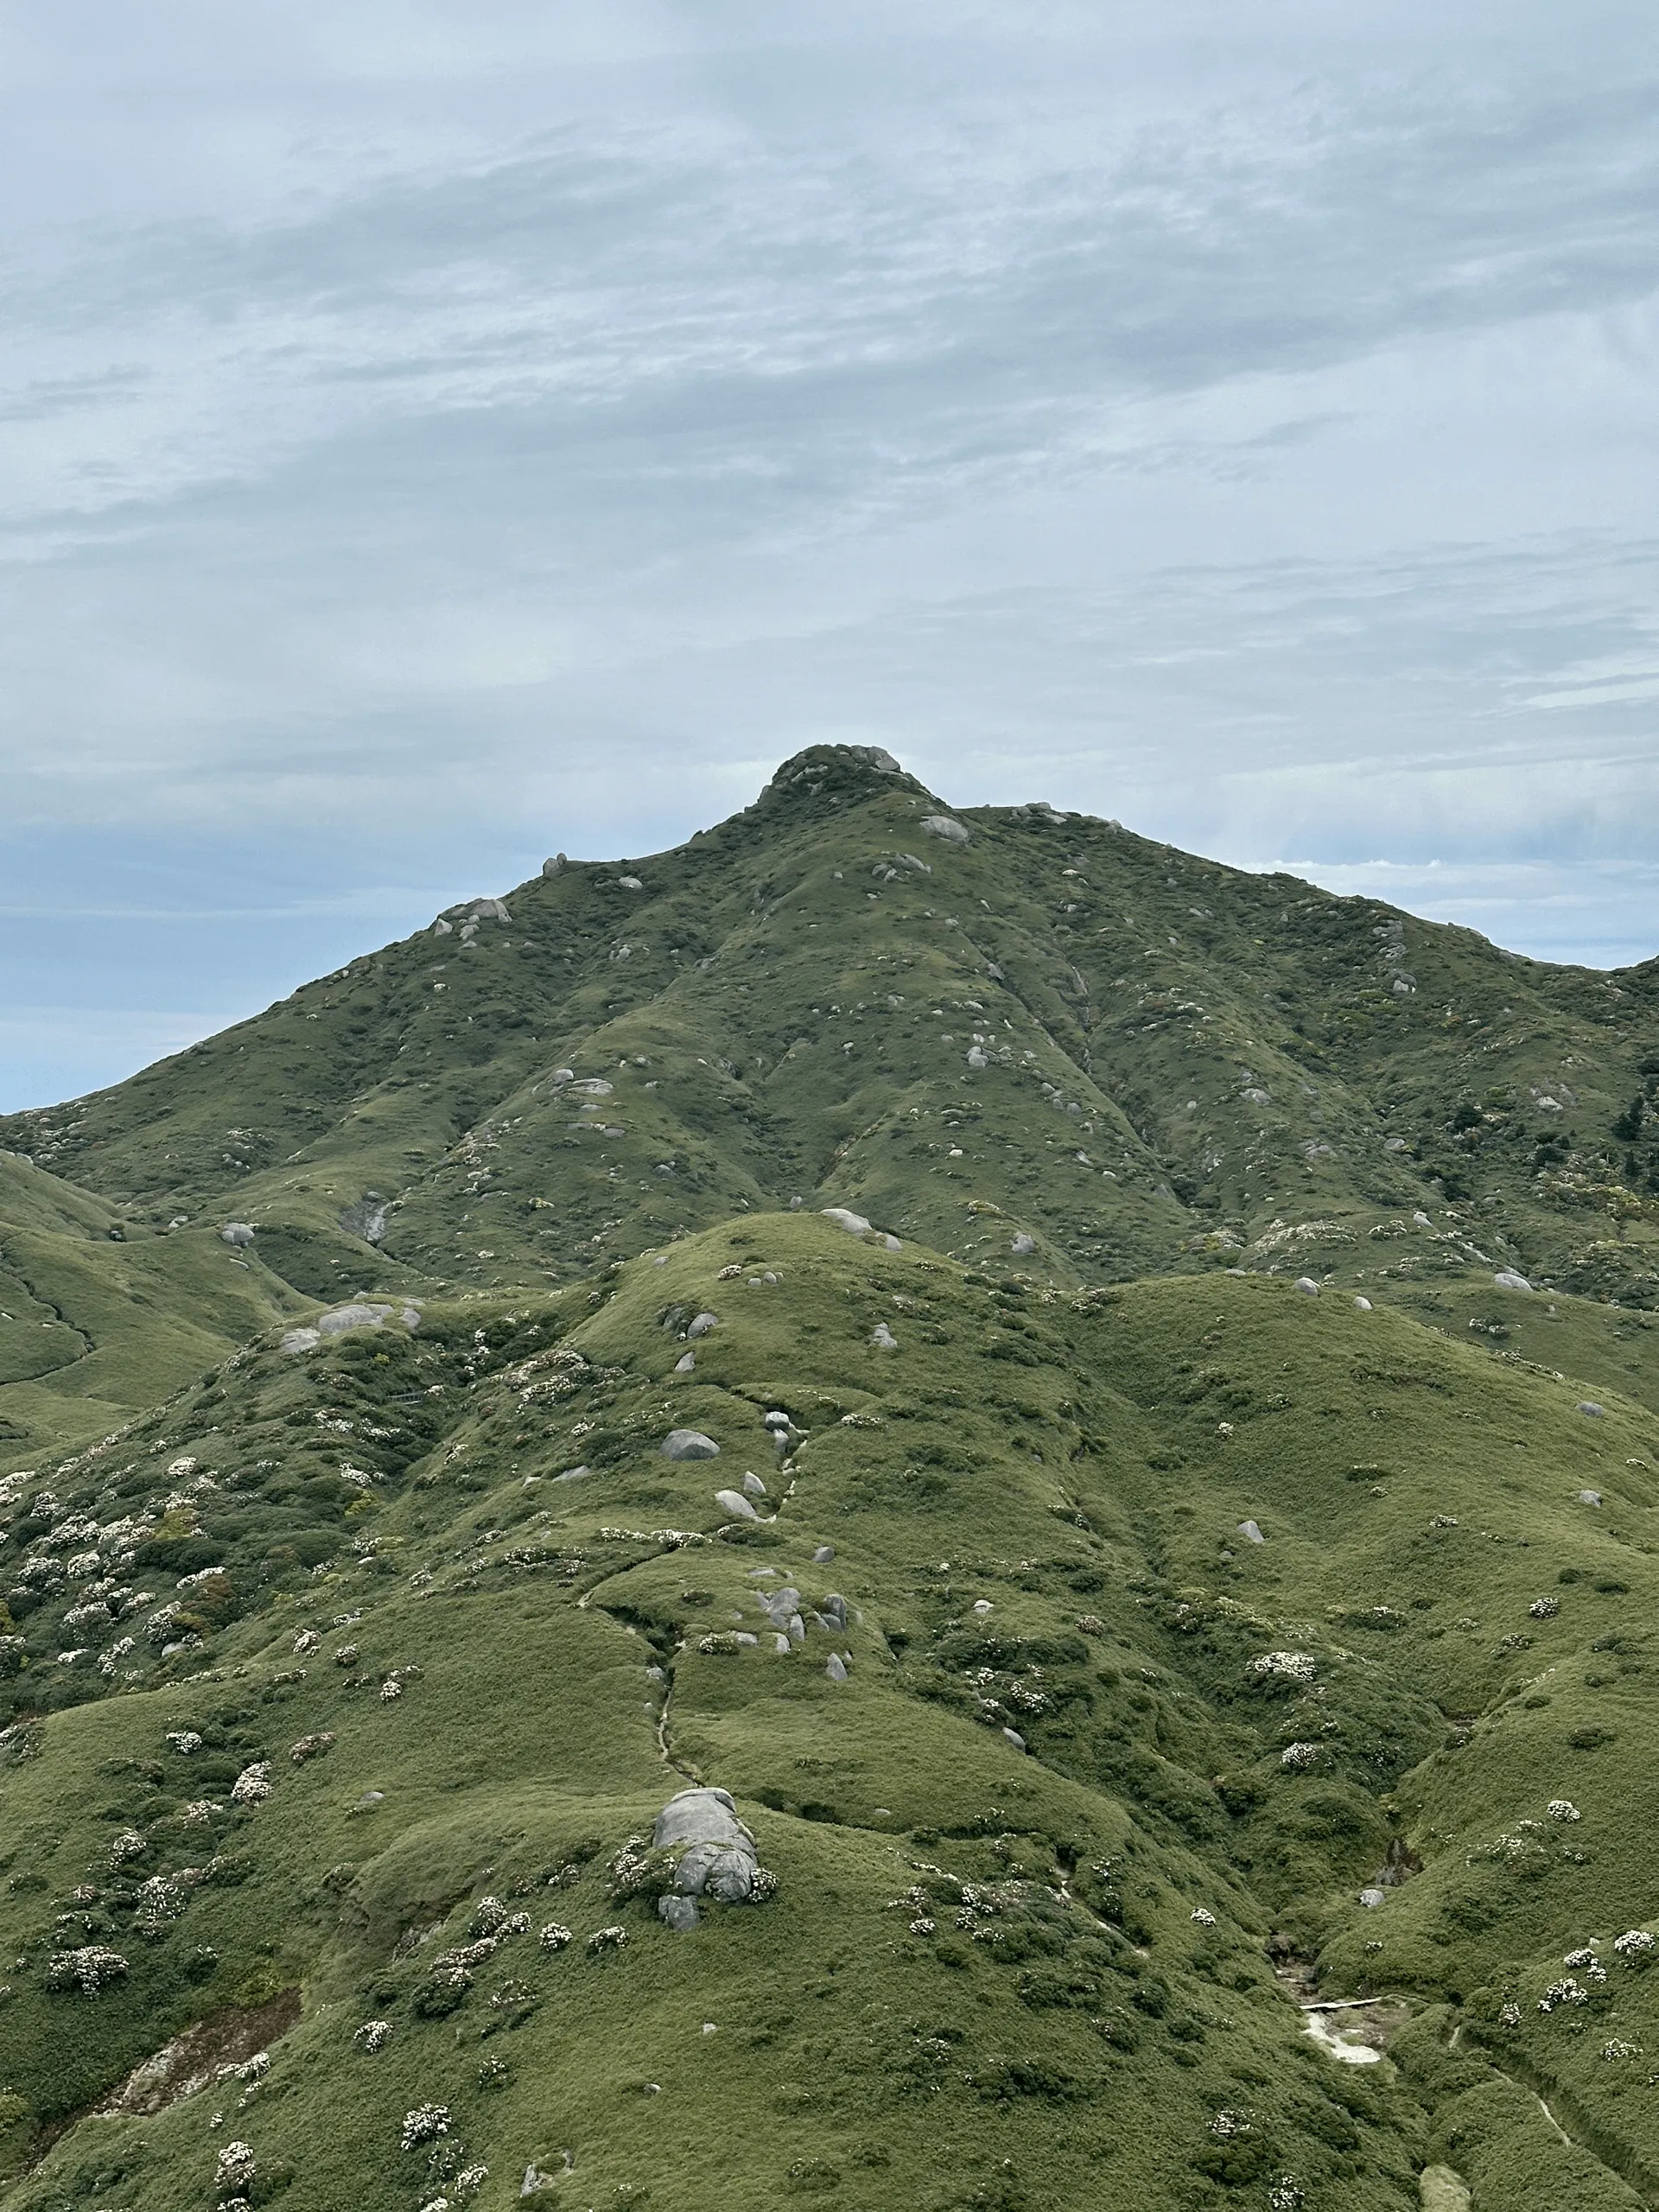
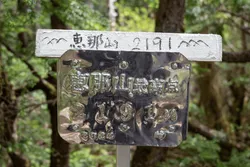
There was one final steep climb to reach the peak of Mt Miyanoura, which at 1936m is also the highest peak in all of Kyushu.
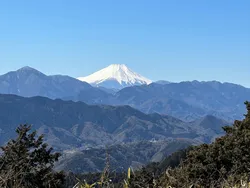
From here you could also see across to Mt Nagatadake (永田岳, nagata-dake), which was the second peak we were planning to hit.
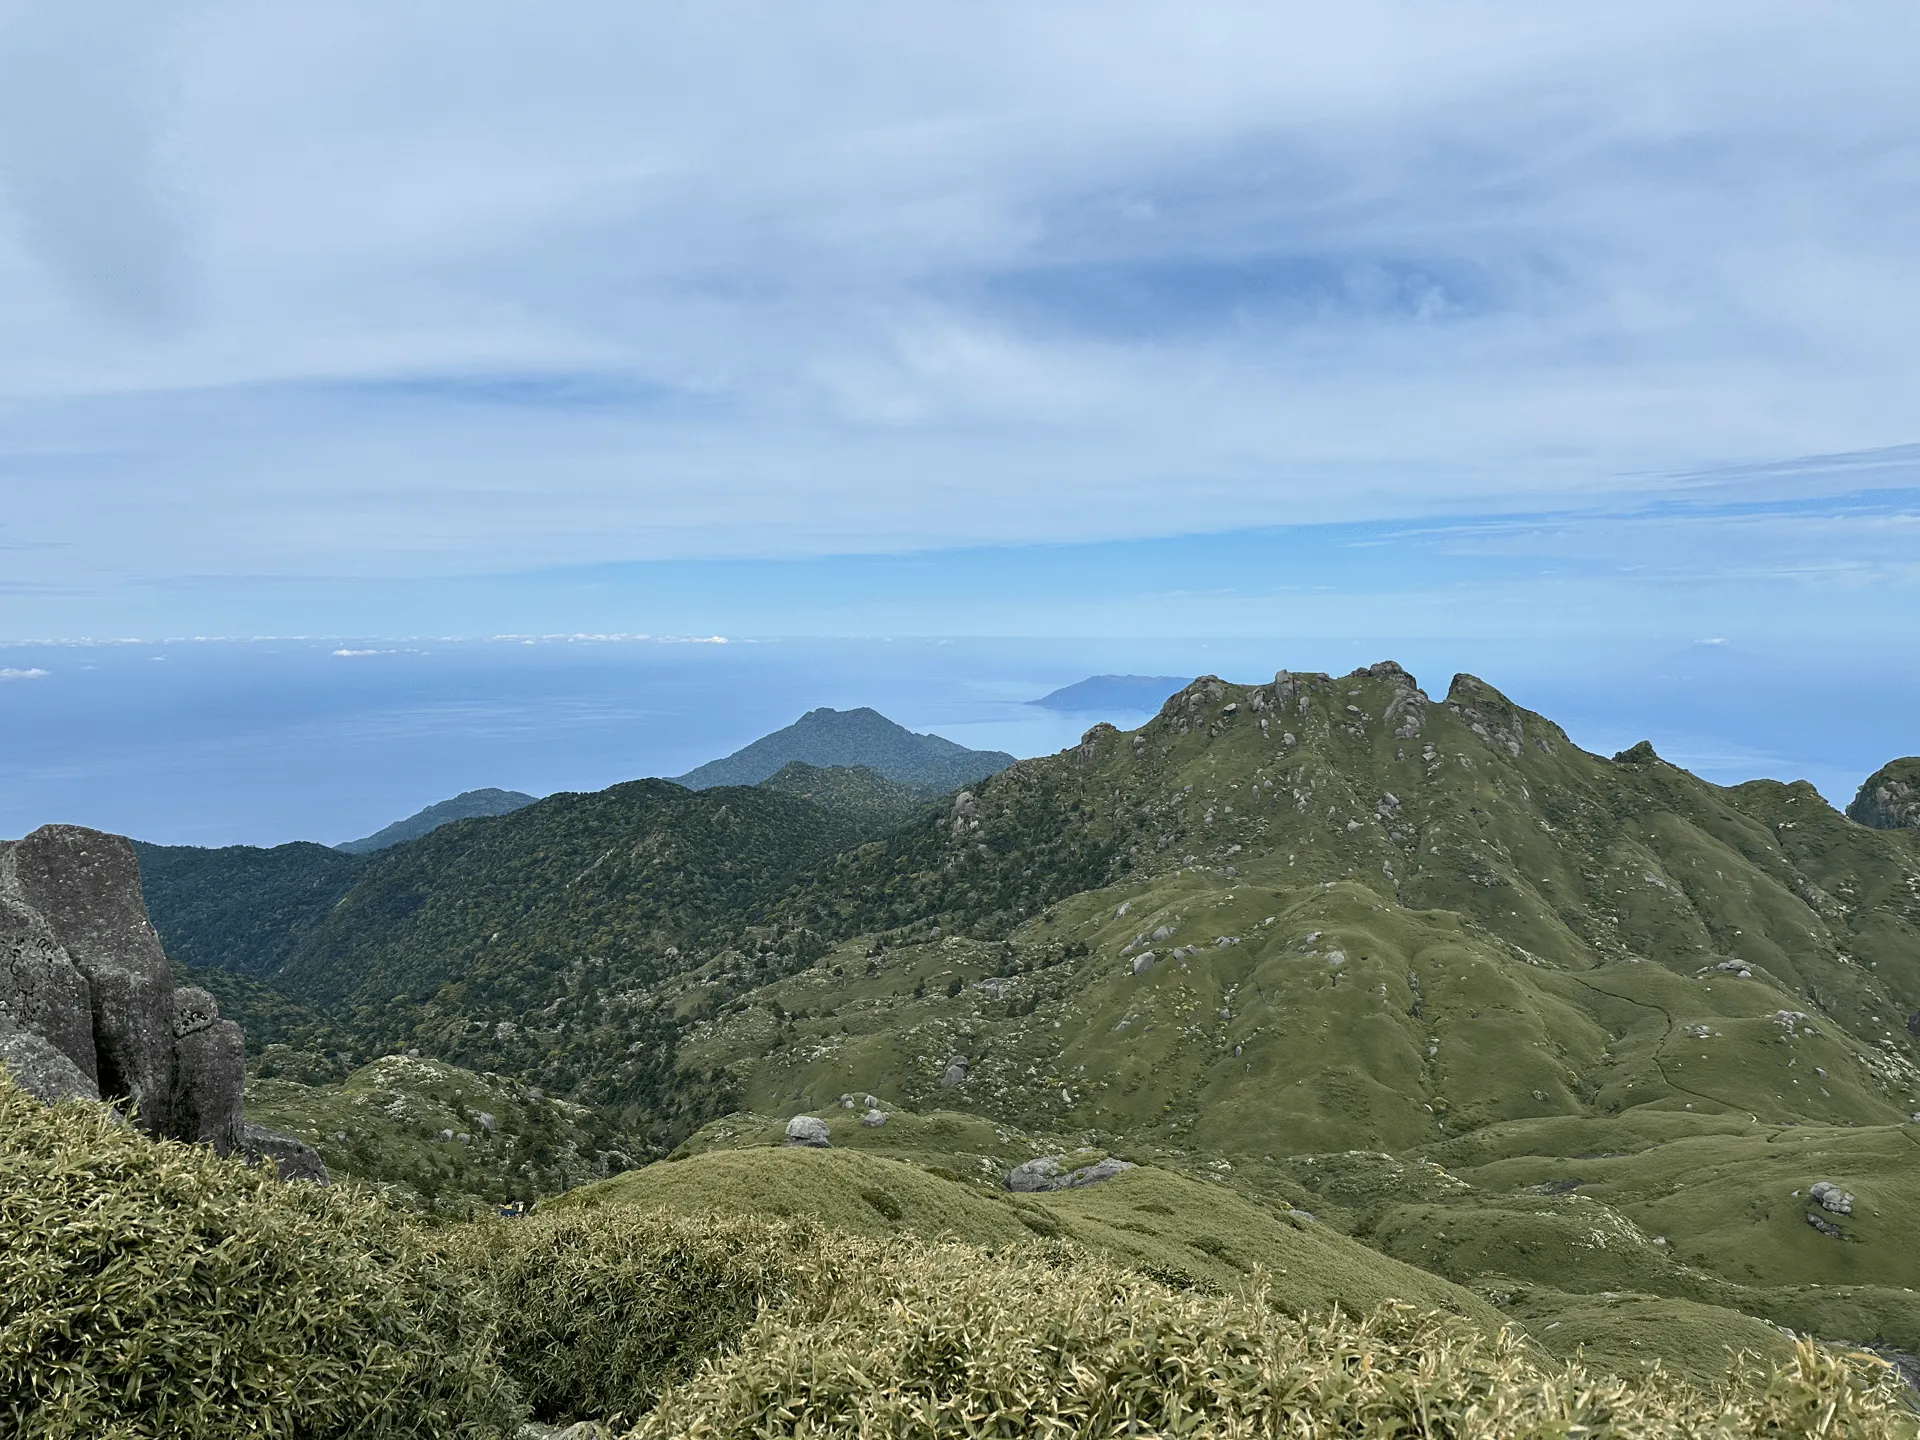
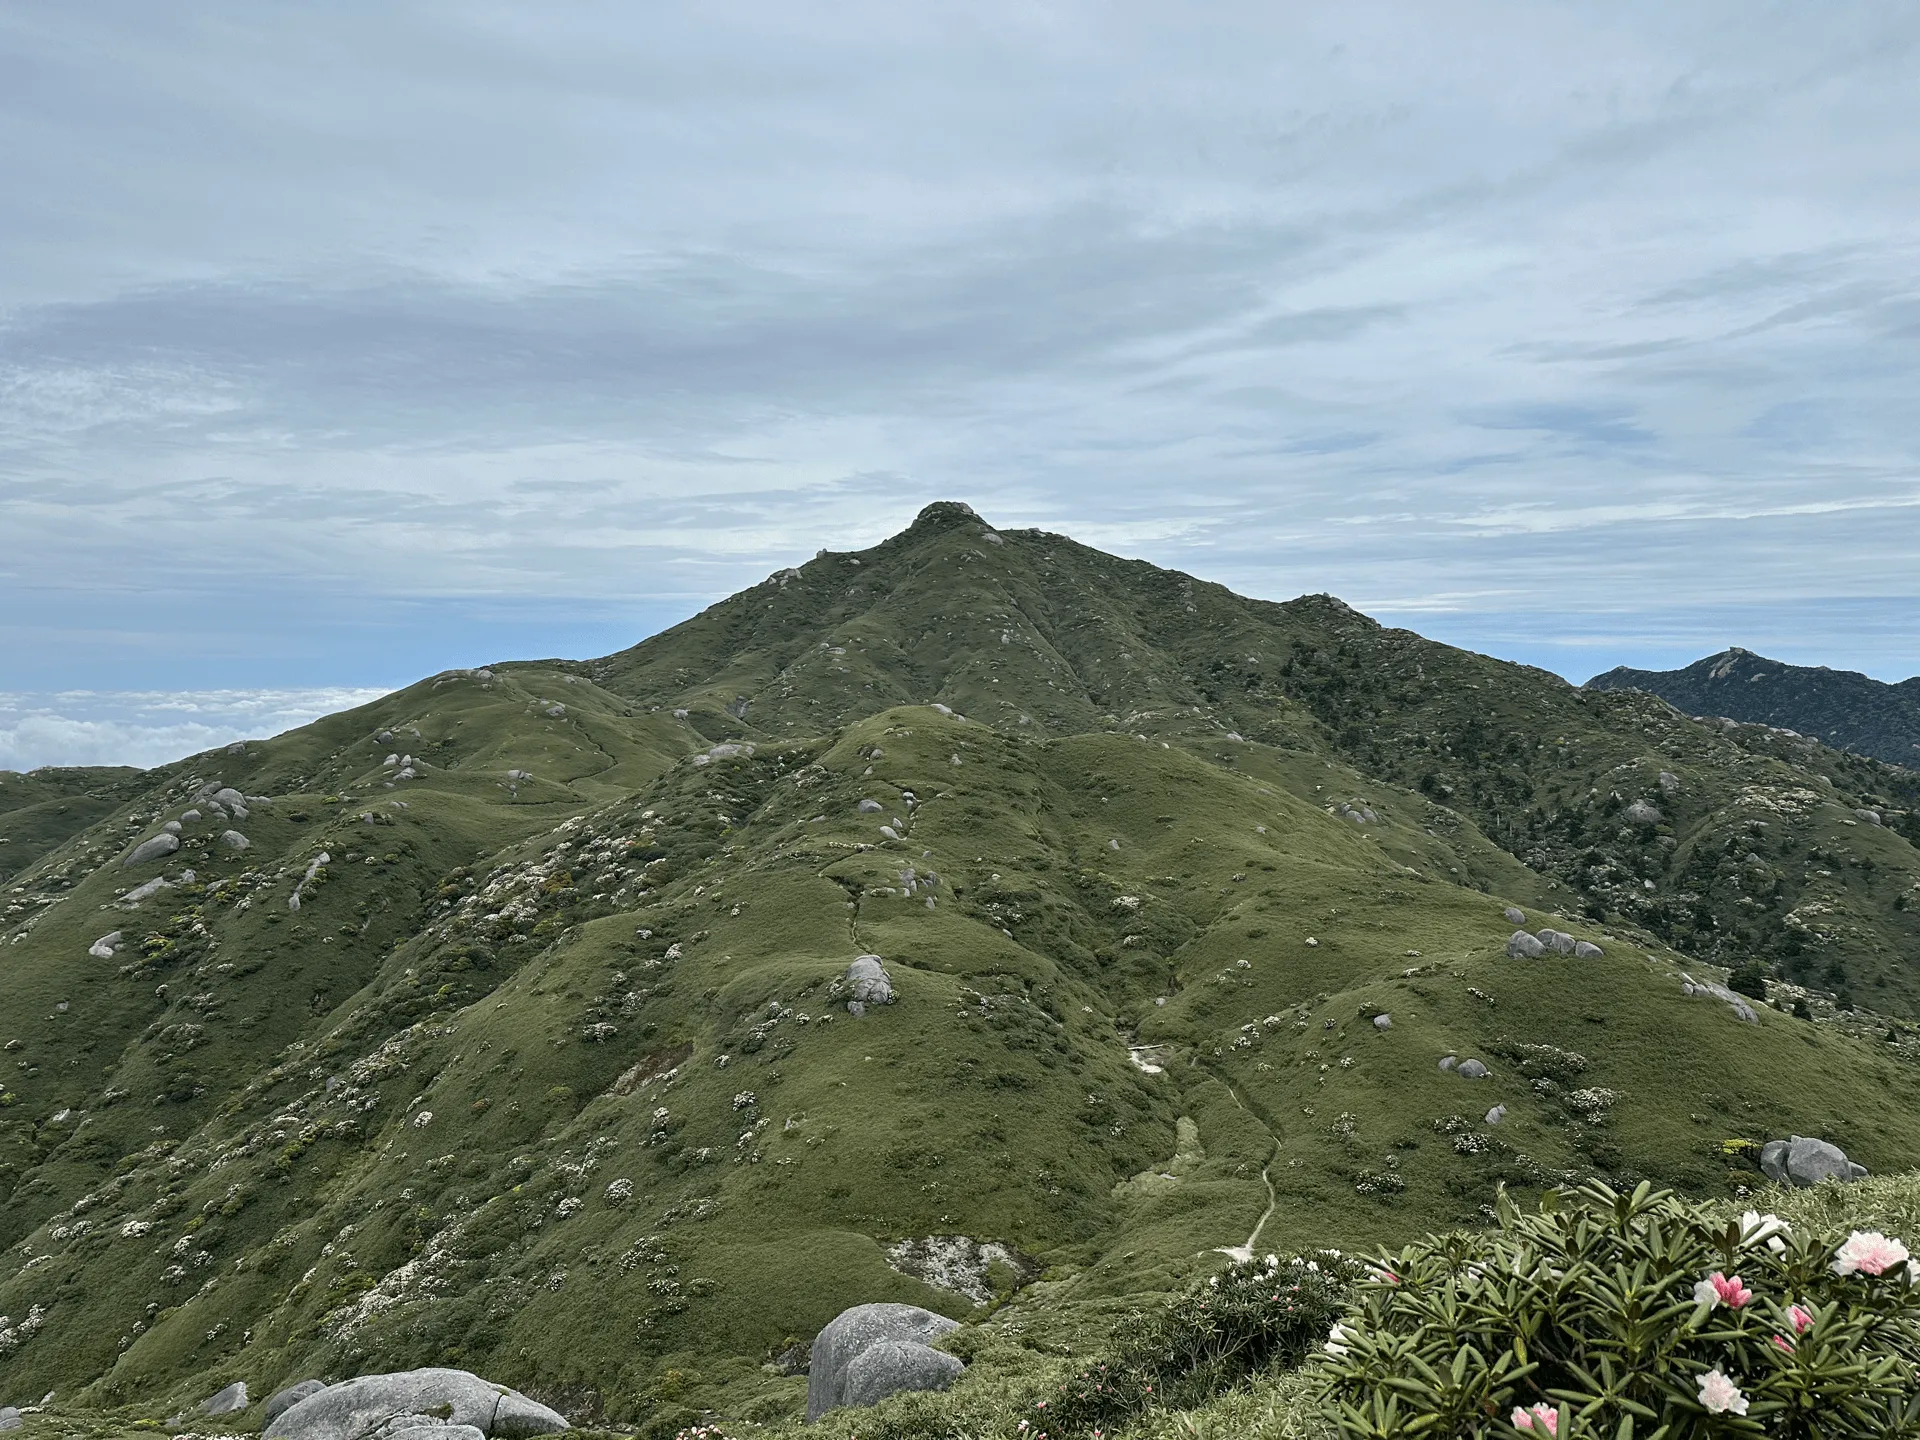
Climbing Mt Nagatadake is an optional 90min detour, which you can skip if you don’t have the energy. For me actually this mountain was the highlight of my trip. I would definitely recommend it!
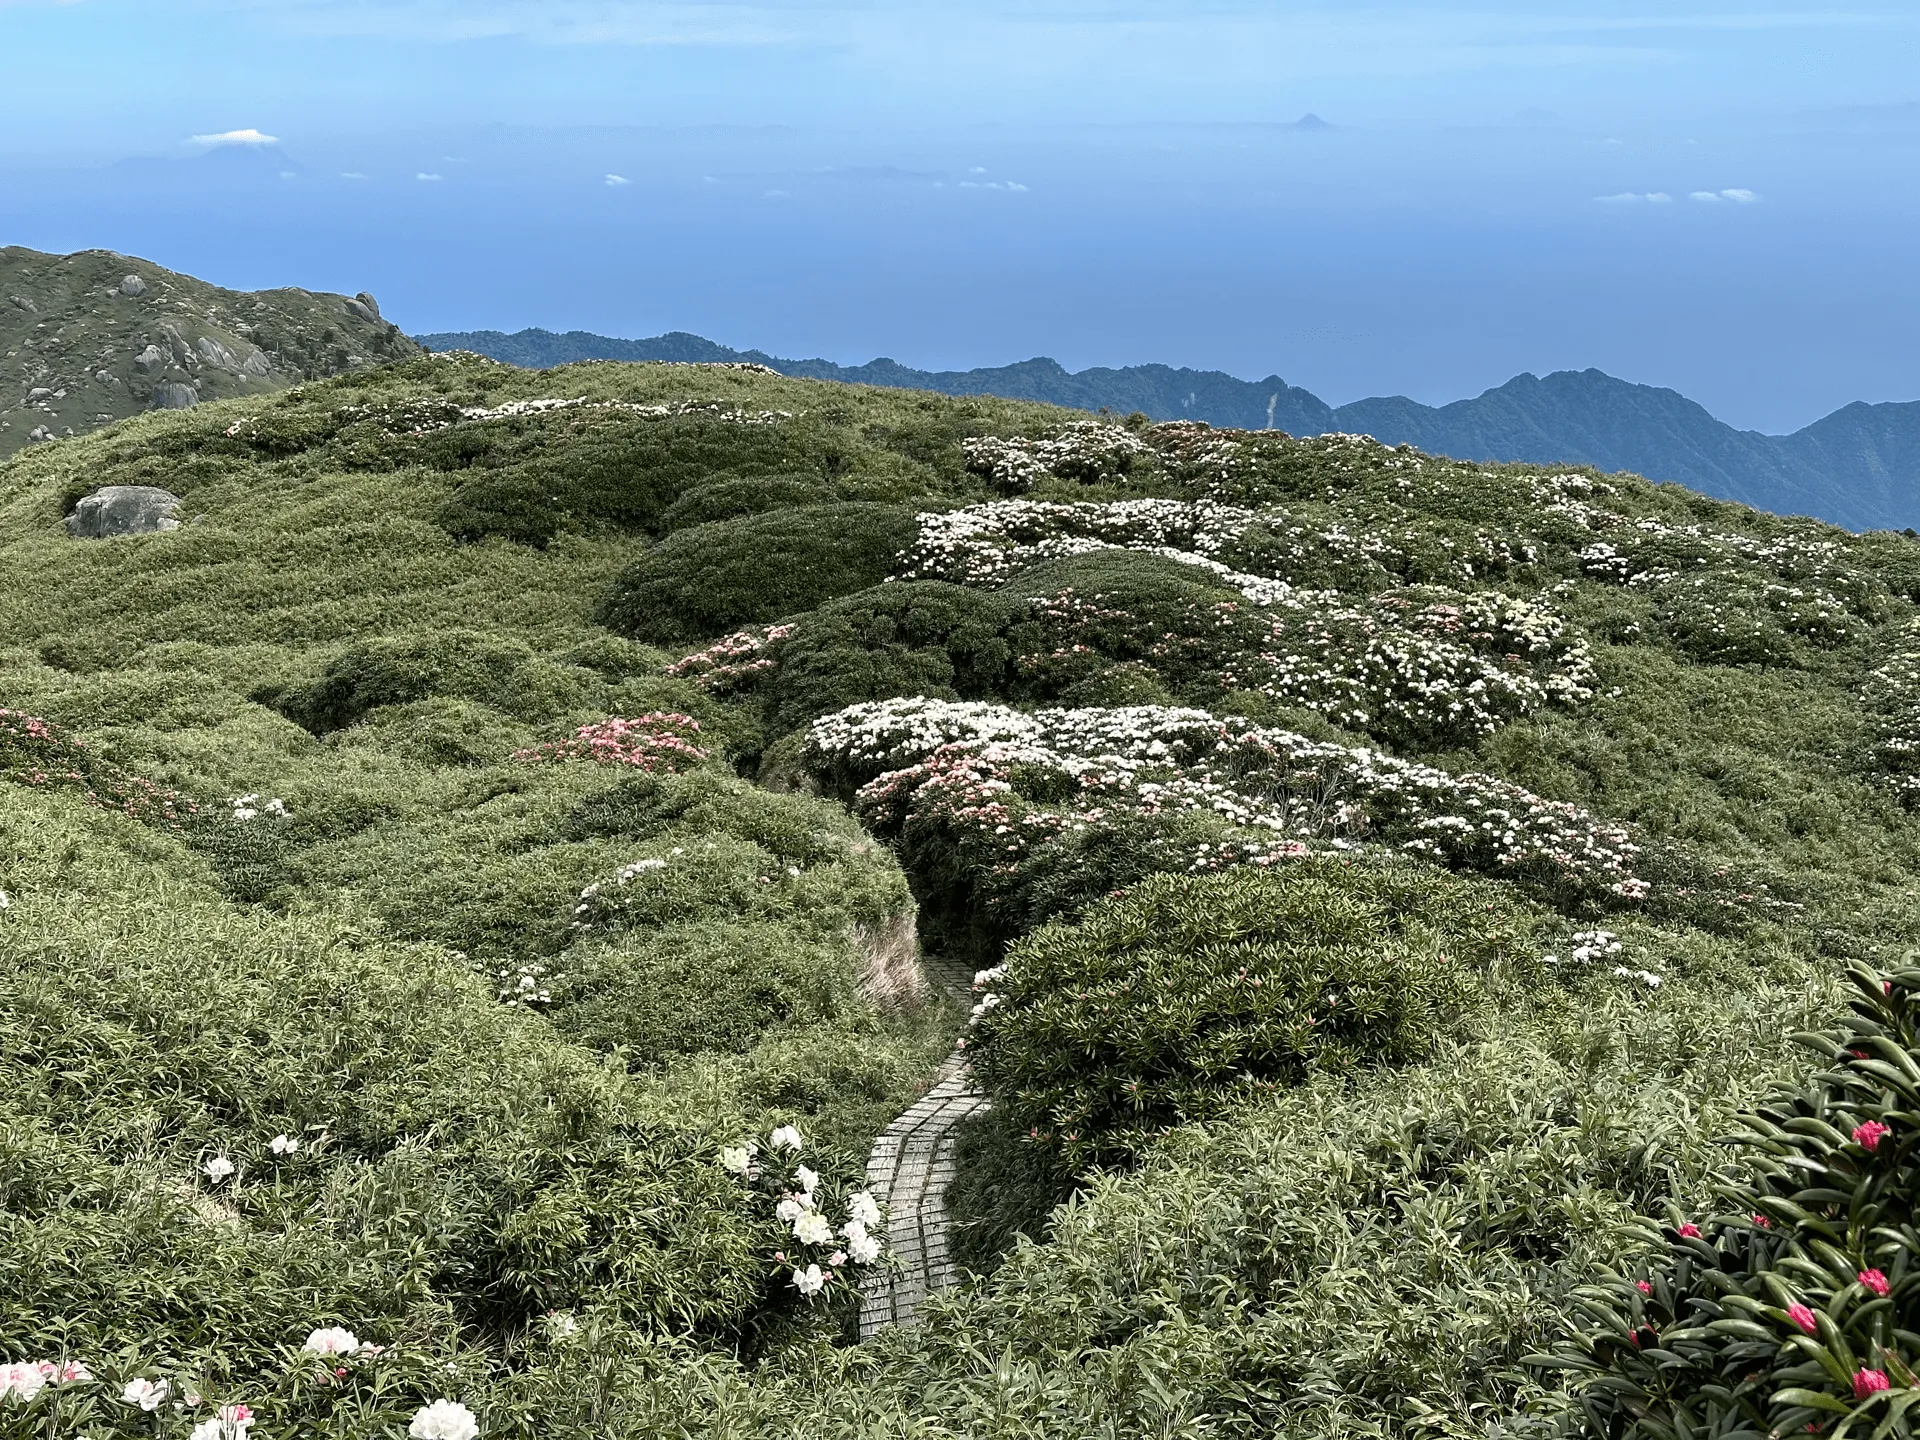

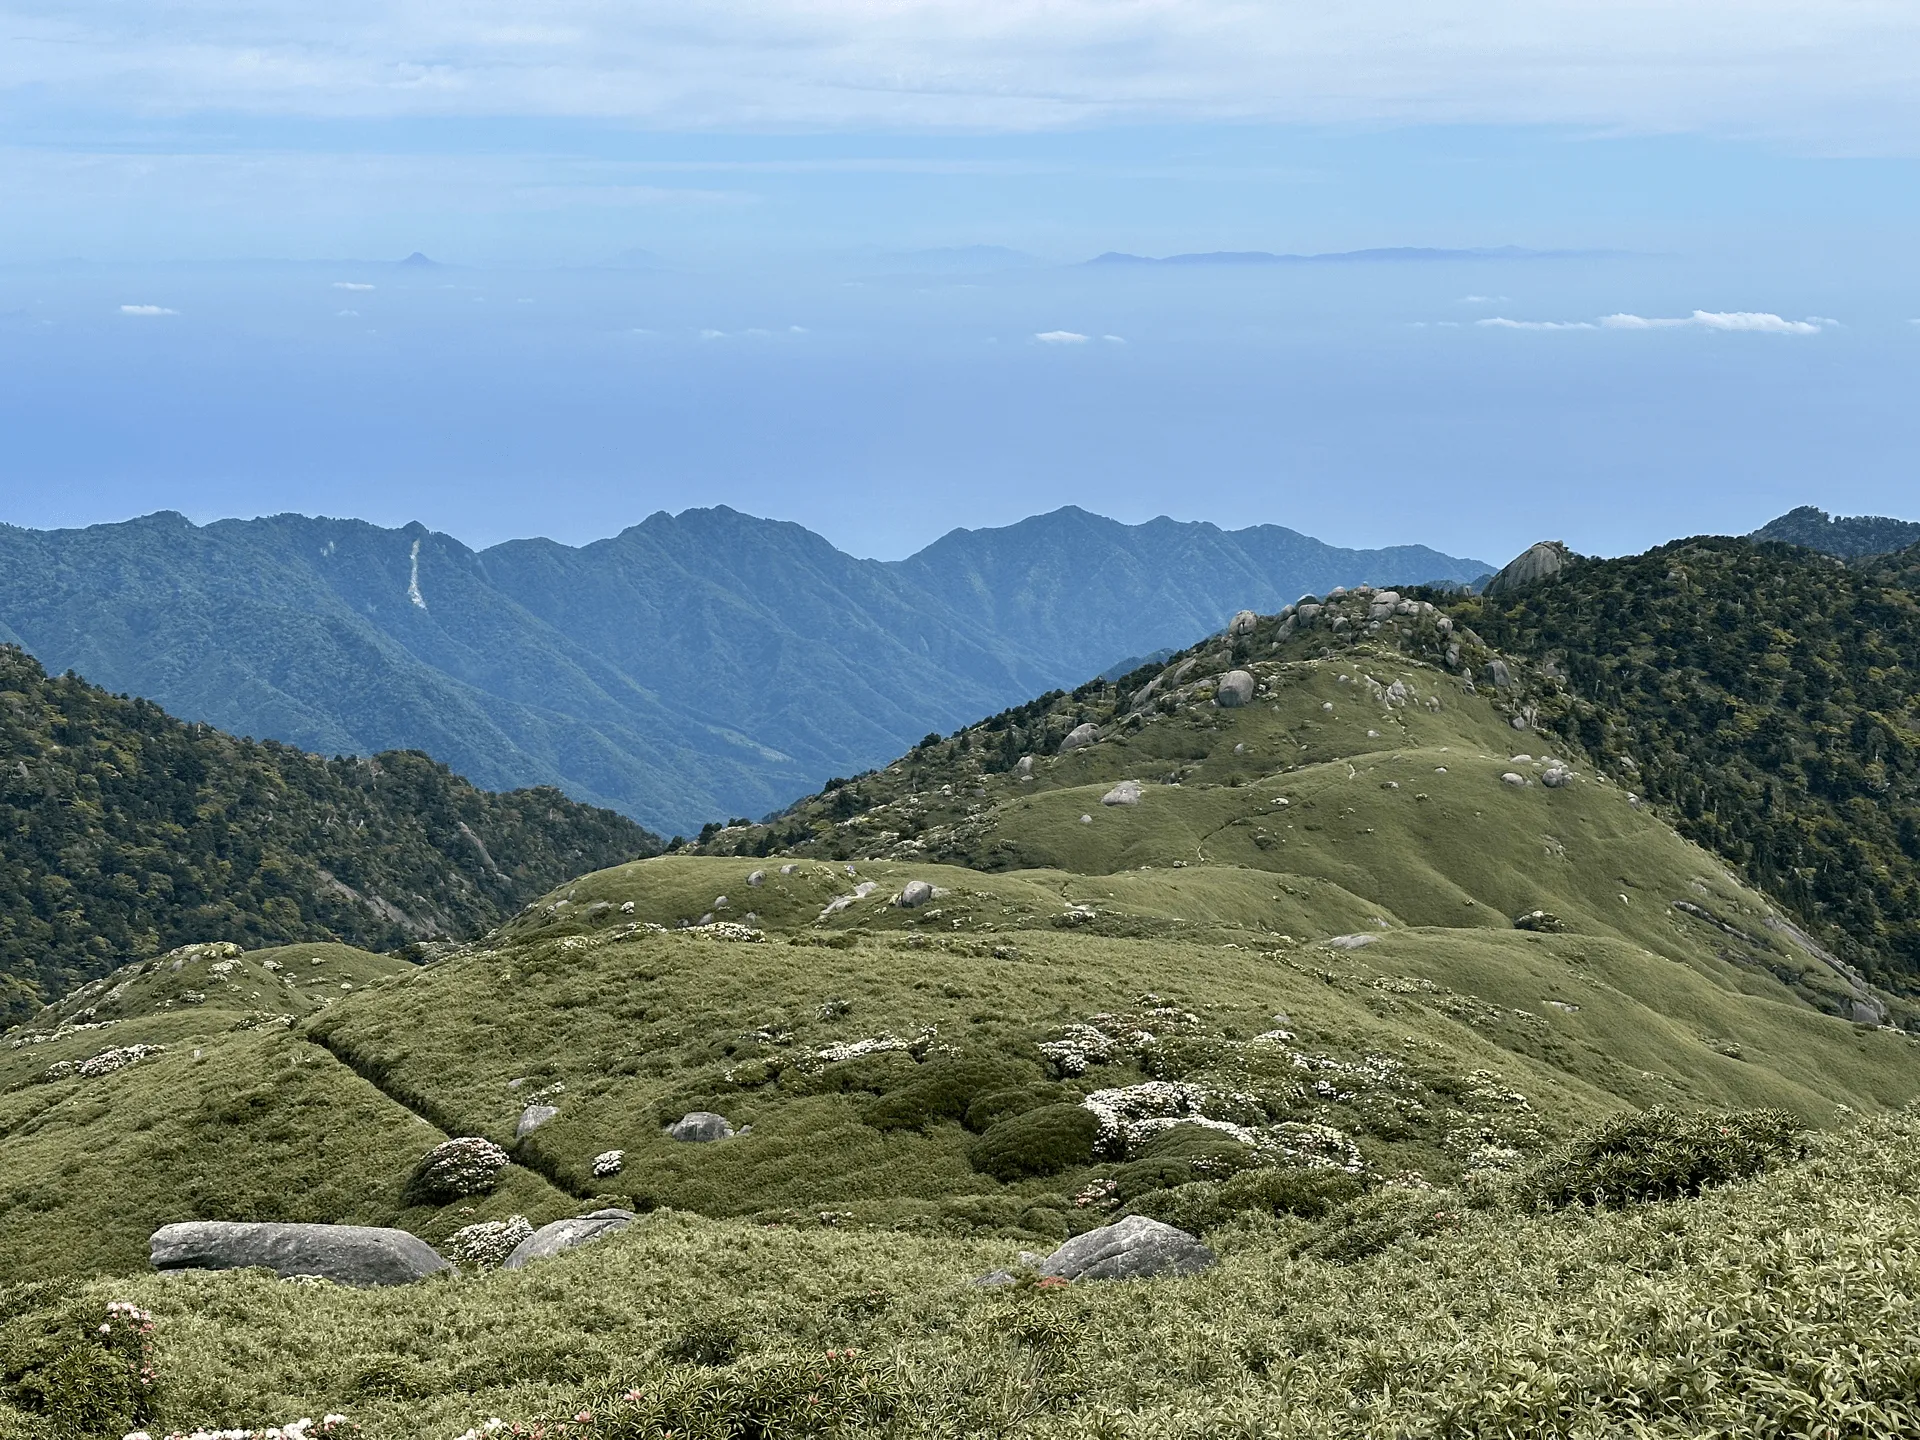
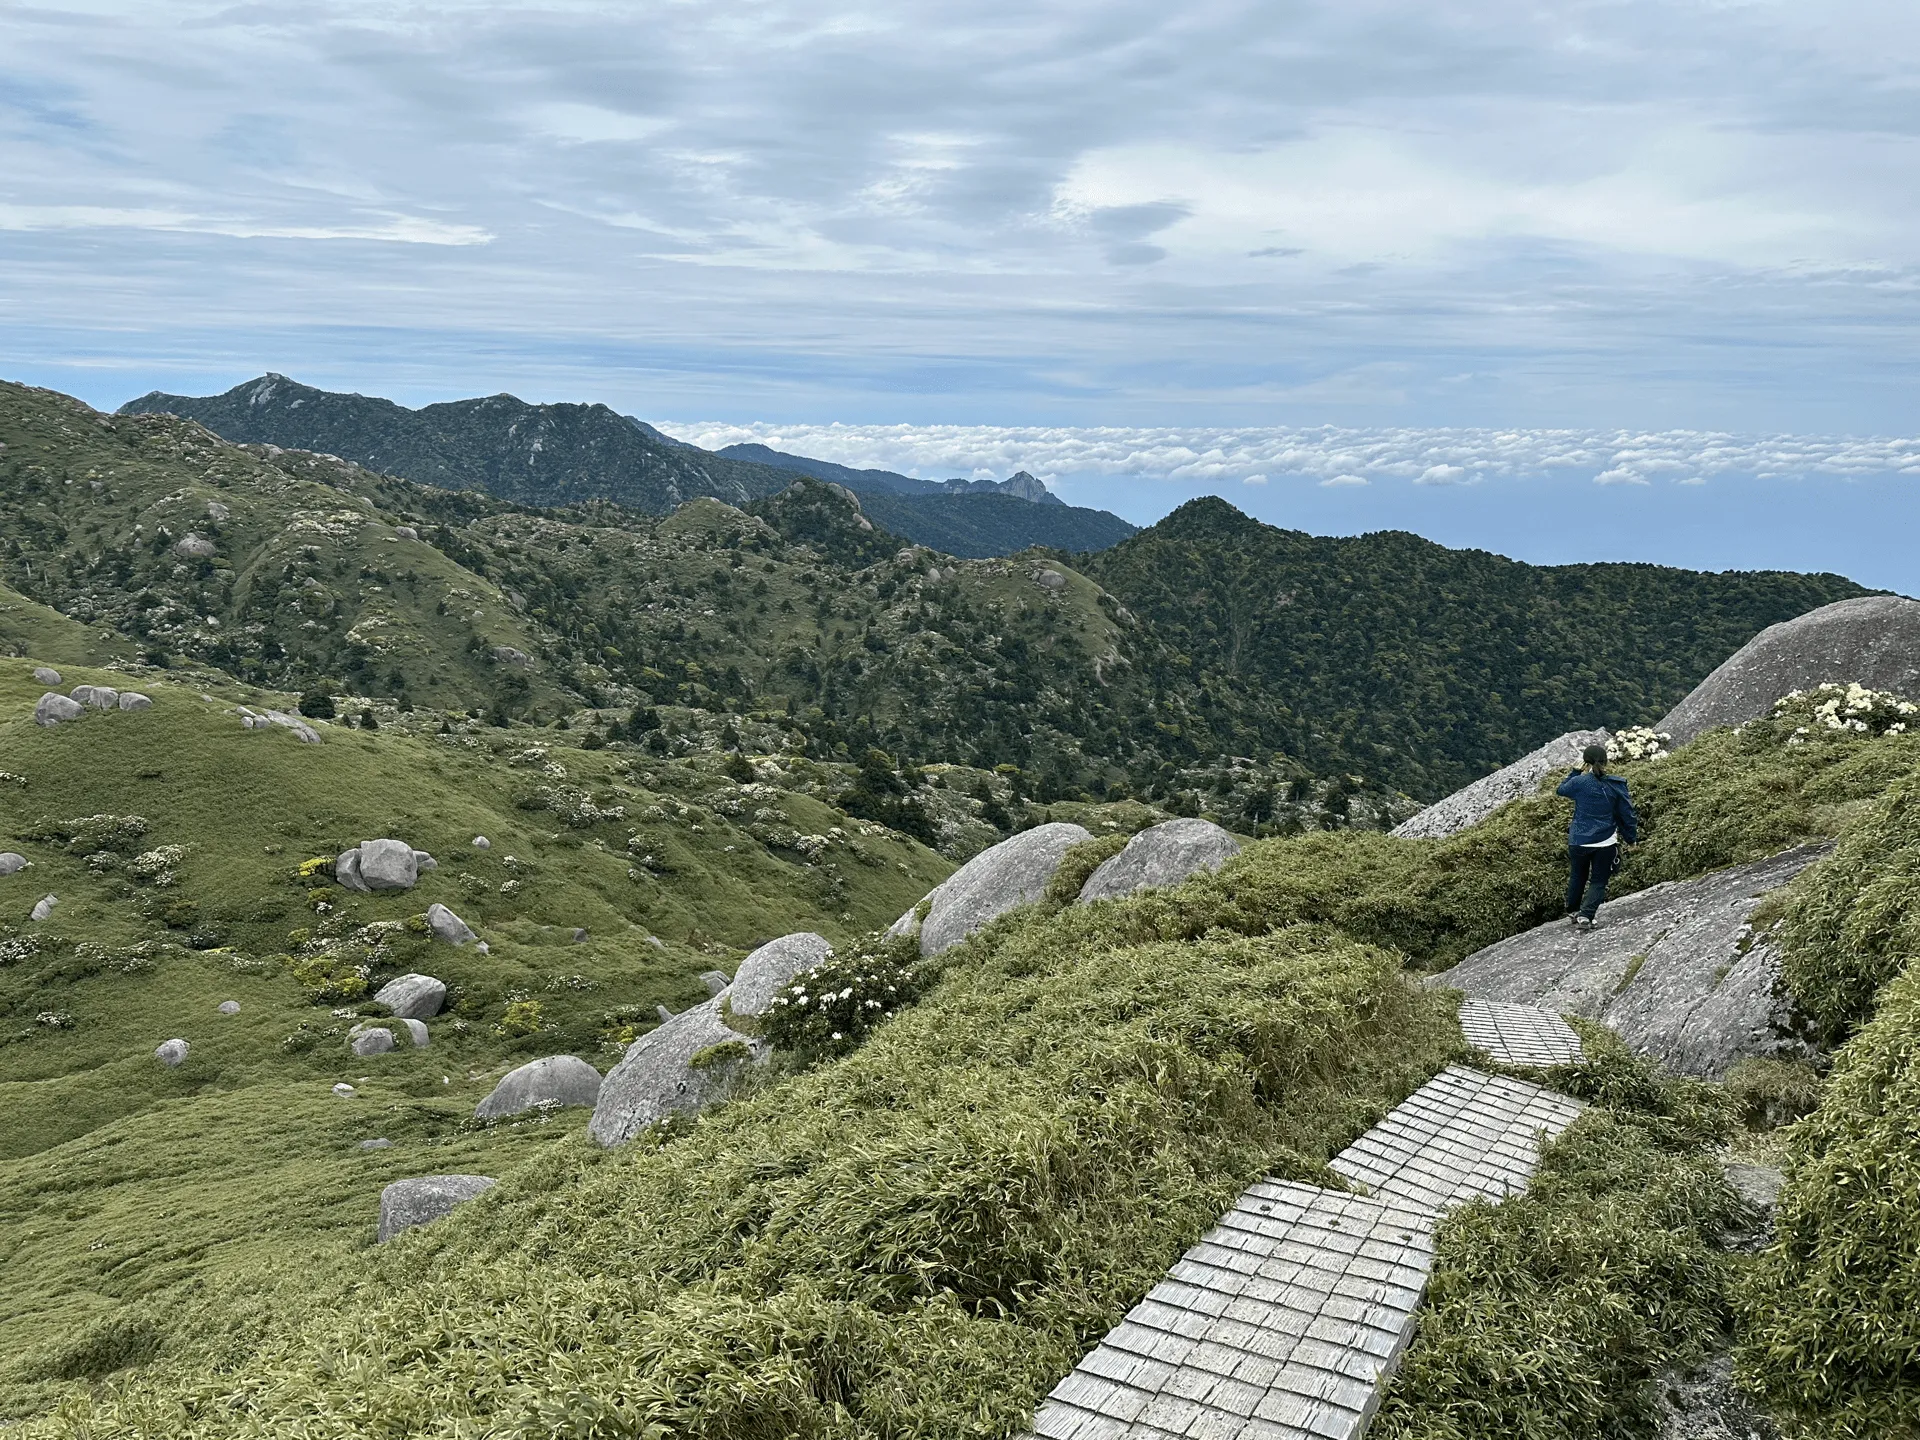
The area around Mt Nagatadake probably had the most amount of flowers blooming, and as you climb you get a clear view of Mt Miyanoura from the opposite side.

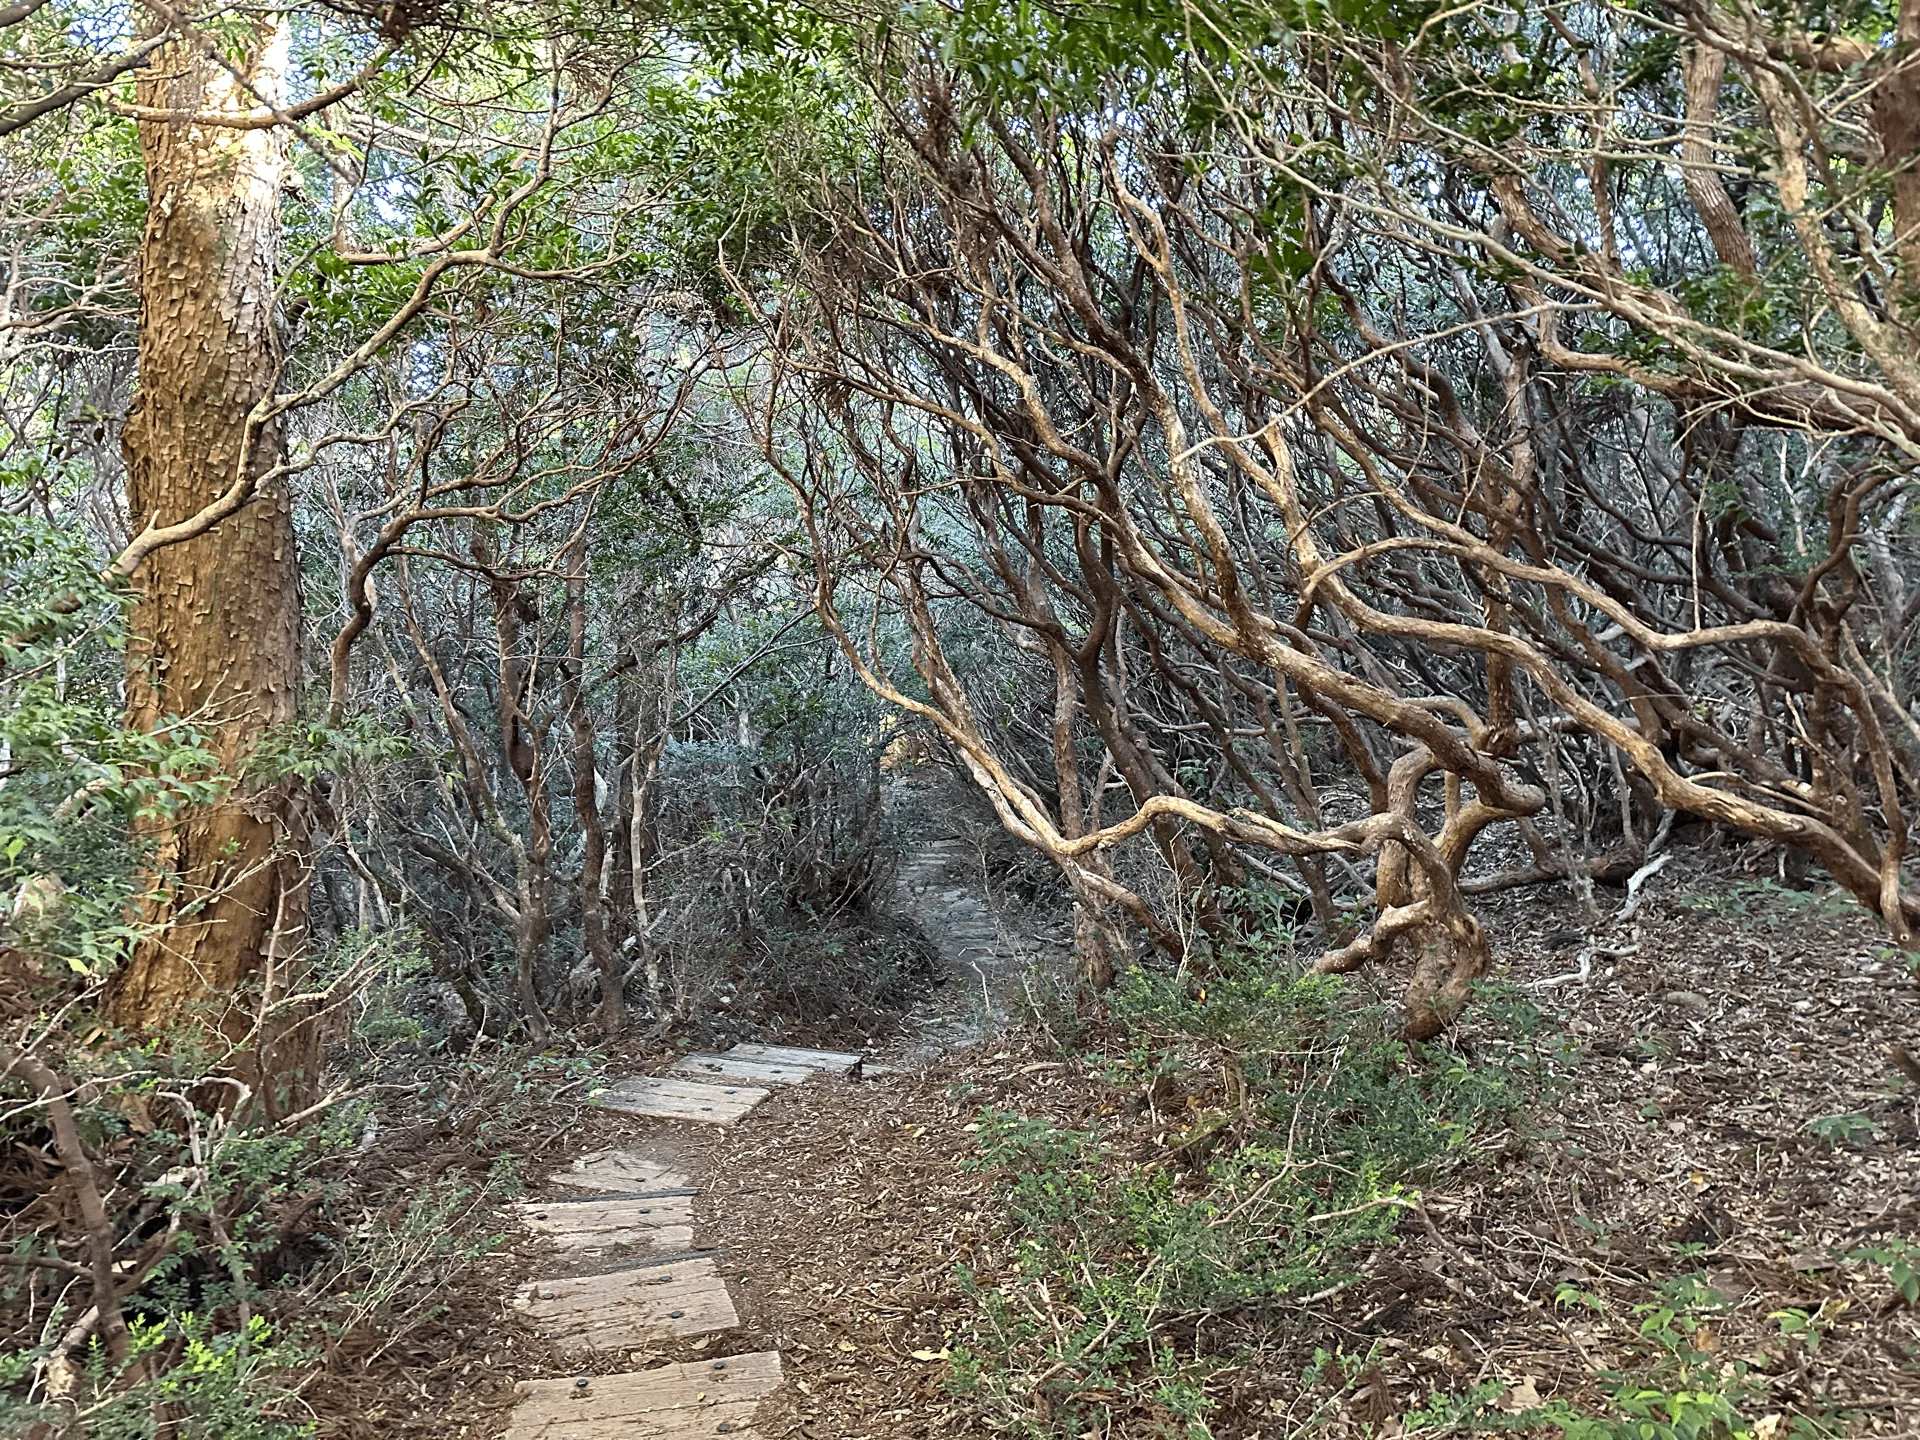
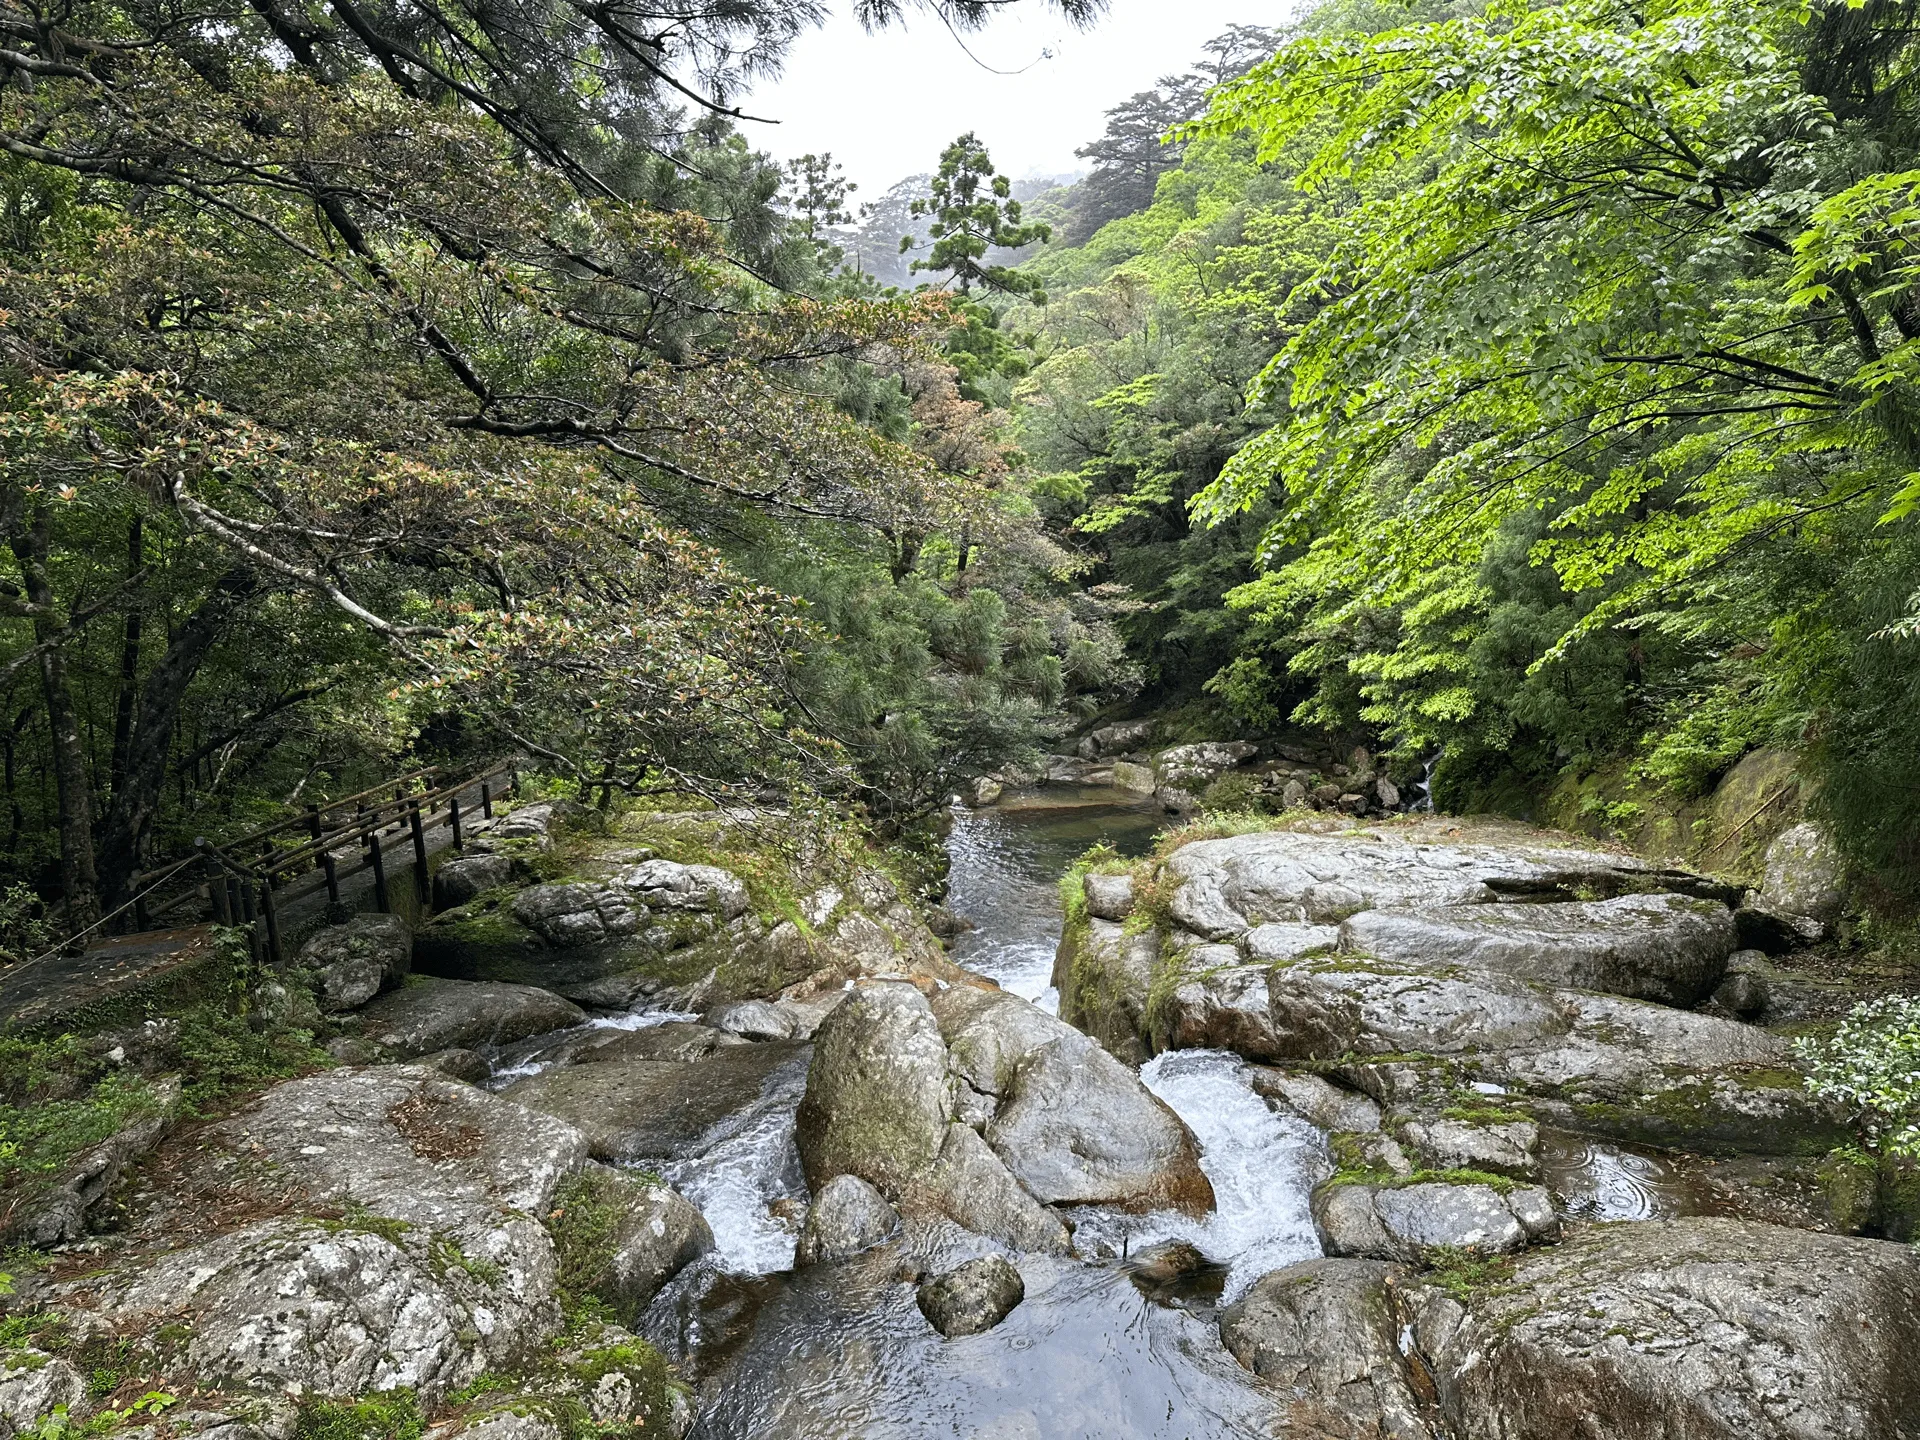
Then the trail takes you on a descent back down into the forests of Yakushima. We also came across a group of monkeys and a couple of deer.
We arrived at the Shin-takatsuka hut (新高塚小屋) at 2pm, which had the same sort of layout as the hut from the first night. Although we arrived earlier than we had planned to, it was just in time because two large groups trickled in after us, and the hut became fully occupied well before 4pm.
The hut had a hypothetical capacity of around 40 people, but another 8 people had to also squish themselves in around the door entrance and it was super packed. You essentially had to step over them to go outside, so I doubt they got a very good sleep with people needing to leave during the night to go to the toilet.
Yakushima is said to rain 35 days a month, so the fact that we had good weather up until this point really was some good luck. But on our third day we finally got the true Yakushima experience, and it rained most of the way down. I’m at least glad it was on the last day of our hike when we would get to have a hot shower at the end of it!
As we descended we passed the famous Jomon Sugi, which is somewhere in the range of 2000 to 7000 years old and the oldest known Japanese cedar tree.
Since it is quite a popular tourist destination (possibly the most iconic location in all of Yakushima), from here the trail got comparatively easier with mostly wooden stairs and paths.

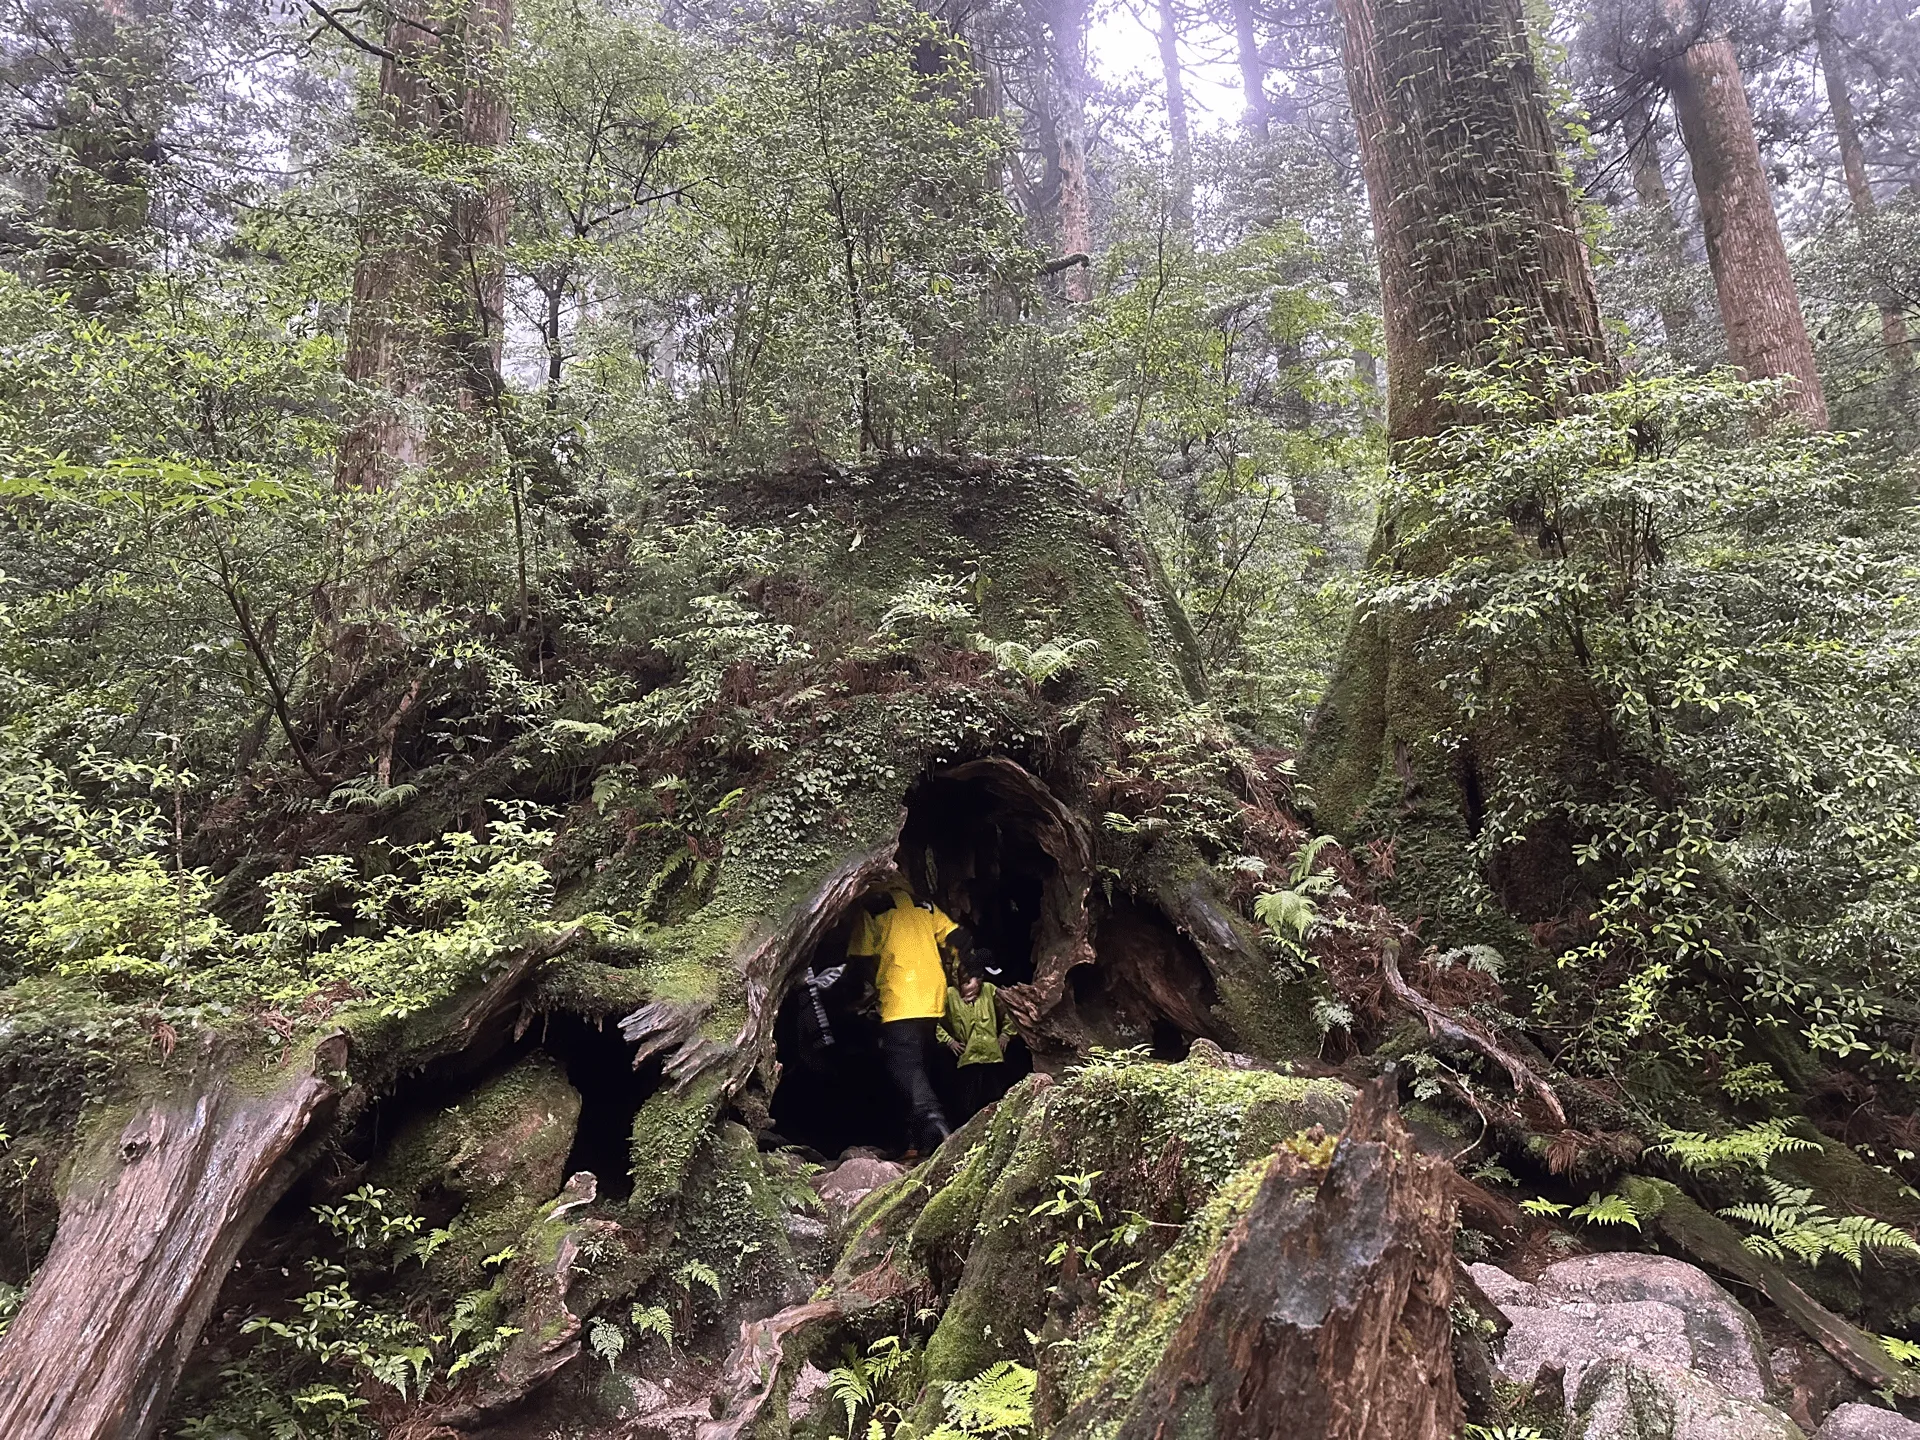
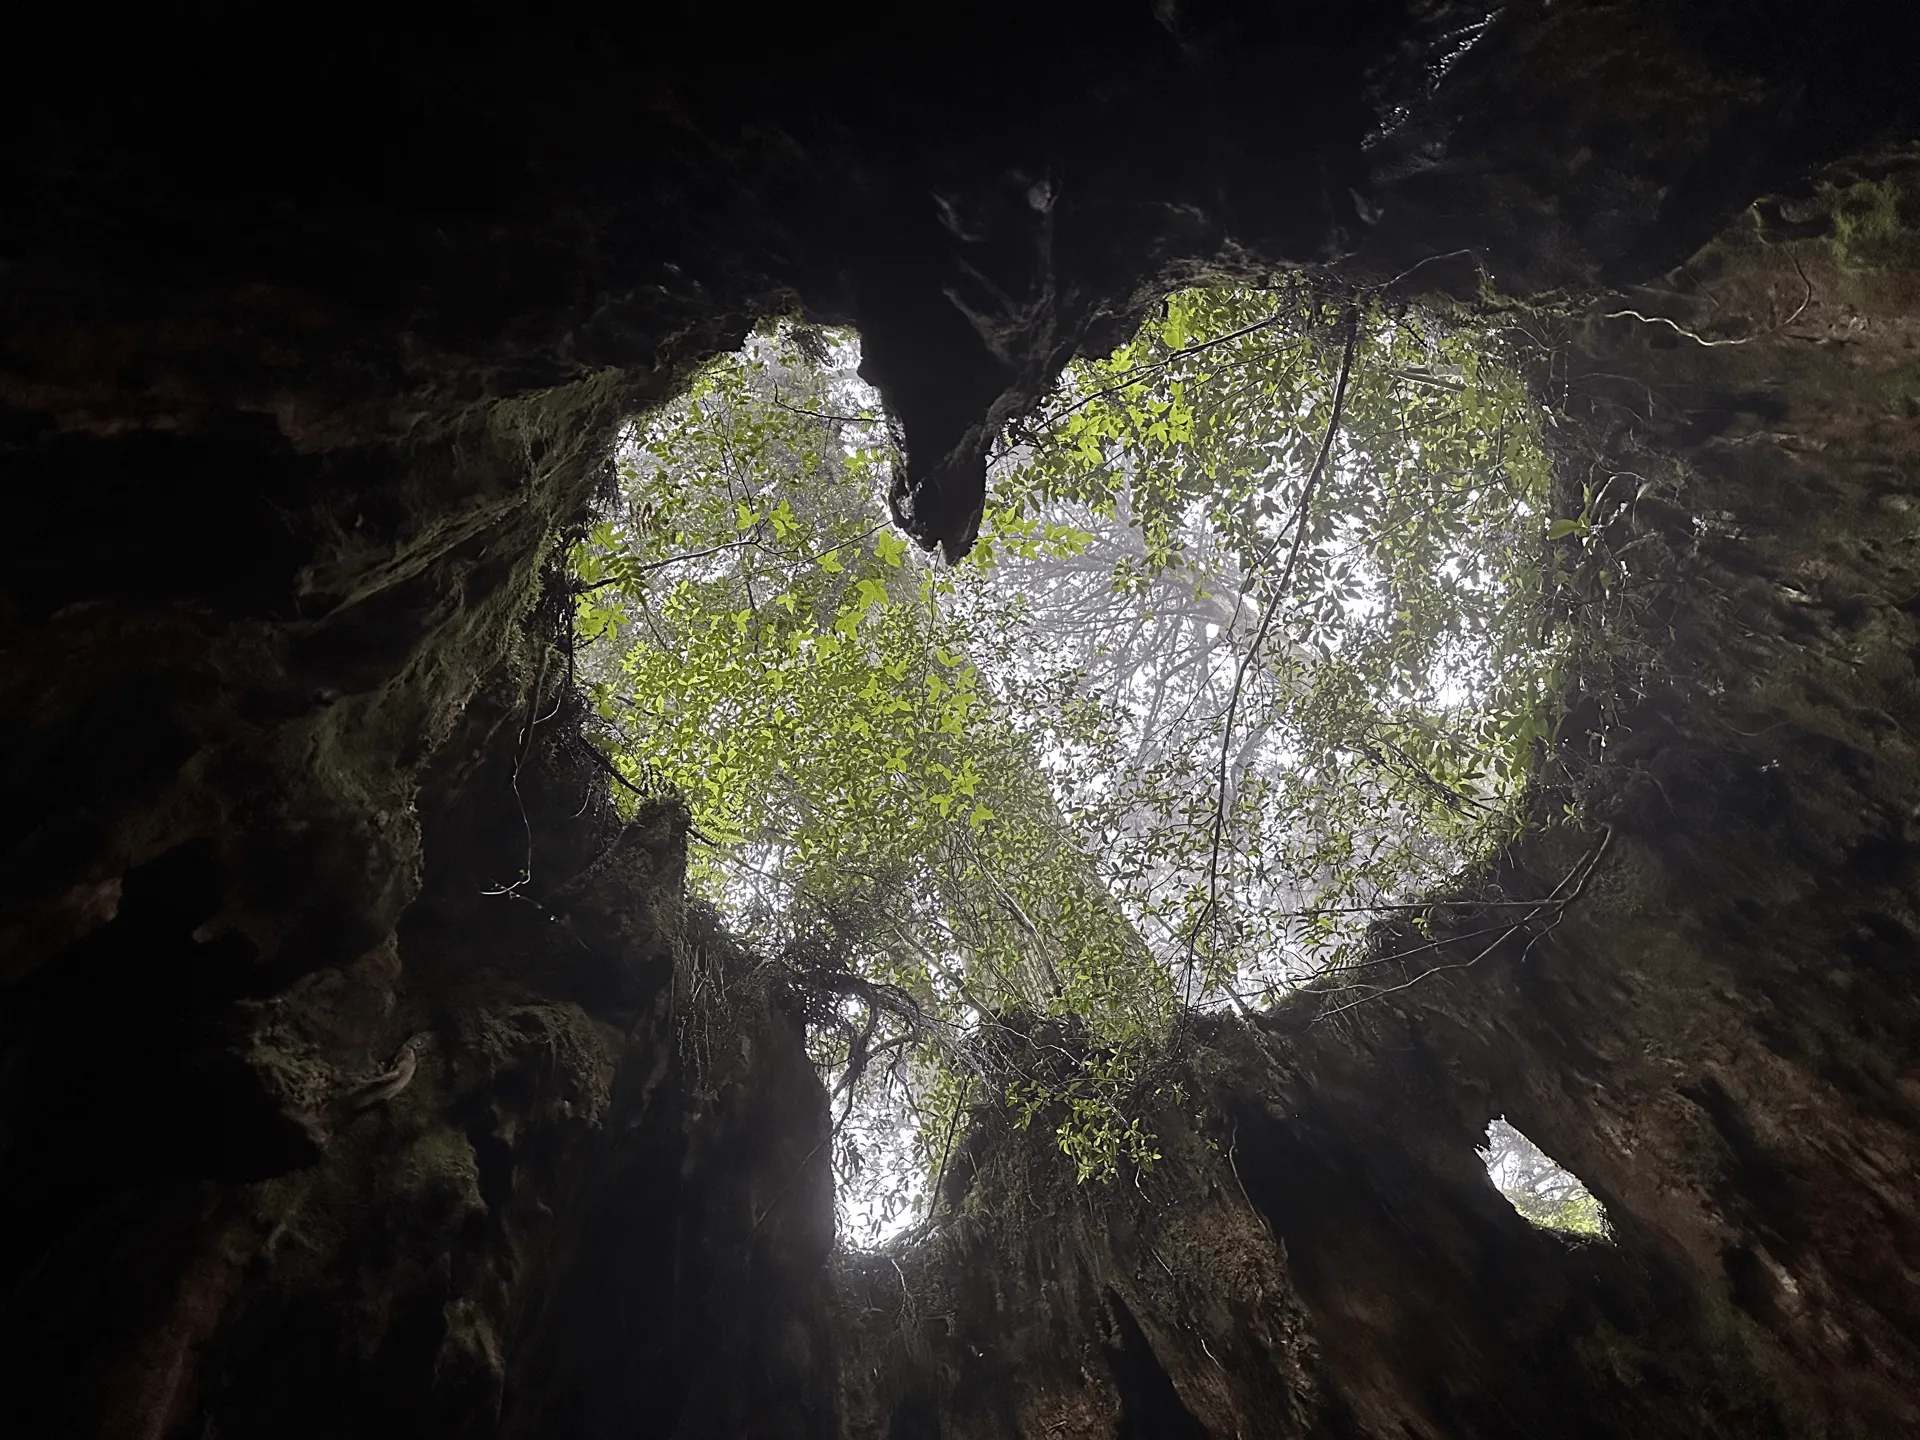
We also passed Wilson’s Stump, a hollow stump which if you stand inside and look up can see the shape of a heart.
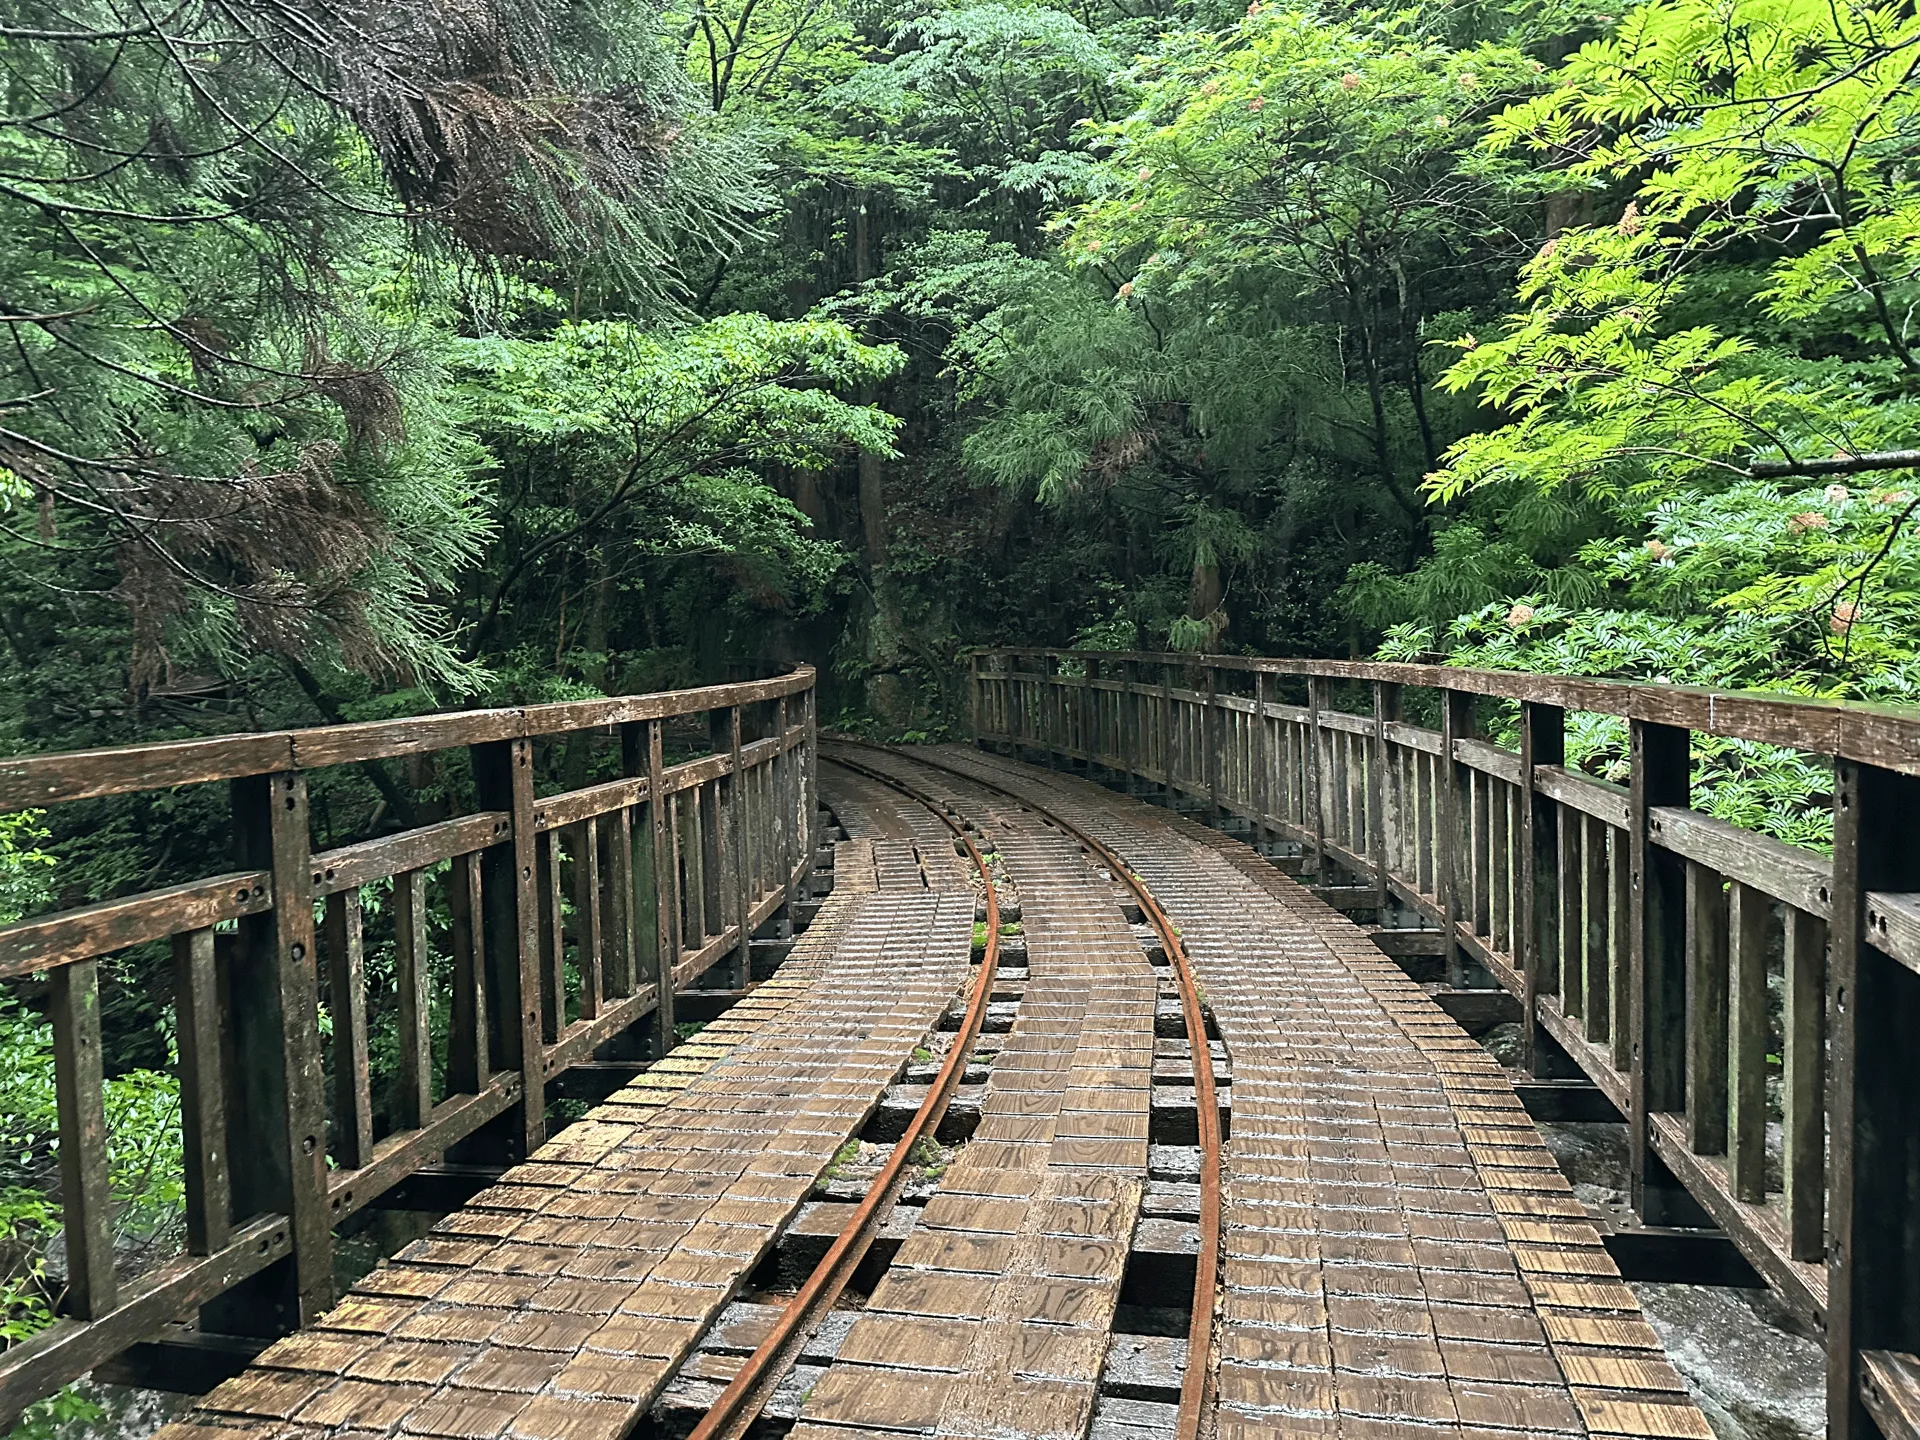
Once we reached the Anbo Forest railway around 8am, we started passing by a lot of tour groups going in the other direction, no doubt climbing up to see the Jomon Sugi.

I’m not going to lie, although I normally would enjoy having such a smooth surface to walk along, at this point my shoulders were sore from carrying a heavy pack (I was carrying one of the tents) and I also had the unfortunate realisation that my rain jacket was not quite as waterproof as I thought it was, and I was getting pretty soaked through.
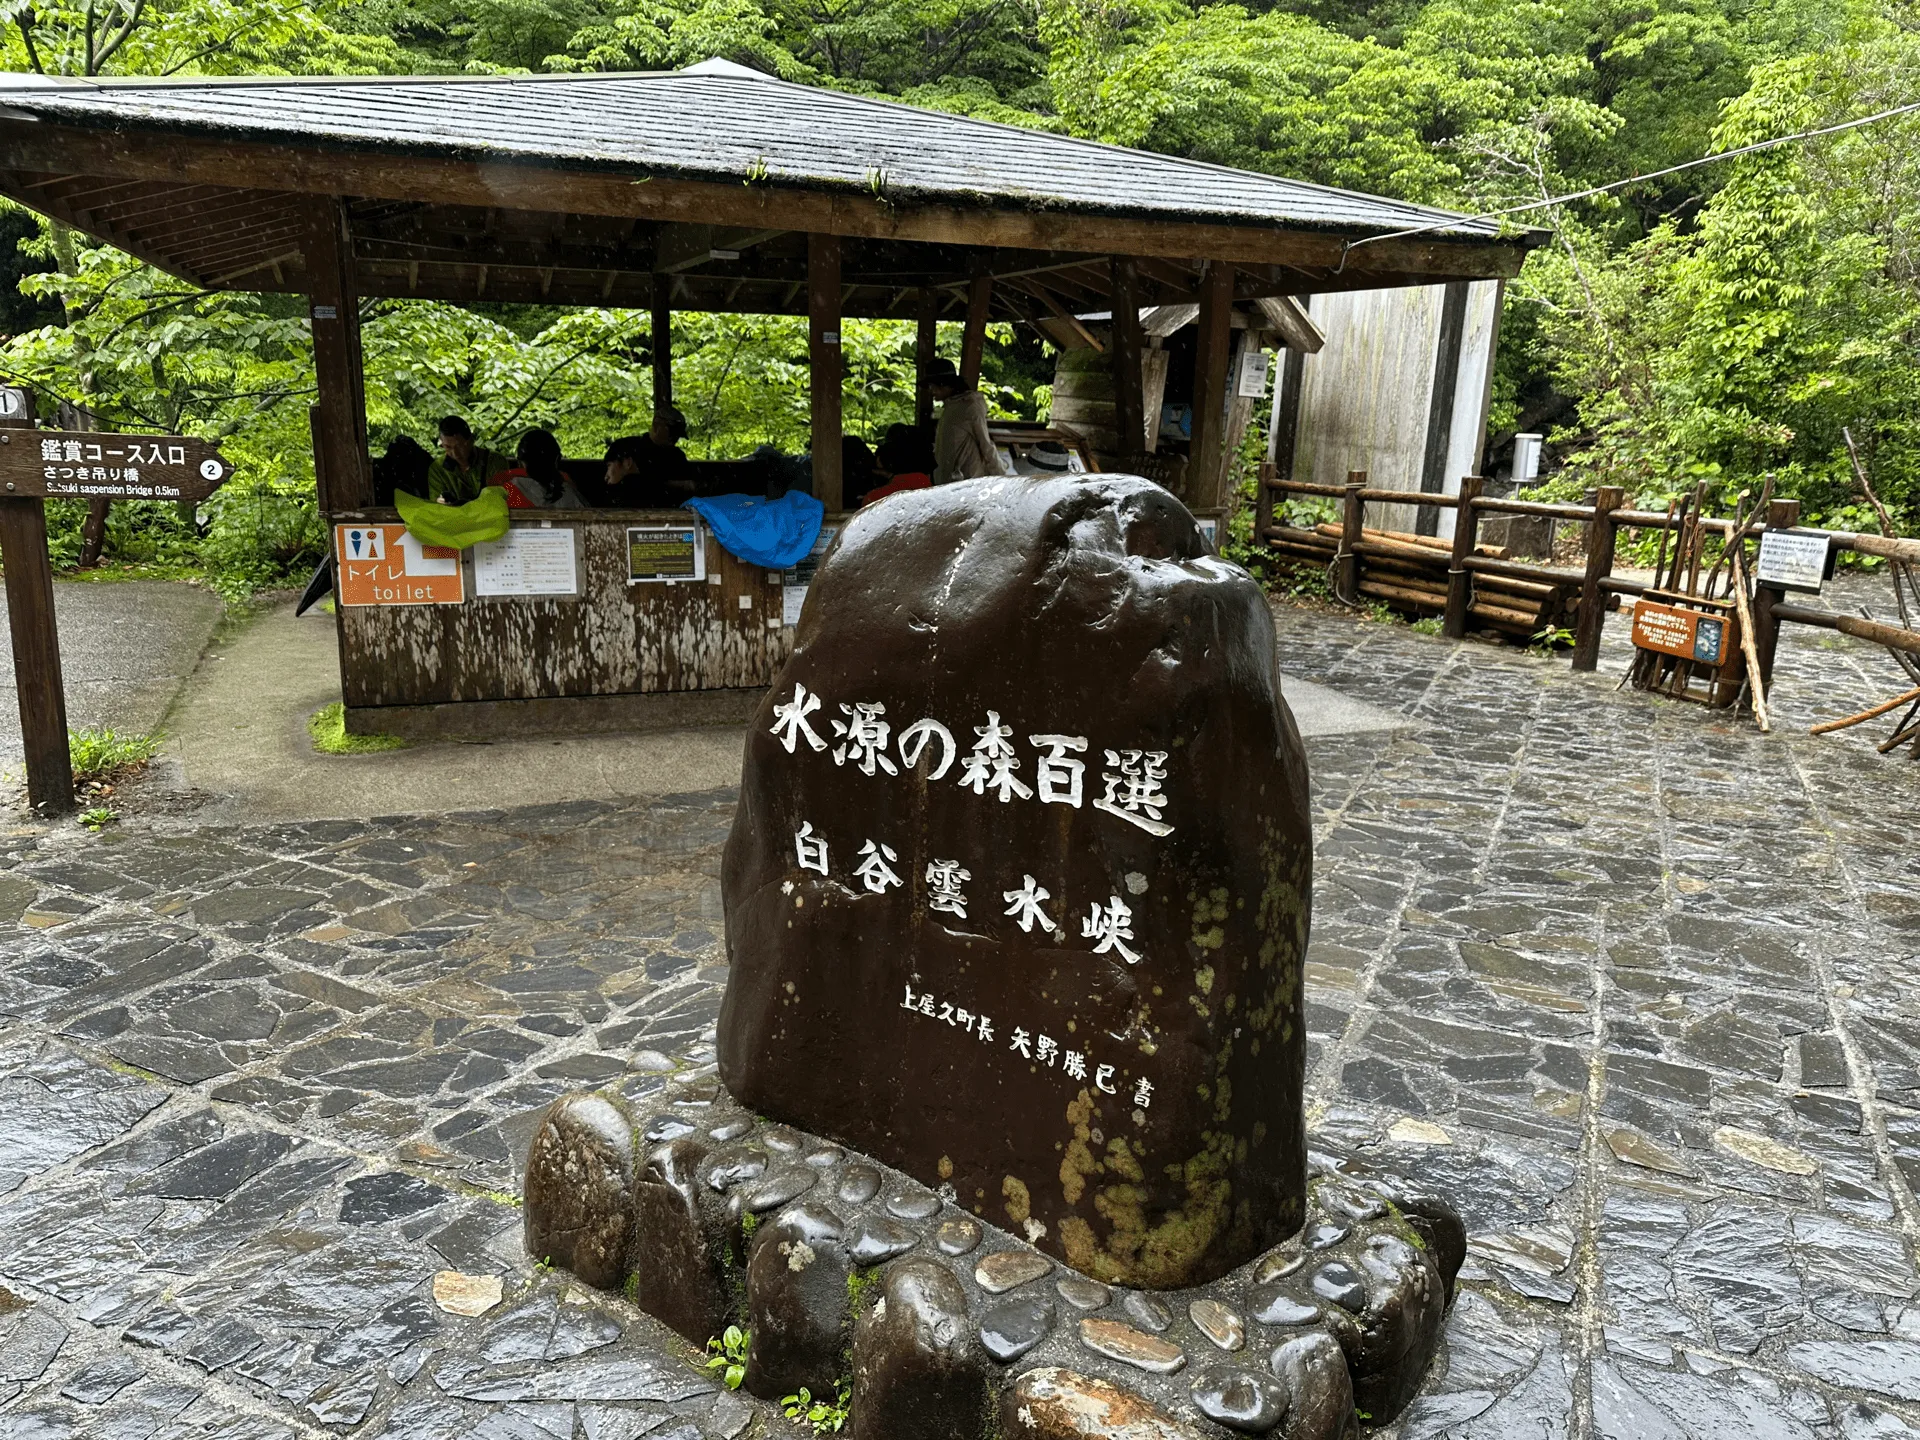
We eventually left the train tracks, and after one final climb through the forest (which took my mind off of my shoulders and how drenched I was) we reached the Shiratani mountain hut (白谷山荘). We only had an hour left on the trail, but opted to have a longer break here, since there was still plenty of time until our bus arrived.
Here I switched out my wet clothes for a dry (but not clean) shirt. The hut even had clean toilets and electricity, and the little bit of rest motivated me to finish off the final stretch of our hike in much higher spirits.
And finally, about 44 hours after beginning the hike, we were done! This was my first time doing 2 nights of camping, so I was a bit worried about the idea of not showering for two consecutive nights. I did feel a bit unclean and gross when going to sleep in the hut, but once you’re out on the trail and sweating anyway, it didn’t matter too much.
The next day we rented a car and did a full loop around Yakushima island for a bit of sightseeing, before heading back home to Tokyo.
| Date climbed | Length | Course time |
|---|---|---|
| 2024-05-17 | 20km | 14h (the expected time for an average hiker without breaks) |
This is the traverse course of Yakushima that starts at Yodagawa (淀川) trailhead and ends at the Shiratani Usui Gorge trailhead (白谷雲水峡登山口).
We slightly deviated from the official course by adding a 90 minute detour to Mt Nagata-dake.
There are toilets (i.e. holes in the ground) available at each campsite, but remember to bring your own toilet paper!
If you are planning on cooking with a gas burner, you can’t bring the canister onto the plane, but they do sell them at Yakushima airport.
The mountain huts on the trail are unmanned - and it’s a first-come, first-serve system. To be sure to get a spot, I recommend trying to arrive at the hut super early, or on a weekday. Our first night at the hut was on a Friday, which was quite empty and so we were able to stretch out quite a bit.
In comparison our Saturday night stay at the next hut was very crowded to the point where people were sleeping in the area where you take off your shoes. We arrived at the hut by 2pm, and this was early enough to ensure a proper sleeping spot - if you arrived by 4pm, you might be too late.
If you are worried about whether you’ll be able to get a spot in the huts, you can also bring a tent as a backup. We went as a group of 4, and so two of us brought 2-person tents in case this happened.
We used the Yakushima public bus (屋久島交通), but there is also another company called Matsubanda so be sure not to get the two companies confused. From the airport, we got the bus to Gochomae, where you’ll need to do a transfer to the second bus to take you to Kigensugi.
We were able to fly from Tokyo to Kagoshima, and then from Kagoshima to Yakushima all in the same morning, and make it in time for the bus leaving the airport at 13:13.
| Time | Location | Transport | Cost | Notes |
|---|---|---|---|---|
| 13:13 | Yakushima airport bus stop (屋久島空港バス停発) | Local bus | 460 | |
| 13:25 | Gochomae bus stop (合庁バス停) | |||
| 13:30 | Gochomae bus stop | Local bus | 1290 | Bus transfer |
| 13:30 | Kigensugi bus stop (紀元杉バス停) |
Once you’ve finished your hike, the return bus from the Shiratani Usui Gorge trailhead (白谷雲水峡) comes every couple of hours, but you’ll probably be aiming for either the 10:50 or 13:45 bus. Where you want to get off depends on your plans after the hike, so I recommend Googling for the latest timetable.
Also note that you can buy a unlimited 3-day bus pass for 3000 yen, which will save you around 500 yen in bus costs. You can buy this at the airport or from a small brown building just outside to the left of the airport.
There is also a 2000 yen donation you are requested to make when hiking overnight in Yakushima, which you can also do at the same building. You’ll receive a free postcard and square wooden keychain which makes for a good souvenir to take home.

Looking at YAMAP it seems that May is by far the most popular month to hike Mt Miyanoura, with the bulk of hikers coming in the March - May season. Although Yakushima is in the south and so gets warmer a lot quicker than other parts of Japan, there can still be snow. Looking at April 2025 it looks like there were some remnants.
The rainy season comes quicker in Yakushima (late May) and the area is also prone to typhoons, so although we see some hiking pick up again in July - August on the YAMAP stats, September is suspiciously quiet. I assume this is the likeliest time for typhoons to hit the island.
Leave a comment